java实现小球碰撞功能
本文实例为大家分享了java实现小球碰撞的具体代码,供大家参考,具体内容如下
这次我们做一个小球的碰撞的游戏,规则是:按下添加按钮,窗口的中心部分会产生一个小球(刚开始默认为黑色),四个方向随机产生,发射小球,再次按下即产生两个小球。当小球碰到窗体边缘的时候会产生反弹,当两个小球接触时会产生碰撞,双方交换速度,向相反方向移动。我们可以选择相应的颜色来改变下一个发射的小球颜色。当按下清除可以清除屏幕上的小球,当按下添加则会继续产生小球。最后我们还添加了自动产生小球的功能,按下开关,在屏幕中间会定时产生小球。接下来,我们来展示代码部分。
public class Jframe {
private Ball[] arrayball = new Ball[100];
public static void main(String[] args) {
Jframe frame = new Jframe();
frame.showUI();
}
public void showUI() {
javax.swing.JFrame jf = new javax.swing.JFrame();
jf.setSize(1000, 1000);
jf.getContentPane().setBackground(Color.WHITE);
jf.setTitle("小球");
jf.setDefaultCloseOperation(3);
// 设置居中显示
jf.setLocationRelativeTo(null);
JPanel jp1 =new JPanel();
JButton jb1 = new JButton("添加");
jp1.add(jb1);
// jb1.setBounds(100,50, 40, 20);
JButton jb2 = new JButton("暂停");
jp1.add(jb2);
// jb1.setBounds(200,50, 40, 20);
JButton jb3 = new JButton("清除");
jp1.add(jb3);
// jb1.setBounds(300,50, 40, 20);
JButton jb4 = new JButton("自动添加");
jp1.add(jb4);
jf.add(jp1,BorderLayout.NORTH);
Mouse mouse = new Mouse();
Color[] color = {Color.RED,Color.BLUE,Color.BLACK,Color.GREEN,Color.YELLOW};
for(int i=0;i<color.length;i++){
JButton jbu = new JButton();
jbu.setBackground(color[i]);
jbu.setPreferredSize(new Dimension(30, 30));
jp1.add(jbu);
jbu.addActionListener(mouse);
}
jb1.addActionListener(mouse);
jb2.addActionListener(mouse);
jb3.addActionListener(mouse);
jb4.addActionListener(mouse);
jf.addMouseListener(mouse);
jf.addMouseMotionListener(mouse);
BallJpanel cp = new BallJpanel();
cp.setBackground(Color.WHITE);
jf.add(cp,BorderLayout.CENTER);
jf.setVisible(true);
Graphics g = cp.getGraphics();
mouse.setcp(cp);
mouse.setg(g);
mouse.setarrayball(arrayball);
mouse.setmouse(mouse);
cp.setarrayball(arrayball);
}
}
这是窗体的基本配置,采用边框布局,上方放置按钮,中间是画布。我们为按钮添加了动作监听器,并使用了一系列的方法来把对象传递到其他类中。
public class Ball {
public int size = 90; // 小球的直径
public int x = 500; // 小球所在的x坐标
public int y = 500; // 小球所在的y坐标
public int vx = 5;
public int vy = 5;
public BallJpanel cp;
public Color color = Color.BLACK;
public int max_x, max_y, Min_x, Min_y;
private Ball[] arrayball;
public void setcp(BallJpanel cp) {
this.cp = cp;
}
public void setarrayball(Ball[] arrayball) {
this.arrayball = arrayball;
}
public void setX(int x) {
this.x = x;
}
public int getX() {
return x;
}
public void setY(int y) {
this.y = y;
}
public int setY() {
return y;
}
public Ball(int x, int y, int vx, int vy, Color color) {
this.x = x;
this.y = y;
this.vx = vx;
this.vy = vy;
this.color = color;
}
public void ballMove(Graphics g) {
x += vx;
y += vy;
max_y = cp.getHeight();
max_x = cp.getWidth();
if (x <= size / 2) {
x = size / 2;
vx = -vx;
}
if (y <= size / 2) {
y = size / 2;
vy = -vy;
}
if (x + size / 2 >= max_x) {
x = max_x - size / 2;
vx = -vx;
}
if (y + size / 2 >= max_y) {
y = max_y - size / 2;
vy = -vy;
}
for (int i = 0; i < arrayball.length; i++)
{
if (arrayball[i] == null)
break;
Ball ball = arrayball[i];
if (this.equals(ball))
continue;
if ((ball.x - this.x) * (ball.x - this.x) + (ball.y - this.y) * (ball.y - this.y) <= size * size)
{
int tempvx = this.vx;
int tempvy = this.vy;
this.vx = ball.vx;
this.vy = ball.vy;
ball.vx = tempvx;
ball.vy = tempvy;
while ((ball.x - this.x) * (ball.x - this.x) + (ball.y - this.y) * (ball.y - this.y) <= size * size)
{
this.x += this.vx;
this.y += this.vy;
System.out.println("等待");
}
}
}
}
}
考虑到这是一个小球的运动系统,我们为小球写了一个类,添加小球的时候,会创建小球对象,并使其获得位置,颜色,速度等参数,并将其存入数组。小球的方法就是运动,每当执行ballMove方法,便会为小球修改位置坐标(基于其速度),再判断是否撞击边框,以及判断是否和别的小球有坐标重叠,如果有重叠,则跑一个循环,修改位置坐标,使其分离。Ball这部分代码和监听器中的方法有所联系,我们接下来介绍监听器的方法。
public class Mouse implements MouseMotionListener, MouseListener, ActionListener {
private Graphics g;
private BallJpanel cp;
private Ball[] arrayball;
private int index = 0;
private int x;
private int y;
private int vx;
private int vy;
private int random=1;
private Color color=Color.black;
private ThreadBall tb;
private Mouse mouse;
public int selfFlag=0;
public void setmouse(Mouse mouse)
{
this.mouse= mouse;
}
public void setarrayball(Ball[] arrayball) {
this.arrayball = arrayball;
}
public void setg(Graphics g) {
this.g = g;
}
public void setcp(BallJpanel cp) {
this.cp = cp;
}
public void actionPerformed(ActionEvent e) {
if ("添加".equals(e.getActionCommand())) {
System.out.println("添加");
if (tb == null) {
// 创建线程对象
tb = new ThreadBall();
tb.setcp(cp);
tb.setarrayball(arrayball);
tb.setg(g);
tb.start();
tb.setmouse(mouse);
}
tb.stopFlag=0;
addBall();
}
if ("暂停".equals(e.getActionCommand())) {
if(tb!=null)
{
if(tb.stopFlag==0)
{
tb.stopFlag=1;
System.out.println("暂停");
}
else
{
tb.stopFlag=0;
System.out.println("开始");
}
}
}
if ("清除".equals(e.getActionCommand())) {
tb.stopFlag=1;
cp.paint1(g);
index=0;
System.out.println("清除");
}
if ("自动添加".equals(e.getActionCommand())){
if(selfFlag==0)
{selfFlag=1;System.out.println("自动添加打开");}
else
{selfFlag=0;System.out.println("自动添加关闭");}
}
if("".equals(e.getActionCommand())){
JButton jbu=(JButton)e.getSource();
color=jbu.getBackground();
g.setColor(color);
}
}
public void mouseDragged(MouseEvent e) {
}
public void mouseMoved(MouseEvent e) {
}
public void mouseClicked(MouseEvent e) {
}
public void mousePressed(MouseEvent e) {
}
public void mouseReleased(MouseEvent e) {
}
public void mouseEntered(MouseEvent e) {
}
public void mouseExited(MouseEvent e) {
}
public void addBall() {
x = 500;
y = 500;
random=1+(int)(Math.random()*4);
switch(random)
{
case 1:
vx=5;
vy=5;
break;
case 2:
vx=-5;
vy=-5;
break;
case 3:
vx=5;
vy=-5;
break;
case 4:
vx=-5;
vy=5;
break;
}
Ball ball = new Ball(x, y,vx , vy, color);
arrayball[index++] = ball;
}
}
监听器中,我们设置了一系列参数来控制一些方法的开启和关闭,以及写了添加小球的方法,为其赋初值,随机一个初始发射方向。这段代码我们用到了线程。线程的使用分为两步,创建线程对象并start线程。
public class ThreadBall extends Thread {
private Graphics g;
private BallJpanel cp;
private Ball[] arrayball;
public int stopFlag=0;
private int add=0;
private Mouse mouse;
public void setmouse(Mouse mouse)
{
this.mouse=mouse;
}
public void setcp(BallJpanel cp) {
this.cp = cp;
}
public void setg(Graphics g)
{
this.g=g;
}
public void setarrayball(Ball[] arrayball) {
this.arrayball = arrayball;
}
/**
* 启动线程执行的方法
*/
public void run() {
while (true) {
if(stopFlag==0)
{
for (int i = 0; i < arrayball.length; i++)
{
if(arrayball[i]==null)
break;
Ball ball = arrayball[i];
ball.setarrayball(arrayball);
ball.setcp(cp);
ball.ballMove(g);
}
cp.paint(g);
add++;
if(add==5000)
add=0;
if(add%50==0&&mouse.selfFlag==1)
mouse.addBall();
}
try {
Thread.sleep(50);
} catch (InterruptedException e) {
e.printStackTrace();
}
}
}
}
以上是线程的属性和方法,此类继承Thread并重写了run方法。run方法的思路是循环调用ballMove方法修改小球坐标,并调用paint方法更新显示,我们加入了一个延时函数,来控制调用的频率。
public class BallJpanel extends JPanel {
private Ball[] arrayball;
public void setarrayball(Ball[] arrayball)
{
this.arrayball=arrayball;
}
public void paint(Graphics g)
{
super.paint(g);
for(int i=0;i<arrayball.length;i++)
{
if(arrayball[i]==null)
{
break;
}
Ball ball=arrayball[i];
g.setColor(ball.color);
g.fillOval(ball.x-ball.size/2, ball.y-ball.size/2, ball.size, ball.size);
}
}
public void paint1(Graphics g)
{
super.paint(g);
for(int i=0;i<arrayball.length;i++)
{
if(arrayball[i]==null)
{
break;
}
arrayball[i]=null;
}
}
}
BallJpanel类写的是画布,及小球的运动区域,画笔也是从其对象cp上获得。类里用paint写画面的重绘方法(包括画板小球的重绘),paint1用来清空画布及数组。
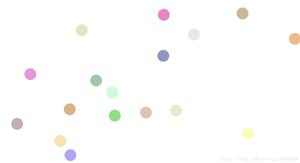
以上便是java小球运动的全部代码,我们来看一下效果。
以上是 java实现小球碰撞功能 的全部内容, 来源链接: utcz.com/z/351712.html