python3人脸识别的两种方法
本文实例为大家分享了python3" title="python3">python3实现人脸识别的具体代码,供大家参考,具体内容如下
第一种:
import cv2
import numpy as np
filename = 'test1.jpg'
path = r'D:\face'
def detect(filename):
face_cascade = cv2.CascadeClassifier('haarcascade_frontalface_default.xml')
face_cascade.load(path + '\haarcascade_frontalface_default.xml')
img = cv2.imread(filename)
gray = cv2.cvtColor(img, cv2.COLOR_BGR2GRAY)
faces = face_cascade.detectMultiScale(gray, 1.3, 5)
for (x, y, w, h) in faces:
img = cv2.rectangle(img, (x, y), (x + w, y + h), (255, 0, 0), 2)
cv2.namedWindow("vikings detected")
cv2.imshow("vikings detected", img)
cv2.waitKey(0)
detect(filename)
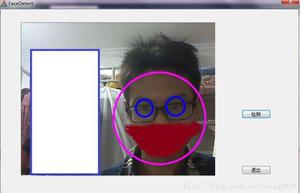
结果:
第二种 参考贾志刚opencv教程
# -*- coding:utf-8 -*-
import cv2 as cv
import numpy as np
src = cv.imread('test1.jpg')
path = r'D:\face'
def face_detect_demo():
gray = cv.cvtColor(src,cv.COLOR_BGR2GRAY)
face_detector = cv.CascadeClassifier('haarcascade_frontalface_default.xml')
face_detector.load(path + '\haarcascade_frontalface_default.xml')
faces = face_detector.detectMultiScale(gray,1.3,5)
for x,y,w,h in faces:
cv.rectangle(src,(x,y),(x+w,y+h),(0,0,255),2)
cv.imshow("result",src)
print("--------------python face detect-------------")
cv.namedWindow("input image",0)
cv.namedWindow("result",0)
cv.imshow("input image",src)
face_detect_demo()
cv.waitKey(0)
cv.destroyAllWindows()
结果:
以上是 python3人脸识别的两种方法 的全部内容, 来源链接: utcz.com/z/350849.html


