iOS实现点击微信头像(放大、缩放、保存)效果
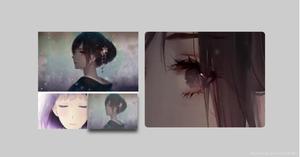
先来看看实现效果(GIF):
实现思路:
直接自定义 UIView(CYPhotoPreviewer),为了实现双击缩放,可以实现 UIScrollViewDelegate 对应的方法。如果需要模糊背景,可以在自定义的 UIView 中先添加模糊背景,再添加 UIScrollView,继而在 UIScrollView 中添加图片容器,这个容器就是要显示的图片的 superView,代码一目了然:
- (void)setup {
self.frame = [UIScreenmainScreen].bounds;
self.backgroundColor = [UIColorclearColor];
UITapGestureRecognizer *singleTap = [[UITapGestureRecognizeralloc] initWithTarget:selfaction:@selector(singleTap:)];
[self addGestureRecognizer:singleTap];
UITapGestureRecognizer *doubleTap = [[UITapGestureRecognizeralloc] initWithTarget:selfaction:@selector(doubleTap:)];
doubleTap.numberOfTapsRequired = 2;
[singleTaprequireGestureRecognizerToFail:doubleTap];
[self addGestureRecognizer:doubleTap];
UILongPressGestureRecognizer *longPress = [[UILongPressGestureRecognizeralloc] initWithTarget:selfaction:@selector(longPress:)];
[self addGestureRecognizer:longPress];
// 设置模糊背景
self.blurBackground = [[UIVisualEffectViewalloc] initWithEffect:[UIBlurEffecteffectWithStyle:UIBlurEffectStyleExtraLight]];
self.blurBackground.frame = self.frame;
[self addSubview:self.blurBackground];
// 设置 UIScrollView 相关属性
self.scrollView = [[UIScrollViewalloc] initWithFrame:[UIScreenmainScreen].bounds];
self.scrollView.delegate = self;
self.scrollView.bouncesZoom = YES;
self.scrollView.maximumZoomScale = 3.0;
self.scrollView.multipleTouchEnabled = YES;
self.scrollView.alwaysBounceVertical = NO;
self.scrollView.showsVerticalScrollIndicator = NO;
self.scrollView.showsHorizontalScrollIndicator = NO;
[self addSubview:self.scrollView];
// containerView
self.containerView = [[UIViewalloc] init];
[self.scrollViewaddSubview:self.containerView];
// imageView
self.imageView = [[UIImageViewalloc] init];
self.imageView.clipsToBounds = YES;
self.imageView.backgroundColor = [UIColorcolorWithWhite:1.0 alpha:0.5];
[self.containerViewaddSubview:self.imageView];
}
可以看到,我们给设置了模糊背景,给这个 CYPhotoPreviewer 添加了单击手势(关闭 PhotoPreviewer)、双击手势(缩放图片)、长按手势(使用 UIAlertController 菜单,比如保存图片等)。
好,确定了这个 CYPhotoPreviewer 中的显示内容,那么我们该如何显示这个 CYPhotoPreviewer 呢?
- 直接将这个 CYPhotoPreviewer 添加到 keyWindow 上
- 将这个 CYPhotoPreviewer 添加到控制器的 self.view 上
这两种方式的实现都差不多,不过如果使用第一种方式的话,会导致将 CYPhotoPreviewer 添加到 keyWindow 上之后,再长按继续将 UIAlertController 显示就比较麻烦了,因此,这里打算采用将 CYPhotoPreviewer 添加到控制器的 self.view 上,继而就可以很方便的显示 UIAlertController 了:
- (void)previewFromImageView:(UIImageView *)fromImageViewinContainer:(UIView *)container {
_fromImageView = fromImageView;
fromImageView.hidden = YES;
[containeraddSubview:self]; // 将 CYPhotoPreviewer 添加到 container 上
self.containerView.origin = CGPointZero;
self.containerView.width = self.width; // containerView 的宽度是屏幕的宽度
UIImage *image = fromImageView.image;
// 计算 containerView 的高度
if (image.size.height / image.size.height > self.height / self.width) {
self.containerView.height = floor(image.size.height / (image.size.width / self.width));
} else {
CGFloatheight = image.size.height / image.size.width * self.width;
if (height self.height && self.containerView.height - self.height
可以看到,我们将外面的图片 fromImageView 传递进来,是为了显示更好的动画效果;将控制器的 container(self.view)传递进来,是为了将 CYPhotoPreviewer 添加到 container 的细节不需要在调用处处理,即初始化 CYPhotoPreviewer 之后,CYPhotoPreviewer 就直接被 container 添加为 subview 了。动画很简单不再细说。
显示的效果已经做好,单击关闭 CYPhotoPreviewer 也比较好实现,只需要从父类移除 CYPhotoPreviewer 即可:
- (void)dismiss {
[UIViewanimateWithDuration:0.18 delay:0.0 options:UIViewAnimationOptionCurveEaseInOutanimations:^{
CGRectfromRect = [self.fromImageViewconvertRect:self.fromImageView.boundstoView:self.containerView];
self.imageView.contentMode = self.fromImageView.contentMode;
self.imageView.frame = fromRect;
self.blurBackground.alpha = 0.01;
} completion:^(BOOL finished) {
[UIViewanimateWithDuration:0.10 delay:0 options:UIViewAnimationOptionCurveEaseInOutanimations:^{
self.fromImageView.hidden = NO;
self.alpha = 0;
} completion:^(BOOL finished) {
[self removeFromSuperview];
}];
}];
}
好了,显示和关闭 CYPhotoPreviewer 都实现了,如果需要双击缩放图片效果,就得实现 UIScrollViewDelegate 的两个方法以及 CYPhotoPreviewer 的双击手势:
- (UIView *)viewForZoomingInScrollView:(UIScrollView *)scrollView{
return self.containerView;
}
- (void)scrollViewDidZoom:(UIScrollView *)scrollView {
UIView *subView = self.containerView;
CGFloatoffsetX = (scrollView.bounds.size.width > scrollView.contentSize.width)?
(scrollView.bounds.size.width - scrollView.contentSize.width) * 0.5 : 0.0;
CGFloatoffsetY = (scrollView.bounds.size.height > scrollView.contentSize.height)?
(scrollView.bounds.size.height - scrollView.contentSize.height) * 0.5 : 0.0;
subView.center = CGPointMake(scrollView.contentSize.width * 0.5 + offsetX,
scrollView.contentSize.height * 0.5 + offsetY);
}
- (void)doubleTap:(UITapGestureRecognizer *)recognizer {
if (self.scrollView.zoomScale > 1.0) {
[self.scrollViewsetZoomScale:1.0 animated:YES];
} else {
CGPointtouchPoint = [recognizerlocationInView:self.imageView];
CGFloatnewZoomScale = self.scrollView.maximumZoomScale;
CGFloatxSize = self.width / newZoomScale;
CGFloatySize = self.height / newZoomScale;
[self.scrollViewzoomToRect:CGRectMake(touchPoint.x - xSize / 2, touchPoint.y - ySize / 2, xSize, ySize) animated:YES];
}
}
最后一个就是长按弹出菜单(UIAlertController)了:
- (void)longPress:(UILongPressGestureRecognizer *)recognizer {
// 为了避免弹警告:Warning: Attempt to present on which is already presenting ,最好加入状态判断
if (recognizer.state == UIGestureRecognizerStateBegan) {
UIAlertController *alertController = [UIAlertControlleralertControllerWithTitle:@"QuoraDots" message:nilpreferredStyle:UIAlertControllerStyleActionSheet];
[alertControlleraddAction:[UIAlertActionactionWithTitle:@"保存" style:UIAlertActionStyleDefaulthandler:nil]];
[alertControlleraddAction:[UIAlertActionactionWithTitle:@"取消" style:UIAlertActionStyleCancelhandler:nil]];
UIViewController *vc = self.viewController;
[vcpresentViewController:alertControlleranimated:YEScompletion:nil];
}
}
注意一点, longPress: 这个方法会调用很频繁,因此,为了避免 Attempt to present xxx on xxx which is already presenting xxx 这个警告,我们需要判断手势的状态。
源码下载
后话:
这个只是显示单张图片的大图,如果需要显示多张图片类似微信微博的九宫格图片的大图显示,则需要将这个 CYPhotoPreviewer 搞成 UICollectionView 的 item 即可,大家可以尝试尝试。
好了,以上就是这篇文章的全部内容了,希望本文的内容对各位iOS开发者们能带来一定的帮助,如果有疑问大家可以留言交流,谢谢大家对的支持。
以上是 iOS实现点击微信头像(放大、缩放、保存)效果 的全部内容, 来源链接: utcz.com/z/319878.html