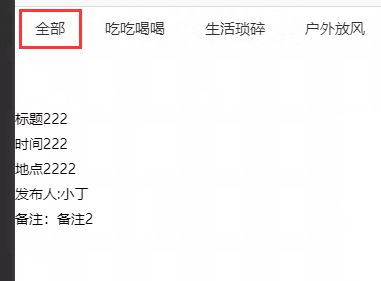
uniapp 想实现不同tab 显示不同数据?
如何让不同的分类展示不同的数据
我想让id为1的 显示在全部栏目下 id为2显示吃吃喝喝栏目下 因该怎么改
swiperDateList: [ {
id: 1,
title:'一起吃个饭',
time:2020,
location: '1111',
publisher: '小丁',
remark: '备注'
},
<template> <view class="body-view">
<!-- 使用scroll-view实现tabs滑动切换 -->
<scroll-view class="top-menu-view" scroll-x="true" :scroll-into-view="tabCurrent">
<view class="menu-topic-view" v-for="item in tabs" :id="'tabNum'+item.id" :key="(item.id - 1)" @click="swichMenu(item.id - 1)">
<view :class="currentTab==(item.id - 1) ? 'menu-topic-act' : 'menu-topic'">
<text class="menu-topic-text">{{item.name}}</text>
<view class="menu-topic-bottom">
<view class="menu-topic-bottom-color"></view>
</view>
</view>
</view>
</scroll-view>
<!-- 内容 -->
<swiper class="swiper-box-list" :current="currentTab" @change="swiperChange">
<swiper-item class="swiper-topic-list" v-for="item in swiperDateList" :key="item.id">
<view class="swiper-item">
<view class="list">
<view class="item">
<view class="item-start">
<van-tag type="success">标题</van-tag>
<span class="item-start-value">{{item.time}}</span>
</view>
<view class="item-end" data-lat="" data-lng="">
<van-tag type="danger">时间</van-tag>
<span class="item-end-value">{{item.time}}</span>
</view>
<view class="item-time">
<span> 地点</span>
<span class="item-end-value">{{item.location}}</span>
</view>
<view class="item-seating">
<van-tag type="primary">发布人:</van-tag>
<span>{{item.publisher}}</span>
</view>
<van-divider></van-divider>
<view class="item-remark">
备注:{{item.remark}}
</view>
</view>
</view>
</view>
</swiper-item>
</swiper>
</view>
</template>
<script>
export default {
data() {
return {
tabs: [{
id: 1,
name: '全部'
},
{
id: 2,
name: '吃吃喝喝'
},
{
id: 3,
name: '生活琐碎'
},
{
id: 4,
name: '户外放风'
},
{
id: 5,
name: '健身自律'
},
{
id: 6,
name: '其他'
},
],
currentTab: 0,
tabCurrent: 'tabNum1',
// Tab切换内容
swiperDateList: [
{
id: 1,
title:'一起吃个饭',
time:2020,
location: '1111',
publisher: '小丁',
remark: '备注'
},
{
id: 1,
title:'一起吃个饭2',
time:222,
location: '2222',
publisher: '小丁',
remark: '备注2'
},
{
id: 2,
content: '交通交通'
},
{
id: 3,
content: '住房'
},
{
id: 4,
content: '社会保障'
},
{
id: 5,
content: '民生热点'
},
{
id: 6,
content: '即日头条'
},
],
}
},
onLoad() {
},
methods: {
swichMenu(id) {
this.currentTab = id
console.log(11,id)
this.tabCurrent = 'tabNum'+ id
},
swiperChange(e) {
console.log(22,e.detail.current)
let index = e.detail.current
this.swichMenu(index)
}
}
}
</script>
<style scoped lang="scss">
.body-view {
height: 100vh;
width: 100%;
display: flex;
flex: 1;
flex-direction: column;
overflow: hidden;
align-items: flex-start;
justify-content: center;
}
.top-menu-view {
display: flex;
position: fixed;
top: 0rpx;
left: 0;
white-space: nowrap;
width: 100%;
background-color: #FFFFFF;
height: 86rpx;
line-height: 86rpx;
border-top: 1rpx solid #d8dbe6;
.menu-topic-view {
display: inline-block;
white-space: nowrap;
height: 86rpx;
position: relative;
.menu-topic-text {
font-size: 30rpx;
color: #303133;
padding: 10rpx 40rpx;
}
// .menu-topic-act {
// margin-left: 30upx;
// margin-right: 10upx;
// position: relative;
// height: 100%;
// display: flex;
// align-items: center;
// justify-content: center;
// }
.menu-topic-bottom {
position: absolute;
bottom: 0;
width: 100%;
.menu-topic-bottom-color {
width: 40rpx;
height: 4rpx;
}
}
.menu-topic-act .menu-topic-bottom {
display: flex;
justify-content: center;
}
.menu-topic-act .menu-topic-bottom-color {
background: #3d7eff;
}
}
}
.swiper-box-list {
width: 100%;
padding-top: 200rpx;
flex:1;
background-color: #FFFFFF;
.swiper-topic-list {
width: 100%;
}
}
</style>
回答:
看你的数据是怎么来的,如果是一次性读取到全部的,可以用以下两种方式:
- 在获取到数据之后做好分类,分类在几个不同的当中,然后再模版中按照不同情况渲染列表面板,多数情况下会使用 uViewUI 的tabs组件。然后按照激活标签显示对应的面板。
- 获取到数据之后直接赋值给一个变量,使用 uViewUI 的tabs组件绑定激活标签变量,配合 computed 来动态变更显示列表。
如果不同面板是请求不同的借口的,依旧会是按照方式1.来处理,只不过会增加一个loading效果。
以上是 uniapp 想实现不同tab 显示不同数据? 的全部内容, 来源链接: utcz.com/p/934498.html