nginx+redis实现session共享
上一篇我们介绍了nginx实现的负载均衡和动静分离,可看这边。
我们在文章的末尾说到,负载均衡需要面临的一个问题是内存数据的同步。例如:我有A,B两台服务器做了负载均衡,当我在A服务器上执行了登录并且将登录数据存入session的时候,这些session数据只存在于A服务器上,而没有在B服务器上,假如在处理下一个请求的时候,我需要用到session的数据,而不巧的是,这个请求刚好被交由B服务器来处理,这时候就会出现B服务器拿不到session数据的情况,从而造成错误。
这是一个无法避免的问题,有若干的解决方案,归结起来都是要实现session等数据在各负载均衡分支中的同步,第一种想到的方案是把这些数据放在mysql等数据库,也就是说存在磁盘,但是我们都知道session之所以出现是因为它是在内存中的,程序读取内存的数据要远远比读取磁盘的数据快,所以我们把一些经常用到的东西都放在session里面。
有没有一种数据库,是存放在内存中的呢?这就是redis。通俗的讲,它就是一个数据库,但是这个数据库是存在与内存里面的,所以存取起来速度要比读取磁盘的数据快得多。又因为它是一个数据库,所以可以实现数据的同步。
我们把session数据存放在redis中,然后所有的集群分支都可以去访问这个数据库里面的东西,这就是全局缓存的原理。
1.第一步是安装redis,我的服务器是windows的,下载的是免安装版本,解压以后就可以了,其目录如下。一开始redis是默认不需要密码,如果想要设置密码,可以进入redis.windows.conf文件下找到requirepass,删除前面的#号,在其后面便可以设置密码。

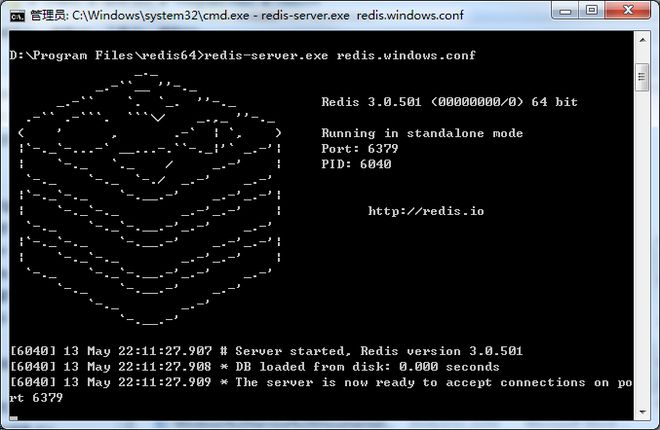
2.从cmd进入redis的根目录,键入如下指令:redis-server.exeredis.windows.conf。这样就可以启动redis了,如果启动成功,则会出现下面画面。当然还可以修改conf文件,加上密码。requirepass xxxxx
3.接下来我们就可以做一些配置工作,来实现session数据的全局缓存。
1)首先是添加jar包,如果你是maven项目,需要在pom.xml加入下面代码
<!-- redis -->
<dependency>
<groupId>org.springframework.session</groupId>
<artifactId>spring-session-data-redis</artifactId>
<version>1.3.1.RELEASE</version>
<type>pom</type>
</dependency>
如果不是maven项目,你需要加入下面这些jar包。

2)编写redis.properties,代码如下
redis_isopen:yes
#主机地址
redis_hostName=xxx.xxx.xxx.xxx
#端口
redis_port=6379
#密码
redis_password=xxxxxxxx
#连接超时时间
redis_timeout=200000
redis_maxIdle:300
redis_maxActive:600
redis_maxWait:100000
redis_testOnBorrow:true
基本上与我们配置数据库的连接语句类似。
3)编写spring-redis.xml配置文件,这个文件配置关于redis的一些基本信息。
<?xml version="1.0" encoding="UTF-8" standalone="no"?>
<beans xmlns="http://www.springframework.org/schema/beans"
xmlns:context="http://www.springframework.org/schema/context" xmlns:tx="http://www.springframework.org/schema/tx"
xmlns:util="http://www.springframework.org/schema/util" xmlns:xsi="http://www.w3.org/2001/XMLSchema-instance"
xsi:schemaLocation="http://www.springframework.org/schema/beans http://www.springframework.org/schema/beans/spring-beans.xsd http://www.springframework.org/schema/context http://www.springframework.org/schema/context/spring-context.xsd http://www.springframework.org/schema/tx http://www.springframework.org/schema/tx/spring-tx.xsd http://www.springframework.org/schema/util http://www.springframework.org/schema/util/spring-util.xsd ">
<!-- session设置 maxInactiveIntervalInSeconds为session的失效时间,单位为秒-->
<bean
class="org.springframework.session.data.redis.config.annotation.web.http.RedisHttpSessionConfiguration">
<property name="maxInactiveIntervalInSeconds" value="3600"></property>
</bean>
<!-- redis连接池 -->
<bean id="poolConfig" class="redis.clients.jedis.JedisPoolConfig">
<property name="maxIdle" value="${redis_maxIdle}" />
<property name="testOnBorrow" value="${redis_testOnBorrow}" />
</bean>
<!-- redis连接工厂 -->
<bean id="connectionFactory"
class="org.springframework.data.redis.connection.jedis.JedisConnectionFactory">
<property name="hostName" value="${redis_hostName}" />
<property name="port" value="${redis_port}" />
<property name="password" value="${redis_password}" />
<property name="timeout" value="${redis_timeout}" />
<property name="poolConfig" ref="poolConfig"></property>
</bean>
</beans>
4)在application.xml(spring的主配置文件)需要加入redis.properties配置文件的扫描,如下。
<!-- 读取redis参数配置 -->
<bean id="propertyConfigurer"
class="org.springframework.beans.factory.config.PropertyPlaceholderConfigurer">
<property name="locations">
<list>
<value>/WEB-INF/classes/redis.properties</value>
</list>
</property>
</bean>
5)在主配置文件中引入spring-redis.xml,如下。
<import resource="spring-redis.xml" />
6)在web.xml中,加入关于session的过滤器,只有这样session才会被redis所操纵。
<filter>
<filter-name>springSessionRepositoryFilter</filter-name>
<filter-class>org.springframework.web.filter.DelegatingFilterProxy</filter-class>
</filter>
<filter-mapping>
<filter-name>springSessionRepositoryFilter</filter-name>
<url-pattern>/*</url-pattern>
</filter-mapping>
这样以后,我们就实现了redis对session的管理。
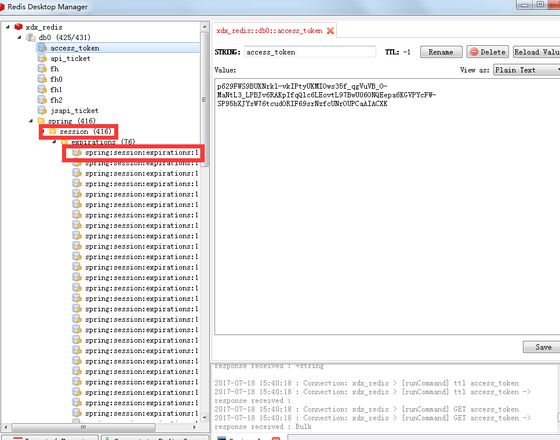
7)我们可以安装一个redis的客户端来查看里面的数据,叫做Redis Desktop Manager。如下图,很好用,可以看到redis数据库中的数据。
PS.再退出的时候,需要这样写才不会出错。(ssh项目)
public String yipinExit(){
Iterator<String>keys=session.keySet().iterator();
while(keys.hasNext()){
String key=keys.next();
session.remove(key);
}
return "yipinExit";
}
以上就是本文的全部内容,希望对大家的学习有所帮助,也希望大家多多支持。
以上是 nginx+redis实现session共享 的全部内容, 来源链接: utcz.com/p/252798.html