Java HttpClient技术详解
一、HttpClient
1.1、 前台系统访问后台接口的方式
两个系统间如何互相访问?两个tomcat上的项目如何互相访问
采用HttpClient实现跨系统的接口调用。
1.2、 什么是HttpClient
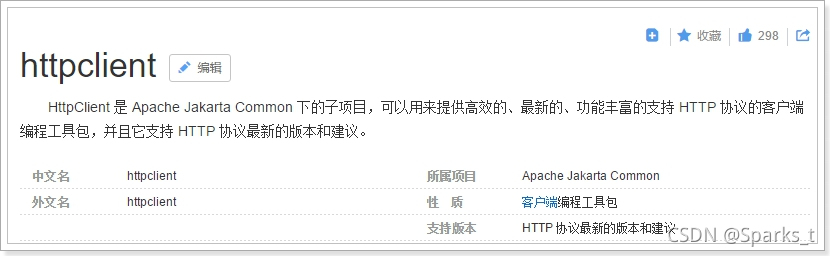
官网:http://hc.apache.org/index.html
现在也叫:HttpComponents
特点:
- HttpClient别名:HttpComponents
- HttpClient可以发送get、post、put、delete、…等请求
1.3、 HttpClient入门案例
导入maven坐标
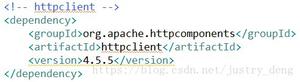
<dependency>
<groupId>org.apache.httpcomponents</groupId>
<artifactId>httpclient</artifactId>
<version>4.4</version>
</dependency>
1.3.1、 发起Get请求
- 1创建一个客户端 CloseableHttpClient
- 2创建一个get方法请求实例 HttpGet
- 3发送请求 execute
- 4获取响应的头信息
- 5获取响应的主题内容
- 6关闭响应对象
使用HttpClient发起Get请求的案例代码:
public class DoGET {
public static void main(String[] args) throws Exception {
// 创建Httpclient对象,相当于打开了浏览器
CloseableHttpClient httpclient = HttpClients.createDefault();
// 创建HttpGet请求,相当于在浏览器输入地址
HttpGet httpGet = new HttpGet("http://www.baidu.com/");
CloseableHttpResponse response = null;
try {
// 执行请求,相当于敲完地址后按下回车。获取响应
response = httpclient.execute(httpGet);
// 判断返回状态是否为200
if (response.getStatusLine().getStatusCode() == 200) {
// 解析响应,获取数据
String content = EntityUtils.toString(response.getEntity(), "UTF-8");
System.out.println(content);
}
} finally {
if (response != null) {
// 关闭资源
response.close();
}
// 关闭浏览器
httpclient.close();
}
}
}
执行日志:
请求头:

响应头:
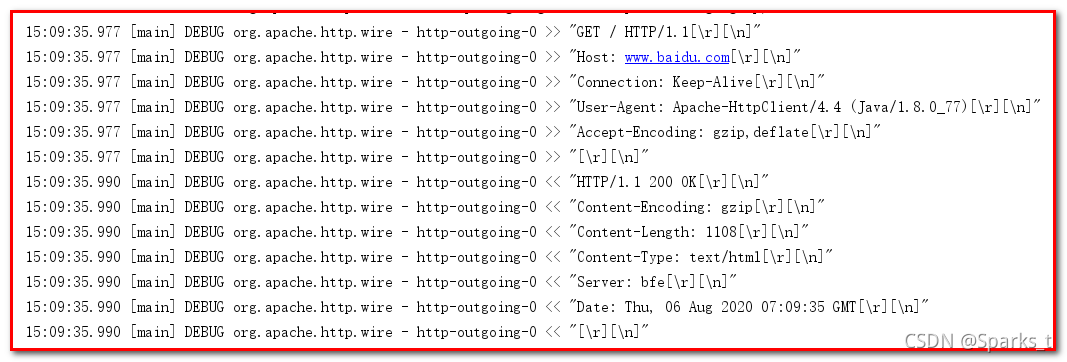
数据:

1.3.2、 带参数的Get请求
- 1创建一个客户端 CloseableHttpClient
- 2通过URIBuilder传递参数
- 3创建一个get方法请求实例 HttpGet
- 4发送请求 execute
- 5获取响应的头信息
- 6获取响应的主题内容
- 7关闭响应对象
访问网站的爬虫协议:

public class DoGETParam {
public static void main(String[] args) throws Exception {
// 创建Httpclient对象
CloseableHttpClient httpclient = HttpClients.createDefault();
// 创建URI对象,并且设置请求参数
URI uri = new URIBuilder("http://www.baidu.com/s").setParameter("wd", "java").build();
// 创建http GET请求
HttpGet httpGet = new HttpGet(uri);
// HttpGet get = new HttpGet("http://www.baidu.com/s?wd=java");
CloseableHttpResponse response = null;
try {
// 执行请求
response = httpclient.execute(httpGet);
// 判断返回状态是否为200
if (response.getStatusLine().getStatusCode() == 200) {
// 解析响应数据
String content = EntityUtils.toString(response.getEntity(), "UTF-8");
System.out.println(content);
}
} finally {
if (response != null) {
response.close();
}
httpclient.close();
}
}
}
1.3.3、 发起POST请求
/*
* 演示:使用HttpClient发起POST请求
*/
public class DoPOST {
public static void main(String[] args) throws Exception {
// 创建Httpclient对象
CloseableHttpClient httpclient = HttpClients.createDefault();
// 创建http POST请求
HttpPost httpPost = new HttpPost("http://www.oschina.net/");
// 把自己伪装成浏览器。否则开源中国会拦截访问
httpPost.setHeader("User-Agent", "Mozilla/5.0 (Windows NT 10.0; WOW64) AppleWebKit/537.36 (KHTML, like Gecko) Chrome/56.0.2924.87 Safari/537.36");
CloseableHttpResponse response = null;
try {
// 执行请求
response = httpclient.execute(httpPost);
// 判断返回状态是否为200
if (response.getStatusLine().getStatusCode() == 200) {
// 解析响应数据
String content = EntityUtils.toString(response.getEntity(), "UTF-8");
System.out.println(content);
}
} finally {
if (response != null) {
response.close();
}
// 关闭浏览器
httpclient.close();
}
}
}
1.3.4、 带参数POST请求
/*
* 演示:使用HttpClient发起带有参数的POST请求
*/
public class DoPOSTParam {
public static void main(String[] args) throws Exception {
// 创建Httpclient对象
CloseableHttpClient httpclient = HttpClients.createDefault();
// 创建http POST请求,访问开源中国
HttpPost httpPost = new HttpPost("http://www.oschina.net/search");
// 根据开源中国的请求需要,设置post请求参数
List<NameValuePair> parameters = new ArrayList<NameValuePair>(0);
parameters.add(new BasicNameValuePair("scope", "project"));
parameters.add(new BasicNameValuePair("q", "java"));
parameters.add(new BasicNameValuePair("fromerr", "8bDnUWwC"));
// 构造一个form表单式的实体
UrlEncodedFormEntity formEntity = new UrlEncodedFormEntity(parameters);
// 将请求实体设置到httpPost对象中
httpPost.setEntity(formEntity);
CloseableHttpResponse response = null;
try {
// 执行请求
response = httpclient.execute(httpPost);
// 判断返回状态是否为200
if (response.getStatusLine().getStatusCode() == 200) {
// 解析响应体
String content = EntityUtils.toString(response.getEntity(), "UTF-8");
System.out.println(content);
}
} finally {
if (response != null) {
response.close();
}
// 关闭浏览器
httpclient.close();
}
}
}
二、项目整合HttpClient—与SpringBoot整合
SpringBoot官方并没有对HttpClient的启动器。所以我们需要自己完成配置,还好,我们刚才在测试案例中已经写过了。
不过,SpringBoot虽然没有提供启动器,但是却提供了一个统一的对Restful服务进行调用的模板类:RestTemplate,底层可以使用HttpClient来实现。有了这个我们就无需自己定义APIService了。
1、导入maven坐标
<dependency>
<groupId>org.apache.httpcomponents</groupId>
<artifactId>httpclient</artifactId>
</dependency>
<dependency>
<groupId>org.springframework.boot</groupId>
<artifactId>spring-boot-starter-web</artifactId>
</dependency>
2、在项目中创建HttpClientConfig类–类似util
3、在application.properties添加如下配置:
#The config for HttpClient
http.maxTotal=300
http.defaultMaxPerRoute=50
http.connectTimeout=1000
http.connectionRequestTimeout=500
http.socketTimeout=5000
http.staleConnectionCheckEnabled=true
4、在类中编写代码
/**
* HttpClient的配置类
*
*/
@Configuration
@ConfigurationProperties(prefix = "http", ignoreUnknownFields = true)
public class HttpClientConfig {
private Integer maxTotal;// 最大连接
private Integer defaultMaxPerRoute;// 每个host的最大连接
private Integer connectTimeout;// 连接超时时间
private Integer connectionRequestTimeout;// 请求超时时间
private Integer socketTimeout;// 响应超时时间
/**
* HttpClient连接池
* @return
*/
@Bean
public HttpClientConnectionManager httpClientConnectionManager() {
PoolingHttpClientConnectionManager connectionManager = new PoolingHttpClientConnectionManager();
connectionManager.setMaxTotal(maxTotal);
connectionManager.setDefaultMaxPerRoute(defaultMaxPerRoute);
return connectionManager;
}
/**
* 注册RequestConfig
* @return
*/
@Bean
public RequestConfig requestConfig() {
return RequestConfig.custom().setConnectTimeout(connectTimeout)
.setConnectionRequestTimeout(connectionRequestTimeout).setSocketTimeout(socketTimeout)
.build();
}
/**
* 注册HttpClient
* @param manager
* @param config
* @return
*/
@Bean
public HttpClient httpClient(HttpClientConnectionManager manager, RequestConfig config) {
return HttpClientBuilder.create().setConnectionManager(manager).setDefaultRequestConfig(config)
.build();
}
/**
* 使用连接池管理连接
* @param httpClient
* @return
*/
@Bean
public ClientHttpRequestFactory requestFactory(HttpClient httpClient) {
return new HttpComponentsClientHttpRequestFactory(httpClient);
}
/**
* 使用HttpClient来初始化一个RestTemplate
* @param requestFactory
* @return
*/
@Bean
public RestTemplate restTemplate(ClientHttpRequestFactory requestFactory) {
RestTemplate template = new RestTemplate(requestFactory);
List<HttpMessageConverter<?>> list = template.getMessageConverters();
for (HttpMessageConverter<?> mc : list) {
if (mc instanceof StringHttpMessageConverter) {
((StringHttpMessageConverter) mc).setDefaultCharset(Charset.forName("UTF-8"));
}
}
return template;
}
public Integer getMaxTotal() {
return maxTotal;
}
public void setMaxTotal(Integer maxTotal) {
this.maxTotal = maxTotal;
}
public Integer getDefaultMaxPerRoute() {
return defaultMaxPerRoute;
}
public void setDefaultMaxPerRoute(Integer defaultMaxPerRoute) {
this.defaultMaxPerRoute = defaultMaxPerRoute;
}
public Integer getConnectTimeout() {
return connectTimeout;
}
public void setConnectTimeout(Integer connectTimeout) {
this.connectTimeout = connectTimeout;
}
public Integer getConnectionRequestTimeout() {
return connectionRequestTimeout;
}
public void setConnectionRequestTimeout(Integer connectionRequestTimeout) {
this.connectionRequestTimeout = connectionRequestTimeout;
}
public Integer getSocketTimeout() {
return socketTimeout;
}
public void setSocketTimeout(Integer socketTimeout) {
this.socketTimeout = socketTimeout;
}
}
三、RestTemplate使用详解
1、概述:
RestTemplate是Spring提供的用于访问Rest服务的客户端,RestTemplate提供了多种便捷访问远程Http服务的方法,能够大大提高客户端的编写效率。
之前的HTTP开发是用apache的HttpClient开发,代码复杂,还得操心资源回收等。代码很复杂,冗余代码多。
导入坐标:
<dependency>
<groupId>org.springframework.boot</groupId>
<artifactId>spring-boot-starter-web</artifactId>
</dependency>
2、创建RestTemplate对象
第一步:创建RestTemplate类,在类中创建RestTemplate对象
/**
* Created by yxq on 2020/08/05.
* RestTemplate工具类,主要用来提供RestTemplate对象
*/
@Configuration//加上这个注解作用,可以被Spring扫描
public class RestTemplateConfig {
/**
* 创建RestTemplate对象,将RestTemplate对象的生命周期的管理交给Spring
* @return
*/
@Bean
public RestTemplate restTemplate(){
return new RestTemplate();
}
}
第二步:创建RestTempController,注入RestTemplate
/**
* Created by yxq on 2019/11/29.
* 本项目不连接数据库,通过RestTemplate发出get、post、put、delete请求,请求admin-project项目中controller的方法
*
*
*/
@RestController
@RequestMapping("/rest")
public class RestTempController {
// 从Spring的容器中获取restTemplate
@Autowired
private RestTemplate restTemplate;
}
3、get请求
第一步:在RestTempController中编写代码,发起get请求:
/**
* 发起get请求,请求admin-project
* http://localhost:8088/admin -->分页查找
*/
@GetMapping
public ResponseEntity<String> findByPage(){
/**
* 第一个参数:url
* 第二个参数:返回值类型
*/
ResponseEntity<String> entity = restTemplate.getForEntity("http://localhost:8088/admin?page=1&rows=3", String.class);
System.out.println("状态码:"+entity.getStatusCode());
System.out.println("响应体"+entity.getBody());
return ResponseEntity.ok(entity.getBody());
}
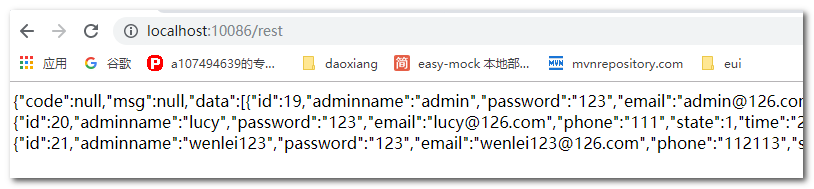
测试结果:
4、post请求
第一步:创建实体类Admin
public class Admin {
/**
* 编号
*/
private Integer id;
/**
* 管理员名
*/
private String adminname;
/**
* 密码
*/
private String password;
/**
* 邮箱
*/
private String email;
/**
* 手机号
*/
private String phone;
/**
* 状态,0禁用,1启用
*/
private Integer state;
/**
* 时间
*/
private Date time;
/**
* 角色id
*/
private String rid;
// 省略getter和setter方法
}
第二步:在RestTempController中编写方法,发送post请求
@PostMapping
public ResponseEntity<String> addAdmin(@RequestBody Admin admin){
/**
* 第一个参数:url
* 第二个参数:数据
* 第三个参数:返回值类型
*/
ResponseEntity<String> entity = restTemplate.postForEntity("http://localhost:8088/admin", admin, String.class);
return entity;
}
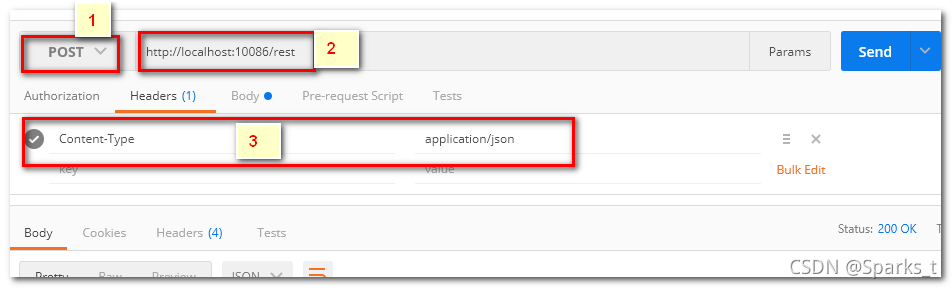
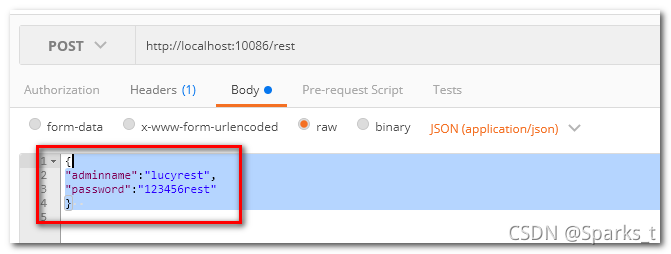
第三步:采用postman测试
5、post请求的中文乱码bug
在RestTemplateConfig中编写处理乱码的问题:
/**
* Created by yxq on 2020/08/05.
* RestTemplate工具类,主要用来提供RestTemplate对象
*/
@Configuration//加上这个注解作用,可以被Spring扫描
public class RestTemplateConfig {
/**
* 创建RestTemplate对象,将RestTemplate对象的生命周期的管理交给Spring
* @return
*/
@Bean
public RestTemplate restTemplate(){
RestTemplate restTemplate = new RestTemplate();
// 设置中文乱码问题方式一
restTemplate.getMessageConverters().add(1,new StringHttpMessageConverter(Charset.forName("UTF-8")));
// 设置中文乱码问题方式二
// restTemplate.getMessageConverters().set(1,
// new StringHttpMessageConverter(StandardCharsets.UTF_8)); // 支持中文编码
return restTemplate;
}
}
6、put请求
第一步:在RestTempController中编写方法,发送put请求
/**
* 修改数据
*
*/
@PutMapping
public ResponseEntity<String> updateAdmin(@RequestBody Admin admin){
// 第一个参数:url
// 第二个参数:对象,数据
restTemplate.put("http://localhost:8088/admin",admin);
return ResponseEntity.ok("修改成功");
}
7、delete请求
第一步:在RestTempController中编写方法,发送delete请求
@DeleteMapping("/{id}")
public ResponseEntity<String> deleteAdmin(@PathVariable("id") Integer id){
restTemplate.delete("http://localhost:8088/admin/"+id);
return ResponseEntity.ok("删除成功");
}
到此这篇关于Java HttpClient技术详解的文章就介绍到这了,更多相关Java HttpClient内容请搜索以前的文章或继续浏览下面的相关文章希望大家以后多多支持!
以上是 Java HttpClient技术详解 的全部内容, 来源链接: utcz.com/p/249660.html