OpenCV轮廓检测之boundingRect绘制矩形边框
函数原型
cv::Rect boundingRect( InputArray array );
参数说明
输入:InputArray类型的array,输入灰度图像或二维点集。
输出:Rect类型的矩形信息,包括矩形尺寸和位置。
测试代码
#include <iostream>
#include <time.h>
#include <opencv2/opencv.hpp>
using namespace std;
using namespace cv;
int main()
{
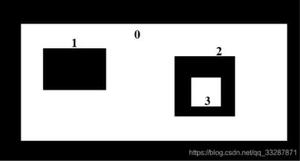
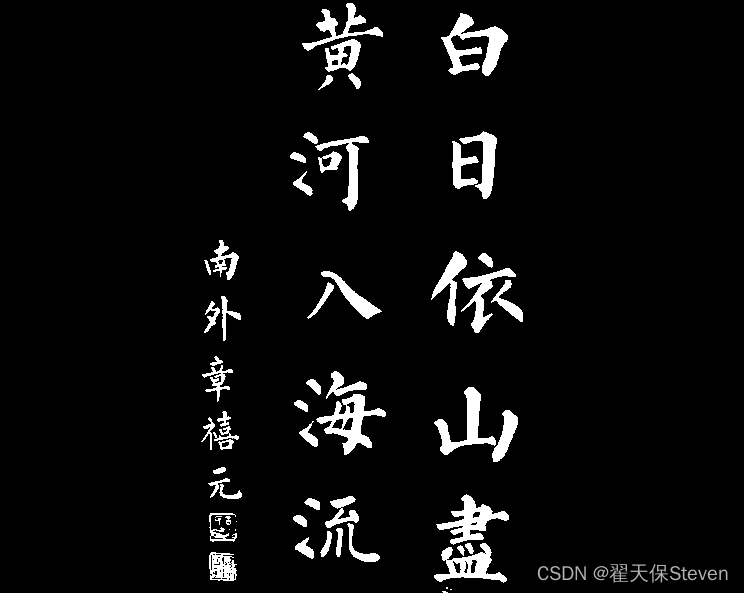
cv::Mat src = imread("test.png",0);
cv::Mat result = src.clone();
cv::Mat th1;
// 最大类间差法,也称大津算法
threshold(result, th1, 0, 255, THRESH_OTSU);
// 反相
th1 = 255 - th1;
// 确定连通区轮廓
std::vector<std::vector<cv::Point> > contours; // 创建轮廓容器
std::vector<cv::Vec4i> hierarchy;
cv::findContours(th1, contours, hierarchy, cv::RETR_EXTERNAL, cv::CHAIN_APPROX_NONE, cv::Point());
// 遍历轮廓显示矩形框
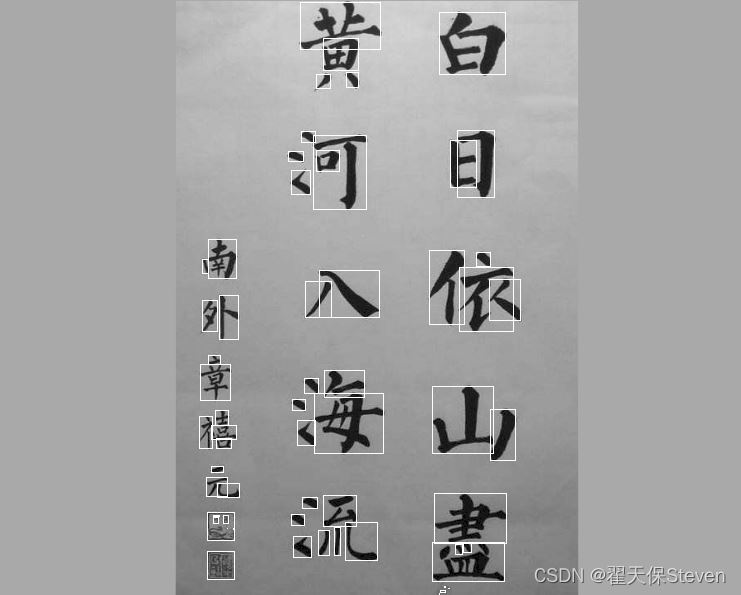
for (int i = 0; i < contours.size(); ++i)
{
cv::Rect rect = cv::boundingRect(cv::Mat(contours[i]));
cv::rectangle(result, rect, Scalar(255), 1);
}
imshow("original", src);
imshow("thresh", th1);
imshow("result", result);
waitKey(0);
return 0;
}
测试效果
补充
这个函数得到的矩形框都是方正的,还有一个函数minAreaRect也可以得到最小包围矩形框,那个是带倾斜角度的。
函数原型
cv::RotatedRect minAreaRect( InputArray points );
参数说明
输入:InputArray类型的points,输入灰度图像或二维点集。
输出:RotatedRect类型的旋转矩形信息,即矩形四角点位置。
测试代码
#include <iostream>
#include <time.h>
#include <opencv2/opencv.hpp>
using namespace std;
using namespace cv;
int main()
{
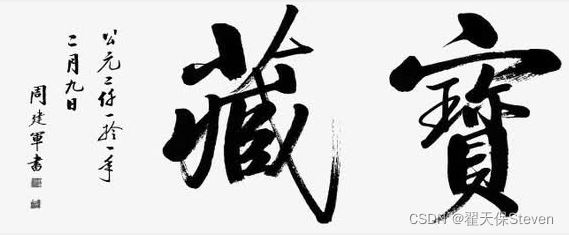
cv::Mat src = imread("test.png",0);
cv::Mat result = src.clone();
cv::Mat th1;
// 最大类间差法,也称大津算法
threshold(result, th1, 0, 255, THRESH_OTSU);
// 反相
th1 = 255 - th1;
// 确定连通区轮廓
std::vector<std::vector<cv::Point> > contours; // 创建轮廓容器
std::vector<cv::Vec4i> hierarchy;
cv::findContours(th1, contours, hierarchy, cv::RETR_EXTERNAL, cv::CHAIN_APPROX_NONE, cv::Point());
// 遍历轮廓显示矩形框
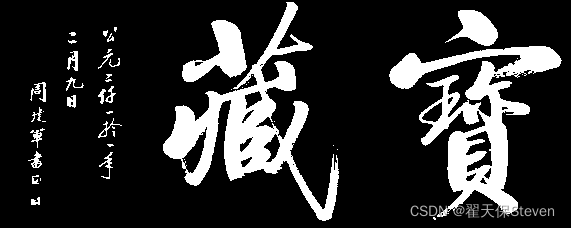
for (int i = 0; i < contours.size(); ++i)
{
cv::RotatedRect rotatedrect = cv::minAreaRect(cv::Mat(contours[i]));
// 存储旋转矩形的四个点
cv::Point2f ps[4];
rotatedrect.points(ps);
std::vector<std::vector<cv::Point>> tmpContours; // 创建一个InputArrayOfArrays 类型的点集
std::vector<cv::Point> contour;
for (int i = 0; i != 4; ++i) {
contour.emplace_back(cv::Point2i(ps[i]));
}
// 插入到轮廓容器中
tmpContours.insert(tmpContours.end(), contour);
// 绘制轮廓,也就是绘制旋转矩形
drawContours(result, tmpContours, -1, Scalar(0), 1, 16); // 填充mask
}
imshow("original", src);
imshow("thresh", th1);
imshow("result", result);
waitKey(0);
return 0;
}
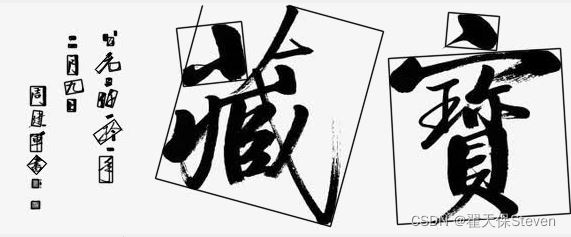
测试效果:
到此这篇关于OpenCV轮廓检测之boundingRect绘制矩形边框的文章就介绍到这了,更多相关OpenCV boundingRect绘制矩形边框内容请搜索以前的文章或继续浏览下面的相关文章希望大家以后多多支持!
以上是 OpenCV轮廓检测之boundingRect绘制矩形边框 的全部内容, 来源链接: utcz.com/p/247957.html