Android 滑动小圆点ViewPager的两种设置方法详解流程
第一种方法:
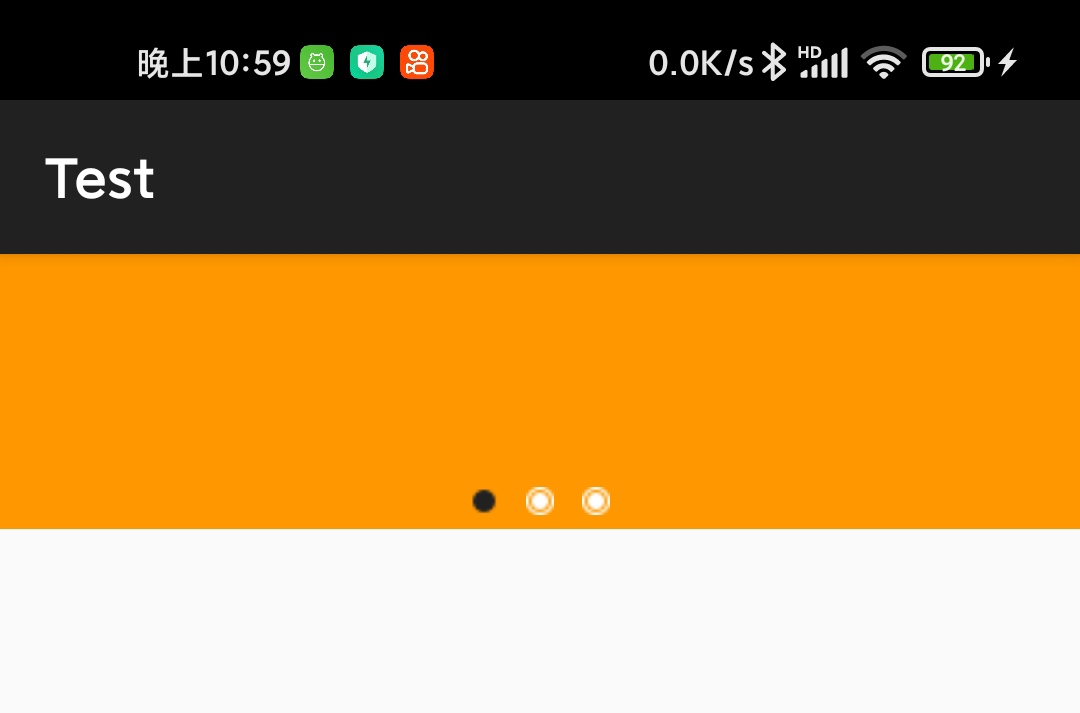
一、测试如下,直接设置小圆点不是图标

二、准备工作
1.在drawable创建dot.xml,设置小圆点,比较方便
<?xml version="1.0" encoding="utf-8"?>
<selector xmlns:android="http://schemas.android.com/apk/res/android">
<item android:state_selected="true">
<shape android:shape="oval">
<solid android:color="@color/black" />
<corners android:radius="8dp" />
</shape>
</item>
<item android:state_selected="false">
<shape android:shape="oval">
<solid android:color="@color/white" />
<corners android:radius="8dp" />
</shape>
</item>
</selector>
2.布局小圆点的状态可以被左右滑动dotview.xml
<!--?xml version="1.0" encoding="utf-8"?-->
<LinearLayout xmlns:android="http://schemas.android.com/apk/res/android"
android:layout_width="match_parent"
android:layout_height="match_parent"
android:padding="5dp">
<ImageView
android:id="@+id/v_dot"
android:layout_width="10dp"
android:layout_height="10dp"
android:src="@drawable/dot"/>
</LinearLayout>
3.分页适配器自定义ViewPagerAdapter.java
public class ViewPagerAdapter extends PagerAdapter {
private List<View> mViewList;
public ViewPagerAdapter(List<View> mViewList) {
this.mViewList = mViewList;
}
@Override
public void destroyItem(ViewGroup container, int position, Object object) {
container.removeView(mViewList.get(position));
}
@Override
public Object instantiateItem(ViewGroup container, int position) {
container.addView(mViewList.get(position));
return (mViewList.get(position));
}
@Override
public int getCount() {
if (mViewList == null)
return 0;
return mViewList.size();
}
@Override
public boolean isViewFromObject(View view, Object object) {
return view == object;
}
}
三、使用工作:
1.activity_main.xml
<?xml version="1.0" encoding="utf-8"?>
<LinearLayout xmlns:android="http://schemas.android.com/apk/res/android"
android:layout_width="match_parent"
android:layout_height="wrap_content"
android:background="#D4D3D3">
<RelativeLayout
android:layout_width="match_parent"
android:layout_height="100dp"
android:background="#FFFFFF"
android:orientation="vertical">
<android.support.v4.view.ViewPager
android:id="@+id/viewpager"
android:layout_width="match_parent"
android:layout_height="wrap_content" />
<LinearLayout
android:id="@+id/ll_dots"
android:layout_width="match_parent"
android:layout_height="wrap_content"
android:layout_alignParentBottom="true"
android:gravity="center"
android:orientation="horizontal" />
</RelativeLayout>
</LinearLayout>
分析下布局结构:
(1)首先是一个ViewPager,用于结合GridView实现左右滑动菜单
(2)下面是一个LinearLayout,有多少个ViewPager的页面就会inflate出多少个小圆点,并且在ViewPager翻页时,也就是说在左右滑动时,下面小圆点的状态也要相应地做出改变
2.MainActivity.java
public class MainActivity extends AppCompatActivity {
private ViewPager mPager;
private LinearLayout mLlDots;
private LayoutInflater inflater;
private List<View> mPagerList;
private int pageCount = 3;//默认三个小点
/**
* 当前显示的是第几页
*/
private int curIndex = 0;
@Override
public void onCreate(Bundle savedInstanceState) {
super.onCreate(savedInstanceState);
setContentView(R.layout.activity_main);
mPager = (ViewPager) findViewById(R.id.viewpager);
mLlDots = (LinearLayout) findViewById(R.id.ll_dots);
inflater = LayoutInflater.from(this);
mPagerList = new ArrayList<View>();
//#FF9800:黄,#4CAF50:绿,#2196F3:蓝
String[] colors = {"#FF9800", "#4CAF50", "#2196F3"};
for (int i = 0; i < pageCount; i++) {
LinearLayout mLL = (LinearLayout) inflater.inflate(R.layout.linearlayout, mPager, false);
mLL.setBackgroundColor(Color.parseColor(colors[i]));
mPagerList.add(mLL);
}
//设置适配器
mPager.setAdapter(new ViewPagerAdapter(mPagerList));
//设置圆点
setDotLayout();
}
/**
* 设置圆点
*/
public void setDotLayout() {
for (int i = 0; i < pageCount; i++) {
mLlDots.addView(inflater.inflate(R.layout.dotview, null));
}
// 默认显示第一页
mLlDots.getChildAt(0).setSelected(true);
mPager.addOnPageChangeListener(new ViewPager.OnPageChangeListener() {
@Override
public void onPageScrolled(int position, float positionOffset, int positionOffsetPixels) {
}
@Override
public void onPageSelected(int position) {
// 取消原点选中
mLlDots.getChildAt(curIndex).setSelected(false);
// 原点选中
mLlDots.getChildAt(position).setSelected(true);
curIndex = position;
}
@Override
public void onPageScrollStateChanged(int state) {
}
});
}
}
这代码中一句,布局LinearLayout随着左右滑动小圆点翻页
LinearLayout mLL = (LinearLayout) inflater.inflate(R.layout.linearlayout, mPager, false);
布局linearlayout.xml
<?xml version="1.0" encoding="utf-8"?>
<LinearLayout xmlns:android="http://schemas.android.com/apk/res/android"
android:layout_width="match_parent"
android:layout_height="match_parent"/>
第二种方法:
一、测试如下,小圆点图标
二、dotview.xml
......
<ImageView
android:id="@+id/v_dot"
android:layout_width="10dp"
android:layout_height="10dp"/>
......
三、设置二个小圆点图标(黑白)
点击链接:二个小圆点图标.zip
// 默认显示第一页
mLlDots.getChildAt(0).findViewById(R.id.v_dot)
.setBackgroundResource(R.drawable.dot_normal);
mLlDots.getChildAt(1).findViewById(R.id.v_dot)
.setBackgroundResource(R.drawable.dot_selected);
mLlDots.getChildAt(2).findViewById(R.id.v_dot)
.setBackgroundResource(R.drawable.dot_selected);
mPager.setOnPageChangeListener(new ViewPager.OnPageChangeListener() {
public void onPageSelected(int position) {
// 取消圆点选中
mLlDots.getChildAt(curIndex)
.findViewById(R.id.v_dot)
.setBackgroundResource(R.drawable.dot_selected);
// 圆点选中
mLlDots.getChildAt(position)
.findViewById(R.id.v_dot)
.setBackgroundResource(R.drawable.dot_normal);
curIndex = position;
}
public void onPageScrolled(int arg0, float arg1, int arg2) {
}
public void onPageScrollStateChanged(int arg0) {
}
});
到此这篇关于Android 滑动小圆点ViewPager的两种设置方法详解流程的文章就介绍到这了,更多相关Android 滑动小圆点内容请搜索以前的文章或继续浏览下面的相关文章希望大家以后多多支持!
以上是 Android 滑动小圆点ViewPager的两种设置方法详解流程 的全部内容, 来源链接: utcz.com/p/244087.html