android 仿微信demo——登录功能实现(移动端)
移动端登录功能实现
登录功能基本和注册一样,唯一不同的是登录可以实现两种登录方式(微信号和手机号),也就是布局不一样。所以需要两个布局,两个activity(这个方法比较简单粗暴,我懒。也可以通过activity动态切换布局,这样只需要一个activity就可以了)
创建两个activity,实现两种登录方式
微信号登录activity
LoginUser.java
package com.example.wxchatdemo;
import android.annotation.SuppressLint;
import android.app.AlertDialog;
import android.content.Intent;
import android.graphics.Color;
import android.os.Build;
import android.os.Bundle;
import android.os.Handler;
import android.os.Message;
import android.support.v7.app.ActionBar;
import android.support.v7.app.AppCompatActivity;
import android.util.Log;
import android.view.View;
import android.widget.Button;
import android.widget.EditText;
import android.widget.ImageView;
import android.widget.TextView;
import android.widget.Toast;
import com.example.wxchatdemo.tools.IEditTextChangeListener;
import com.example.wxchatdemo.tools.WorksSizeCheckUtil;
import org.json.JSONObject;
import java.io.BufferedReader;
import java.io.BufferedWriter;
import java.io.InputStream;
import java.io.InputStreamReader;
import java.io.OutputStream;
import java.io.OutputStreamWriter;
import java.net.HttpURLConnection;
import java.net.URL;
import java.net.URLEncoder;
public class LoginUser extends AppCompatActivity {
//声明组件变量
private EditText weixinNumber;
private EditText password;
private TextView phone_login;
private Button button;
//自定义的一个Hander消息机制
private MyHander myhander = new MyHander();
@Override
public void onCreate(Bundle savedInstanceState) {
super.onCreate(savedInstanceState);
setContentView(R.layout.login_user); //设置布局
/* 隐藏自带标题*/
ActionBar actionBar = getSupportActionBar();
if (actionBar != null) {
actionBar.hide();
}
if (Build.VERSION.SDK_INT >= 21) {
View decorView = getWindow().getDecorView();
int option = View.SYSTEM_UI_FLAG_LAYOUT_FULLSCREEN //全屏显示
| View.SYSTEM_UI_FLAG_LAYOUT_STABLE
| View.SYSTEM_UI_FLAG_LIGHT_STATUS_BAR; //因为背景为浅色所以将状态栏字体设置为黑色
decorView.setSystemUiVisibility(option);
getWindow().setStatusBarColor(Color.TRANSPARENT);
}
initViews(); // 初始化布局元素
/*获取注册activity传过来的微信号*/
Intent intent = getIntent();
String number = intent.getStringExtra("weixin_number");
//把传过来的值显示在登录布局上
weixinNumber.setText(number);
// 设置注册按钮是否可点击
if (weixinNumber.getText() + "" == "" || password.getText() + "" == "") {
button.setEnabled(false);
} else {
button.setEnabled(true);
}
inputFocus(); //监听EditView变色
buttonChangeColor(); //登录按钮变色
// 设置手机号登录的监听器
phone_login.setOnClickListener(new View.OnClickListener() {
@Override
public void onClick(View v) {
//跳转到手机号登录的activity
Intent intent=new Intent(LoginUser.this,LoginPhone.class);
startActivity(intent);
}
});
//button的点击事件
button.setOnClickListener(new View.OnClickListener() {
@Override
public void onClick(View v) {
//创建一个进度条的activity,通过AndroidMainfest.xml文件声明为对话框,这样activity就不会覆盖当前的activity
Intent intent = new Intent();
intent.setClass(LoginUser.this, Loading.class);
startActivity(intent);
// 开一个线程完成网络请求操作
new Thread(new Runnable() {
@Override
public void run() {
try {
Thread.sleep(1000);
httpUrlConnPost(LoginUser.this.weixinNumber.getText() + "",
password.getText() + "");
} catch (InterruptedException e) {
e.printStackTrace();
}
}
}).start();
}
});
}
@SuppressLint("NewApi")
public void initViews() {
// 得到所有的组件
weixinNumber = (EditText) this.findViewById(R.id.log_weixin_number);
password = (EditText) this.findViewById(R.id.log_passwd);
phone_login = (TextView) this.findViewById(R.id.phone_log);
button = (Button) this.findViewById(R.id.log_button);
}
public void inputFocus() {
weixinNumber.setOnFocusChangeListener(new View.OnFocusChangeListener() {
@Override
public void onFocusChange(View v, boolean hasFocus) {
if (hasFocus) {
// 此处为得到焦点时的处理内容
ImageView imageView = (ImageView) findViewById(R.id.login_diver1);
imageView.setBackgroundResource(R.color.input_dvier_focus);
} else {
// 此处为失去焦点时的处理内容
ImageView imageView = (ImageView) findViewById(R.id.login_diver1);
imageView.setBackgroundResource(R.color.input_dvier);
}
}
});
password.setOnFocusChangeListener(new View.OnFocusChangeListener() {
@Override
public void onFocusChange(View v, boolean hasFocus) {
if (hasFocus) {
// 此处为得到焦点时的处理内容
ImageView imageView = (ImageView) findViewById(R.id.login_diver2);
imageView.setBackgroundResource(R.color.input_dvier_focus);
} else {
// 此处为失去焦点时的处理内容
ImageView imageView = (ImageView) findViewById(R.id.login_diver2);
imageView.setBackgroundResource(R.color.input_dvier);
}
}
});
}
public void buttonChangeColor() {
//创建工具类对象 把要改变颜色的Button先传过去
WorksSizeCheckUtil.textChangeListener textChangeListener = new WorksSizeCheckUtil.textChangeListener(button);
textChangeListener.addAllEditText(weixinNumber, password);//把所有要监听的EditText都添加进去
//接口回调 在这里拿到boolean变量 根据isHasContent的值决定 Button应该设置什么颜色
WorksSizeCheckUtil.setChangeListener(new IEditTextChangeListener() {
@Override
public void textChange(boolean isHasContent) {
if (isHasContent) {
button.setBackgroundResource(R.drawable.login_button_focus);
button.setTextColor(getResources().getColor(R.color.loginButtonTextFouse));
} else {
button.setBackgroundResource(R.drawable.login_button_shape);
button.setTextColor(getResources().getColor(R.color.loginButtonText));
}
}
});
}
// 发送请求的主要方法
public void httpUrlConnPost(String number, String password) {
HttpURLConnection urlConnection = null;
URL url;
try {
// 请求的URL地地址
url = new URL(
"http://100.2.178.10:8080/AndroidServer_war_exploded/Login");
urlConnection = (HttpURLConnection) url.openConnection();// 打开http连接
urlConnection.setConnectTimeout(3000);// 连接的超时时间
urlConnection.setUseCaches(false);// 不使用缓存
// urlConnection.setFollowRedirects(false);是static函数,作用于所有的URLConnection对象。
urlConnection.setInstanceFollowRedirects(true);// 是成员函数,仅作用于当前函数,设置这个连接是否可以被重定向
urlConnection.setReadTimeout(3000);// 响应的超时时间
urlConnection.setDoInput(true);// 设置这个连接是否可以写入数据
urlConnection.setDoOutput(true);// 设置这个连接是否可以输出数据
urlConnection.setRequestMethod("POST");// 设置请求的方式
urlConnection.setRequestProperty("Content-Type",
"application/json;charset=UTF-8");// 设置消息的类型
urlConnection.connect();// 连接,从上述至此的配置必须要在connect之前完成,实际上它只是建立了一个与服务器的TCP连接
JSONObject json = new JSONObject();// 创建json对象
json.put("number", URLEncoder.encode(number, "UTF-8"));// 使用URLEncoder.encode对特殊和不可见字符进行编码
json.put("password", URLEncoder.encode(password, "UTF-8"));// 把数据put进json对象中
String jsonstr = json.toString();// 把JSON对象按JSON的编码格式转换为字符串
// ------------字符流写入数据------------
OutputStream out = urlConnection.getOutputStream();// 输出流,用来发送请求,http请求实际上直到这个函数里面才正式发送出去
BufferedWriter bw = new BufferedWriter(new OutputStreamWriter(out));// 创建字符流对象并用高效缓冲流包装它,便获得最高的效率,发送的是字符串推荐用字符流,其它数据就用字节流
bw.write(jsonstr);// 把json字符串写入缓冲区中
bw.flush();// 刷新缓冲区,把数据发送出去,这步很重要
out.close();
bw.close();// 使用完关闭
Log.i("aa", urlConnection.getResponseCode() + "");
//以下判斷是否訪問成功,如果返回的状态码是200则说明访问成功
if (urlConnection.getResponseCode() == HttpURLConnection.HTTP_OK) {// 得到服务端的返回码是否连接成功
// ------------字符流读取服务端返回的数据------------
InputStream in = urlConnection.getInputStream();
BufferedReader br = new BufferedReader(
new InputStreamReader(in));
String str = null;
StringBuffer buffer = new StringBuffer();
while ((str = br.readLine()) != null) {// BufferedReader特有功能,一次读取一行数据
buffer.append(str);
}
in.close();
br.close();
JSONObject rjson = new JSONObject(buffer.toString());
Log.i("aa", "rjson=" + rjson);// rjson={"json":true}
boolean result = rjson.getBoolean("json");// 从rjson对象中得到key值为"json"的数据,这里服务端返回的是一个boolean类型的数据
System.out.println("json:===" + result);
//如果服务器端返回的是true,则说明登录成功,否则登录失败
if (result) {// 判断结果是否正确
//在Android中http请求,必须放到线程中去作请求,但是在线程中不可以直接修改UI,只能通过hander机制来完成对UI的操作
myhander.sendEmptyMessage(1);
Log.i("用户:", "登录成功");
} else {
myhander.sendEmptyMessage(2);
System.out.println("222222222222222");
Log.i("用户:", "登录失败");
}
} else {
myhander.sendEmptyMessage(2);
}
} catch (Exception e) {
e.printStackTrace();
Log.i("aa", e.toString());
System.out.println("11111111111111111");
myhander.sendEmptyMessage(2);
} finally {
urlConnection.disconnect();// 使用完关闭TCP连接,释放资源
}
}
// 在Android中不可以在线程中直接修改UI,只能借助Handler机制来完成对UI的操作
class MyHander extends Handler {
@Override
public void handleMessage(Message msg) {
super.handleMessage(msg);
//判断hander的内容是什么,如果是1则说明登录成功,如果是2说明登录失败
switch (msg.what) {
case 1:
Log.i("aa", msg.what + "");
//提示
Toast.makeText(getApplicationContext(), "登录成功",
Toast.LENGTH_SHORT).show();
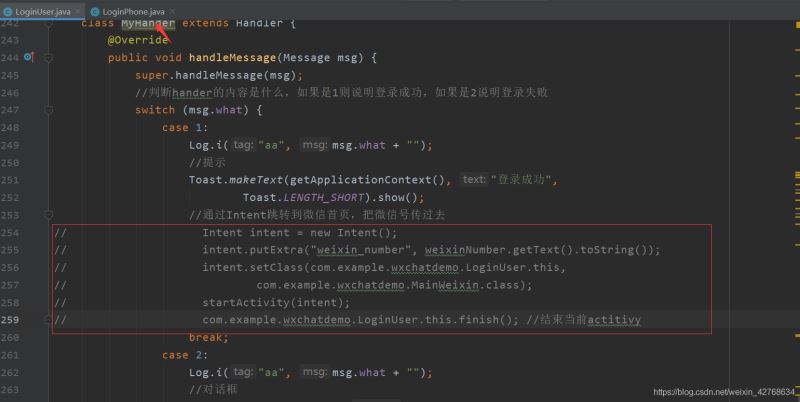
//通过Intent跳转到微信首页,把微信号传过去
Intent intent = new Intent();
intent.putExtra("weixin_number", weixinNumber.getText().toString());
intent.setClass(com.example.wxchatdemo.LoginUser.this,
com.example.wxchatdemo.MainWeixin.class);
startActivity(intent);
com.example.wxchatdemo.LoginUser.this.finish(); //结束当前actitivy
break;
case 2:
Log.i("aa", msg.what + "");
//对话框
new AlertDialog.Builder(com.example.wxchatdemo.LoginUser.this)
.setTitle(" 登录失败")
.setMessage(" 用户名或密码错误,请重新填写")
.setPositiveButton("确定", null)
.show();
break;
}
}
}
//返回按钮处理事件
public void login_activity_back(View v) {
/*跳转到微信启动页*/
Intent intent = new Intent();
intent.setClass(com.example.wxchatdemo.LoginUser.this, Welcome.class);
startActivity(intent);
com.example.wxchatdemo.LoginUser.this.finish(); //结束当前activity
}
}
微信号登录activity对应的布局文件
login_user.xml
<?xml version="1.0" encoding="utf-8"?>
<LinearLayout xmlns:android="http://schemas.android.com/apk/res/android"
android:layout_width="match_parent"
android:layout_height="match_parent"
android:background="@color/title"
android:orientation="vertical">
<!--返回按钮-->
<ImageView
android:id="@+id/close"
android:layout_width="17dp"
android:layout_height="17dp"
android:layout_marginLeft="20dp"
android:layout_marginTop="45dp"
android:onClick="login_activity_back"
android:src="@drawable/backpay" />
<!--标题-->
<TextView
android:layout_width="match_parent"
android:layout_height="wrap_content"
android:layout_marginLeft="30dp"
android:layout_marginTop="45dp"
android:text="微信号/QQ号/邮箱登录"
android:textColor="@color/loginText"
android:textSize="25sp" />
<!--账号输入-->
<LinearLayout
android:layout_width="match_parent"
android:layout_height="wrap_content"
android:layout_marginTop="40dp">
<TextView
android:layout_width="wrap_content"
android:layout_height="wrap_content"
android:layout_marginLeft="30dp"
android:text="账号"
android:textColor="@color/loginText"
android:textSize="16sp" />
<EditText
android:id="@+id/log_weixin_number"
android:layout_width="200dp"
android:layout_height="wrap_content"
android:layout_marginLeft="55dp"
android:background="@null"
android:hint="请填写微信号/QQ号/邮箱"
android:singleLine="true"
android:textColorHint="@color/textColorHint"
android:textCursorDrawable="@drawable/edit_cursor_color"
android:textSize="16sp" />
</LinearLayout>
<!--下划线-->
<ImageView
android:id="@+id/login_diver1"
android:layout_width="320dp"
android:layout_height="1dp"
android:layout_gravity="center_horizontal"
android:layout_marginTop="17dp"
android:background="@color/input_dvier" />
<LinearLayout
android:layout_width="match_parent"
android:layout_height="wrap_content"
android:layout_marginTop="40dp">
<TextView
android:layout_width="wrap_content"
android:layout_height="wrap_content"
android:layout_marginLeft="30dp"
android:text="密码"
android:textColor="@color/loginText"
android:textSize="16sp" />
<EditText
android:id="@+id/log_passwd"
android:layout_width="200dp"
android:layout_height="wrap_content"
android:layout_marginLeft="55dp"
android:password="true"
android:background="@null"
android:hint="请填写密码"
android:singleLine="true"
android:textColorHint="@color/textColorHint"
android:textCursorDrawable="@drawable/edit_cursor_color"
android:textSize="16sp" />
</LinearLayout>
<!--下划线-->
<ImageView
android:id="@+id/login_diver2"
android:layout_width="320dp"
android:layout_height="1dp"
android:layout_gravity="center_horizontal"
android:layout_marginTop="17dp"
android:background="@color/input_dvier" />
<LinearLayout
android:layout_width="match_parent"
android:layout_height="wrap_content">
<TextView
android:id="@+id/phone_log"
android:layout_width="wrap_content"
android:layout_height="wrap_content"
android:layout_marginLeft="30dp"
android:layout_marginTop="30dp"
android:text="用手机号登录"
android:textColor="@color/massageLogin"
android:textSize="17dp" />
</LinearLayout>
<LinearLayout
android:layout_width="match_parent"
android:layout_height="wrap_content"
android:layout_marginTop="40dp"
android:gravity="center_horizontal">
<!--登录按钮-->
<Button
android:id="@+id/log_button"
android:layout_width="321dp"
android:layout_height="48dp"
android:background="@drawable/login_button_shape"
android:text="登录"
android:textColor="@color/loginButtonText"
android:textSize="16sp" />
</LinearLayout>
<LinearLayout
android:layout_width="match_parent"
android:layout_height="wrap_content"
android:layout_marginTop="300dp"
android:divider="@drawable/login_dvier"
android:gravity="center_horizontal"
android:showDividers="middle">
<TextView
android:layout_width="wrap_content"
android:layout_height="wrap_content"
android:paddingHorizontal="10dp"
android:text="找回密码"
android:textColor="@color/massageLogin"
android:textSize="14dp" />
<TextView
android:layout_width="wrap_content"
android:layout_height="wrap_content"
android:paddingHorizontal="10dp"
android:text="紧急冻结"
android:textColor="@color/massageLogin"
android:textSize="14dp" />
<TextView
android:layout_width="wrap_content"
android:layout_height="wrap_content"
android:paddingHorizontal="10dp"
android:text="微信安全中心"
android:textColor="@color/massageLogin"
android:textSize="14dp" />
</LinearLayout>
</LinearLayout>
手机号登录activity
LoginPhone.java
package com.example.wxchatdemo;
import android.annotation.SuppressLint;
import android.app.AlertDialog;
import android.content.Intent;
import android.graphics.Color;
import android.os.Build;
import android.os.Bundle;
import android.os.Handler;
import android.os.Message;
import android.support.v7.app.ActionBar;
import android.support.v7.app.AppCompatActivity;
import android.util.Log;
import android.view.View;
import android.widget.Button;
import android.widget.EditText;
import android.widget.ImageView;
import android.widget.TextView;
import android.widget.Toast;
import com.example.wxchatdemo.tools.IEditTextChangeListener;
import com.example.wxchatdemo.tools.WorksSizeCheckUtil;
import org.json.JSONObject;
import java.io.BufferedReader;
import java.io.BufferedWriter;
import java.io.InputStream;
import java.io.InputStreamReader;
import java.io.OutputStream;
import java.io.OutputStreamWriter;
import java.net.HttpURLConnection;
import java.net.URL;
import java.net.URLEncoder;
public class LoginPhone extends AppCompatActivity {
//声明组件变量
private EditText phone;
private EditText password;
private TextView user_login;
private Button button;
//自定义的一个Hander消息机制
private LoginPhone.MyHander myhander = new LoginPhone.MyHander();
@Override
public void onCreate(Bundle savedInstanceState) {
super.onCreate(savedInstanceState);
setContentView(R.layout.login_phone); //设置布局
/* 隐藏自带标题*/
ActionBar actionBar = getSupportActionBar();
if (actionBar != null) {
actionBar.hide();
}
if (Build.VERSION.SDK_INT >= 21) {
View decorView = getWindow().getDecorView();
int option = View.SYSTEM_UI_FLAG_LAYOUT_FULLSCREEN //全屏显示
| View.SYSTEM_UI_FLAG_LAYOUT_STABLE
| View.SYSTEM_UI_FLAG_LIGHT_STATUS_BAR; //因为背景为浅色所以将状态栏字体设置为黑色
decorView.setSystemUiVisibility(option);
getWindow().setStatusBarColor(Color.TRANSPARENT);
}
initViews(); // 初始化布局元素
// 设置注册按钮是否可点击
if (phone.getText() + "" == "" || password.getText() + "" == "") {
button.setEnabled(false);
} else {
button.setEnabled(true);
}
inputFocus(); //监听EditView变色
buttonChangeColor(); //登录按钮变色
//设置通过微信号登录的监听器
user_login.setOnClickListener(new View.OnClickListener() {
@Override
public void onClick(View v) {
//跳转到用微信号登录的activity
Intent intent = new Intent(LoginPhone.this, LoginUser.class);
startActivity(intent);
}
});
//button的点击事件
button.setOnClickListener(new View.OnClickListener() {
@Override
public void onClick(View v) {
//创建一个进度条的activity,通过AndroidMainfest.xml文件声明为对胡框,这样activity就不会覆盖当前的activity
Intent intent = new Intent();
intent.setClass(LoginPhone.this, Loading.class);
startActivity(intent);
// 开一个线程完成网络请求操作
new Thread(new Runnable() {
@Override
public void run() {
try {
Thread.sleep(1000);
httpUrlConnPost(LoginPhone.this.phone.getText() + "",
password.getText() + "");
} catch (InterruptedException e) {
e.printStackTrace();
}
}
}).start();
}
});
}
@SuppressLint("NewApi")
public void initViews() {
// 得到所有的组件
phone = (EditText) this.findViewById(R.id.log_phone);
password = (EditText) this.findViewById(R.id.log_passwd);
user_login = (TextView) this.findViewById(R.id.user_log);
button = (Button) this.findViewById(R.id.log_button);
}
public void inputFocus() {
phone.setOnFocusChangeListener(new View.OnFocusChangeListener() {
@Override
public void onFocusChange(View v, boolean hasFocus) {
if (hasFocus) {
// 此处为得到焦点时的处理内容
ImageView imageView = (ImageView) findViewById(R.id.login_diver1);
imageView.setBackgroundResource(R.color.input_dvier_focus);
} else {
// 此处为失去焦点时的处理内容
ImageView imageView = (ImageView) findViewById(R.id.login_diver1);
imageView.setBackgroundResource(R.color.input_dvier);
}
}
});
password.setOnFocusChangeListener(new View.OnFocusChangeListener() {
@Override
public void onFocusChange(View v, boolean hasFocus) {
if (hasFocus) {
// 此处为得到焦点时的处理内容
ImageView imageView = (ImageView) findViewById(R.id.login_diver2);
imageView.setBackgroundResource(R.color.input_dvier_focus);
} else {
// 此处为失去焦点时的处理内容
ImageView imageView = (ImageView) findViewById(R.id.login_diver2);
imageView.setBackgroundResource(R.color.input_dvier);
}
}
});
}
public void buttonChangeColor() {
//创建工具类对象 把要改变颜色的Button先传过去
WorksSizeCheckUtil.textChangeListener textChangeListener = new WorksSizeCheckUtil.textChangeListener(button);
textChangeListener.addAllEditText(phone, password);//把所有要监听的EditText都添加进去
//接口回调 在这里拿到boolean变量 根据isHasContent的值决定 Button应该设置什么颜色
WorksSizeCheckUtil.setChangeListener(new IEditTextChangeListener() {
@Override
public void textChange(boolean isHasContent) {
if (isHasContent) {
button.setBackgroundResource(R.drawable.login_button_focus);
button.setTextColor(getResources().getColor(R.color.loginButtonTextFouse));
} else {
button.setBackgroundResource(R.drawable.login_button_shape);
button.setTextColor(getResources().getColor(R.color.loginButtonText));
}
}
});
}
// 发送请求的主要方法
public void httpUrlConnPost(String phone, String password) {
HttpURLConnection urlConnection = null;
URL url;
try {
// 请求的URL地地址
url = new URL(
"http://100.2.178.10:8080/AndroidServer_war_exploded/Login");
urlConnection = (HttpURLConnection) url.openConnection();// 打开http连接
urlConnection.setConnectTimeout(3000);// 连接的超时时间
urlConnection.setUseCaches(false);// 不使用缓存
// urlConnection.setFollowRedirects(false);是static函数,作用于所有的URLConnection对象。
urlConnection.setInstanceFollowRedirects(true);// 是成员函数,仅作用于当前函数,设置这个连接是否可以被重定向
urlConnection.setReadTimeout(3000);// 响应的超时时间
urlConnection.setDoInput(true);// 设置这个连接是否可以写入数据
urlConnection.setDoOutput(true);// 设置这个连接是否可以输出数据
urlConnection.setRequestMethod("POST");// 设置请求的方式
urlConnection.setRequestProperty("Content-Type",
"application/json;charset=UTF-8");// 设置消息的类型
urlConnection.connect();// 连接,从上述至此的配置必须要在connect之前完成,实际上它只是建立了一个与服务器的TCP连接
JSONObject json = new JSONObject();// 创建json对象
json.put("number", URLEncoder.encode(phone, "UTF-8"));// 使用URLEncoder.encode对特殊和不可见字符进行编码
json.put("password", URLEncoder.encode(password, "UTF-8"));// 把数据put进json对象中
String jsonstr = json.toString();// 把JSON对象按JSON的编码格式转换为字符串
// ------------字符流写入数据------------
OutputStream out = urlConnection.getOutputStream();// 输出流,用来发送请求,http请求实际上直到这个函数里面才正式发送出去
BufferedWriter bw = new BufferedWriter(new OutputStreamWriter(out));// 创建字符流对象并用高效缓冲流包装它,便获得最高的效率,发送的是字符串推荐用字符流,其它数据就用字节流
bw.write(jsonstr);// 把json字符串写入缓冲区中
bw.flush();// 刷新缓冲区,把数据发送出去,这步很重要
out.close();
bw.close();// 使用完关闭
Log.i("aa", urlConnection.getResponseCode() + "");
//以下判斷是否訪問成功,如果返回的状态码是200则说明访问成功
if (urlConnection.getResponseCode() == HttpURLConnection.HTTP_OK) {// 得到服务端的返回码是否连接成功
// ------------字符流读取服务端返回的数据------------
InputStream in = urlConnection.getInputStream();
BufferedReader br = new BufferedReader(
new InputStreamReader(in));
String str = null;
StringBuffer buffer = new StringBuffer();
while ((str = br.readLine()) != null) {// BufferedReader特有功能,一次读取一行数据
buffer.append(str);
}
in.close();
br.close();
JSONObject rjson = new JSONObject(buffer.toString());
Log.i("aa", "rjson=" + rjson);// rjson={"json":true}
boolean result = rjson.getBoolean("json");// 从rjson对象中得到key值为"json"的数据,这里服务端返回的是一个boolean类型的数据
System.out.println("json:===" + result);
//如果服务器端返回的是true,则说明登录成功,否则登录失败
if (result) {// 判断结果是否正确
//在Android中http请求,必须放到线程中去作请求,但是在线程中不可以直接修改UI,只能通过hander机制来完成对UI的操作
myhander.sendEmptyMessage(1);
Log.i("用户:", "登录成功");
} else {
myhander.sendEmptyMessage(2);
System.out.println("222222222222222");
Log.i("用户:", "登录失败");
}
} else {
myhander.sendEmptyMessage(2);
}
} catch (Exception e) {
e.printStackTrace();
Log.i("aa", e.toString());
System.out.println("11111111111111111");
myhander.sendEmptyMessage(2);
} finally {
urlConnection.disconnect();// 使用完关闭TCP连接,释放资源
}
}
// 在Android中不可以在线程中直接修改UI,只能借助Handler机制来完成对UI的操作
class MyHander extends Handler {
@Override
public void handleMessage(Message msg) {
super.handleMessage(msg);
//判断hander的内容是什么,如果是1则说明登录成功,如果是2说明登录失败
switch (msg.what) {
case 1:
Log.i("aa", msg.what + "");
Toast.makeText(getApplicationContext(), "登录成功",
Toast.LENGTH_SHORT).show();
Intent intent = new Intent (com.example.wxchatdemo.LoginPhone.this, com.example.wxchatdemo.MainWeixin.class);
startActivity(intent);
com.example.wxchatdemo.LoginPhone.this.finish();
break;
case 2:
Log.i("aa", msg.what + "");
new AlertDialog.Builder(com.example.wxchatdemo.LoginPhone.this)
.setTitle(" 登录失败")
.setMessage(" 用户名或密码错误,请重新填写")
.setPositiveButton("确定", null)
.show();
}
}
}
//返回按钮处理事件
public void login_activity_back(View v) {
/*跳转到微信启动页*/
Intent intent = new Intent();
intent.setClass(com.example.wxchatdemo.LoginPhone.this, Welcome.class);
startActivity(intent);
com.example.wxchatdemo.LoginPhone.this.finish(); //结束当前activity
}
}
手机号登录activity对应的布局文件
login_phone.xml
<?xml version="1.0" encoding="utf-8"?>
<LinearLayout xmlns:android="http://schemas.android.com/apk/res/android"
android:layout_width="match_parent"
android:layout_height="match_parent"
android:background="@color/title"
android:orientation="vertical">
<!--返回按钮-->
<ImageView
android:id="@+id/close"
android:layout_width="17dp"
android:layout_height="17dp"
android:layout_marginLeft="20dp"
android:layout_marginTop="45dp"
android:onClick="login_activity_back"
android:src="@drawable/backpay" />
<!--标题-->
<TextView
android:layout_width="match_parent"
android:layout_height="wrap_content"
android:layout_marginLeft="30dp"
android:layout_marginTop="45dp"
android:text="手机号登录"
android:textColor="@color/loginText"
android:textSize="25sp" />
<!--账号输入-->
<LinearLayout
android:layout_width="match_parent"
android:layout_height="wrap_content"
android:layout_marginTop="40dp">
<TextView
android:layout_width="wrap_content"
android:layout_height="wrap_content"
android:layout_marginLeft="30dp"
android:text="手机号"
android:textColor="@color/loginText"
android:textSize="16sp" />
<EditText
android:id="@+id/log_phone"
android:layout_width="200dp"
android:layout_height="wrap_content"
android:layout_marginLeft="35dp"
android:background="@null"
android:hint="请填写手机号"
android:singleLine="true"
android:textColorHint="@color/textColorHint"
android:textCursorDrawable="@drawable/edit_cursor_color"
android:textSize="16sp" />
</LinearLayout>
<!--下划线-->
<ImageView
android:id="@+id/login_diver1"
android:layout_width="320dp"
android:layout_height="1dp"
android:layout_gravity="center_horizontal"
android:layout_marginTop="17dp"
android:background="@color/input_dvier" />
<LinearLayout
android:layout_width="match_parent"
android:layout_height="wrap_content"
android:layout_marginTop="40dp">
<TextView
android:layout_width="wrap_content"
android:layout_height="wrap_content"
android:layout_marginLeft="30dp"
android:text="密码"
android:textColor="@color/loginText"
android:textSize="16sp" />
<EditText
android:id="@+id/log_passwd"
android:layout_width="200dp"
android:layout_height="wrap_content"
android:password="true"
android:layout_marginLeft="55dp"
android:background="@null"
android:hint="请填写密码"
android:singleLine="true"
android:textColorHint="@color/textColorHint"
android:textCursorDrawable="@drawable/edit_cursor_color"
android:textSize="16sp" />
</LinearLayout>
<!--下划线-->
<ImageView
android:id="@+id/login_diver2"
android:layout_width="320dp"
android:layout_height="1dp"
android:layout_gravity="center_horizontal"
android:layout_marginTop="17dp"
android:background="@color/input_dvier" />
<LinearLayout
android:layout_width="match_parent"
android:layout_height="wrap_content">
<TextView
android:id="@+id/user_log"
android:layout_width="wrap_content"
android:layout_height="wrap_content"
android:layout_marginLeft="30dp"
android:layout_marginTop="30dp"
android:text="用微信号/QQ号/邮箱登录"
android:textColor="@color/massageLogin"
android:textSize="17dp" />
</LinearLayout>
<LinearLayout
android:layout_width="match_parent"
android:layout_height="wrap_content"
android:layout_marginTop="40dp"
android:gravity="center_horizontal">
<!--登录按钮-->
<Button
android:id="@+id/log_button"
android:layout_width="321dp"
android:layout_height="48dp"
android:background="@drawable/login_button_shape"
android:text="登录"
android:textColor="@color/loginButtonText"
android:textSize="16sp" />
</LinearLayout>
<LinearLayout
android:layout_width="match_parent"
android:layout_height="wrap_content"
android:layout_marginTop="150dp"
android:divider="@drawable/login_dvier"
android:gravity="center_horizontal"
android:showDividers="middle">
<TextView
android:layout_width="wrap_content"
android:layout_height="wrap_content"
android:paddingHorizontal="10dp"
android:text="找回密码"
android:textColor="@color/massageLogin"
android:textSize="14dp" />
<TextView
android:layout_width="wrap_content"
android:layout_height="wrap_content"
android:paddingHorizontal="10dp"
android:text="紧急冻结"
android:textColor="@color/massageLogin"
android:textSize="14dp" />
<TextView
android:layout_width="wrap_content"
android:layout_height="wrap_content"
android:paddingHorizontal="10dp"
android:text="微信安全中心"
android:textColor="@color/massageLogin"
android:textSize="14dp" />
</LinearLayout>
</LinearLayout>
创建一个shapre文件login_dvier.xml,自定义竖直分割线
login_dvier.xml
<?xml version="1.0" encoding="utf-8"?>
<shape xmlns:android="http://schemas.android.com/apk/res/android" >
<solid android:color="@color/login_dvier" />
<size android:height="1dp"></size>
<size android:width="1dp"></size>
</shape>
上面两个登录activity都实现了一个自定义的等待框activity,当点击登录按钮时,便会跳转到这个activity,但是自定义的activity会覆盖原有的界面。而微信点击登录按钮后会弹出一个等待框且不会覆盖原有的activity(即原有界面),所以要给自定义的等待框activity在Androidfest.xml文件配置为对话框,这样就不会覆盖原有activity.
创建activity Loading.java ,实现自定义等待框
Loading.java
package com.example.wxchatdemo;
import android.app.Activity;
import android.os.Bundle;
import android.os.Handler;
public class Loading extends Activity {
@Override
public void onCreate(Bundle savedInstanceState) {
// TODO Auto-generated method stub
super.onCreate(savedInstanceState);
setContentView(R.layout.loading); //设置布局
//一秒后结束当前activity
new Handler().postDelayed(new Runnable() {
@Override
public void run() {
Loading.this.finish();
}
}, 1000);
}
}
创建 activity Loading.java对应的布局文件loading.xml
loading.xml
<RelativeLayout xmlns:android="http://schemas.android.com/apk/res/android"
android:layout_width="match_parent"
android:layout_height="match_parent">
<RelativeLayout
android:layout_width="180dp"
android:layout_height="180dp"
android:layout_centerInParent="true"
android:background="@drawable/loading_bg">
<LinearLayout
android:layout_width="fill_parent"
android:layout_height="fill_parent"
android:gravity="center"
android:orientation="vertical">
<ProgressBar
android:id="@+id/progressBar1"
style="?android:attr/progressBarStyleLarge"
android:layout_width="wrap_content"
android:layout_height="wrap_content"
android:layout_gravity="center_horizontal" />
<TextView
android:layout_width="wrap_content"
android:layout_height="wrap_content"
android:layout_marginTop="10dp"
android:text="正在登录"
android:textColor="#fff"
android:textSize="20sp" />
</LinearLayout>
</RelativeLayout>
</RelativeLayout>
在AndroidMainfest.xml文件中配置自定义等待框activity Loading.java 为对话框
<activity
android:name=".Loading"
android:theme="@style/MyDialogStyle" />
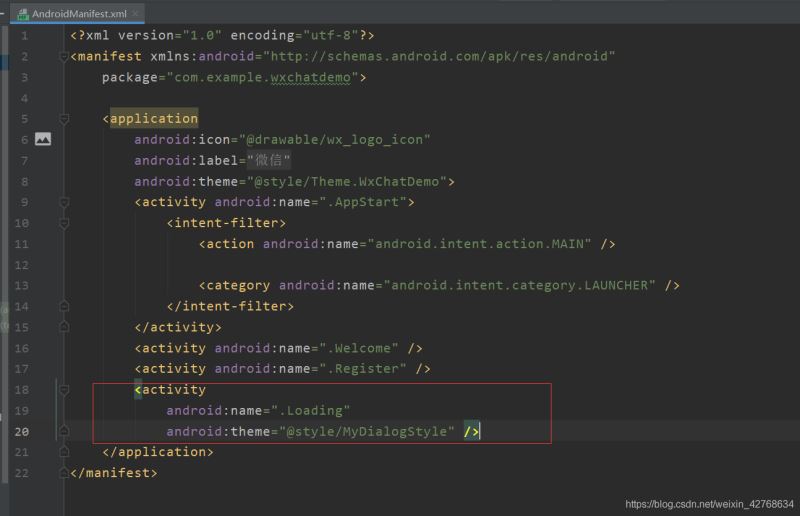
上面用到的主题theme是自定义的主题,把activity转化为对话框,这样就不会覆盖原有的activity,下面会给出如何定义自定义主题
创建样式styles.xml文件,实现自定义主题
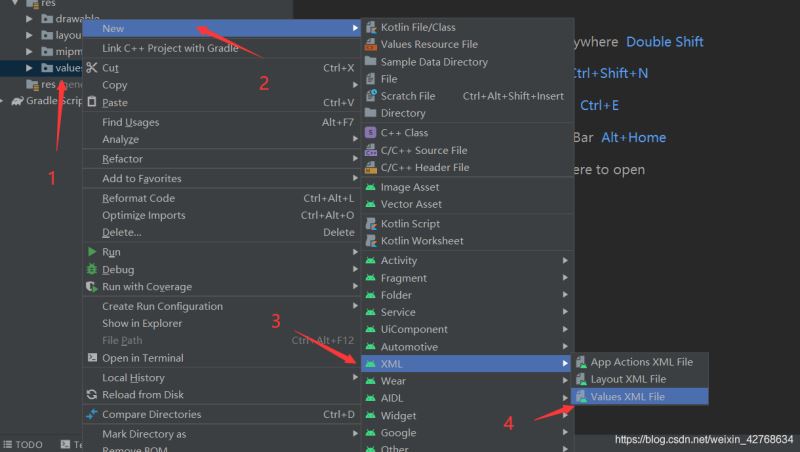
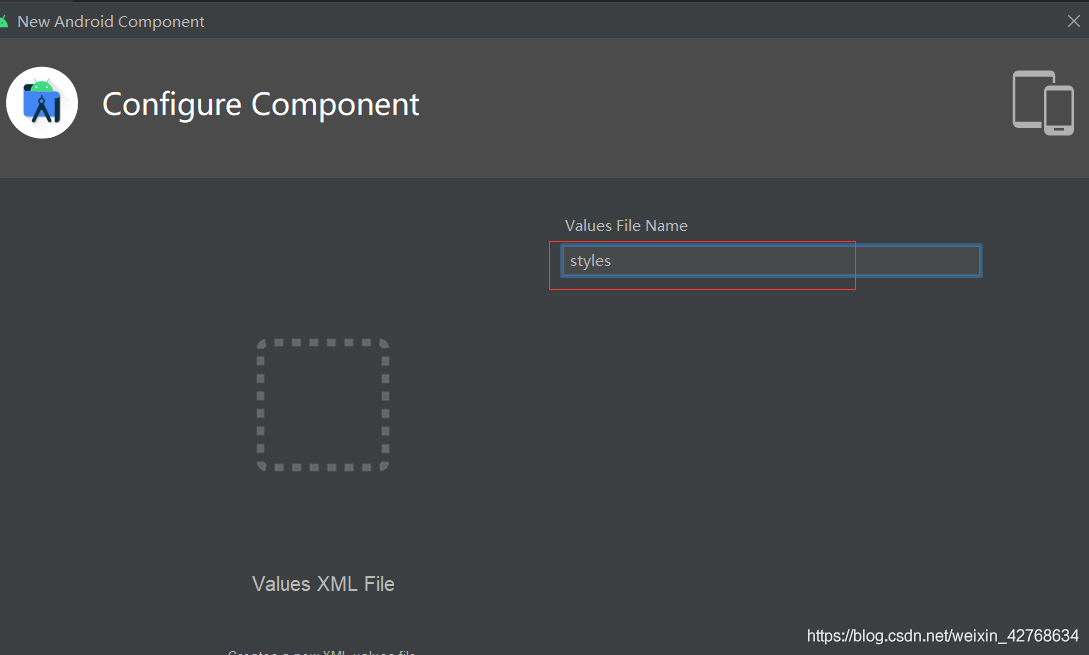
styles.xml
<?xml version="1.0" encoding="utf-8"?>
<resources>
<style name="MyDialogStyle">
<item name="android:windowBackground">@android:color/transparent</item>
<item name="android:windowFrame">@null</item>
<item name="android:windowNoTitle">true</item>
<item name="android:windowIsFloating">true</item>
<item name="android:windowIsTranslucent">true</item>
<item name="android:windowContentOverlay">@null</item>
<item name="android:windowAnimationStyle">@android:style/Animation.Dialog</item>
<item name="android:backgroundDimEnabled">true</item>
</style>
</resources>
在colors.xml声明用到的颜色
colors.xml
<color name="massageLogin">#5A6A8B</color>
<color name="login_dvier">#BEBEBE</color>
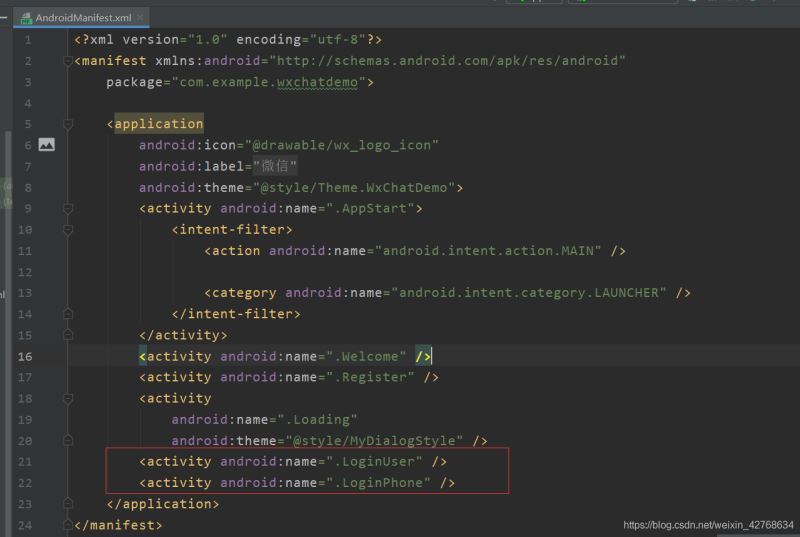
在AndroidMainfest.xml文件中声明创建的activity
测试
虽然服务端登录表单处理功能还没写,但是还是可以测试上面的效果
把以往文章中点击登陆按钮注释代码取消注释
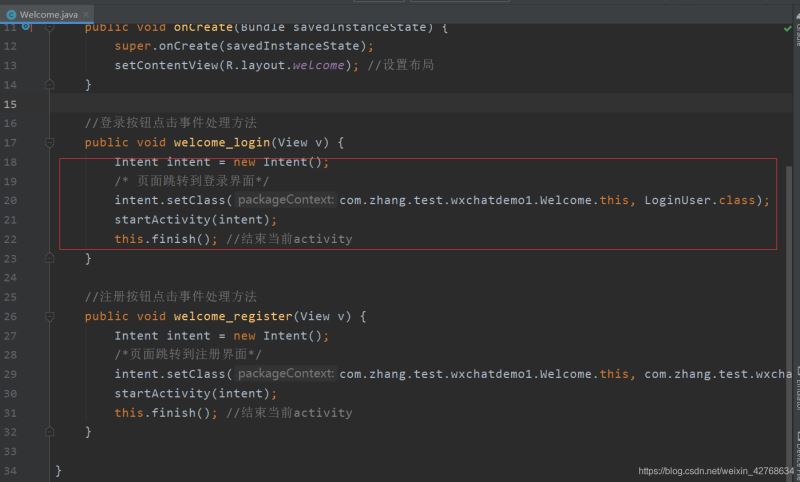
把两个activity登录成功后跳转activity那段代码段注释掉,启动项目测试

到此这篇关于android 仿微信demo——登录功能实现(移动端)的文章就介绍到这了,更多相关android仿微信登录内容请搜索以前的文章或继续浏览下面的相关文章希望大家以后多多支持!
以上是 android 仿微信demo——登录功能实现(移动端) 的全部内容, 来源链接: utcz.com/p/243660.html