Android实现闪屏页效果
本文实例为大家分享了Android实现闪屏页效果的具体代码,供大家参考,具体内容如下
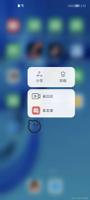
1.效果图

2.闪屏页逻辑及布局
2.1 activity_splash.xml
<?xml version="1.0" encoding="utf-8"?>
<FrameLayout xmlns:android="http://schemas.android.com/apk/res/android"
xmlns:app="http://schemas.android.com/apk/res-auto"
xmlns:tools="http://schemas.android.com/tools"
android:layout_width="match_parent"
android:layout_height="match_parent">
<ImageView
android:layout_width="match_parent"
android:layout_height="match_parent"
android:src="@drawable/splash"
android:scaleType="centerCrop"/>
<Button
android:id="@+id/splash_btn_skip"
android:layout_width="45dp"
android:layout_height="32dp"
android:text="跳过"
android:textStyle="bold"
android:textColor="#fff"
android:background="#30000000"
android:layout_gravity="right"
android:layout_marginTop="30dp"
android:layout_marginRight="30dp"/>
</FrameLayout>
2.2 SplashActivity.java
通过Handler实现
public class SplashActivity extends AppCompatActivity {
//跳过按钮
private Button btnSkip;
private Handler handler = new Handler();
private Runnable runnableToLogin = new Runnable() {
@Override
public void run() {
toLoginActivity();
}
};
@Override
protected void onCreate(Bundle savedInstanceState) {
super.onCreate(savedInstanceState);
setContentView(R.layout.activity_splash);
initView();
initEvent();
//延迟4秒
handler.postDelayed(runnableToLogin,4000);
}
//初始化组件
public void initView(){
btnSkip = findViewById(R.id.splash_btn_skip);
}
//监听事件
public void initEvent(){
btnSkip.setOnClickListener(new View.OnClickListener() {
@Override
public void onClick(View v) {
//防止LoginActivity被打开两次
handler.removeCallbacks(runnableToLogin);
toLoginActivity();
}
});
}
/**
* 跳转到登录界面
*/
private void toLoginActivity(){
Intent intent = new Intent(this,LoginActivity.class);
startActivity(intent);
finish();
}
@Override
protected void onDestroy() {
super.onDestroy();
//防止内存泄漏
handler.removeCallbacks(runnableToLogin);
}
}
3.设置主题样式
3.1 style.xml中
<resources>
<!-- Base application theme. -->
<style name="AppTheme" parent="Theme.AppCompat.Light.NoActionBar">
<!-- Customize your theme here. -->
<item name="colorPrimary">@color/colorPrimary</item>
<item name="colorPrimaryDark">@color/colorPrimaryDark</item>
<item name="colorAccent">@color/colorAccent</item>
</style>
<style name="AppTheme_FullScreen" parent="AppTheme">
<item name="android:windowFullscreen">true</item>
</style>
</resources>
3.2 AndroidManifest.xml中
<?xml version="1.0" encoding="utf-8"?>
<manifest xmlns:android="http://schemas.android.com/apk/res/android"
package="com.example.myrestaurant">
<uses-permission android:name="android.permission.INTERNET" />
<application
android:allowBackup="true"
android:icon="@mipmap/ic_launcher"
android:label="@string/app_name"
android:roundIcon="@mipmap/ic_launcher_round"
android:supportsRtl="true"
android:theme="@style/AppTheme">
<activity android:name=".LoginActivity"></activity>
<activity android:name=".SplashActivity"
android:theme="@style/AppTheme_FullScreen">
<intent-filter>
<action android:name="android.intent.action.MAIN" />
<category android:name="android.intent.category.LAUNCHER" />
</intent-filter>
</activity>
</application>
</manifest>
以上就是本文的全部内容,希望对大家的学习有所帮助,也希望大家多多支持。
以上是 Android实现闪屏页效果 的全部内容, 来源链接: utcz.com/p/243150.html