Flutter开发之Widget自定义总结
前言
在Flutter实际开发中,大家可能会遇到flutter框架中提供的widget达不到我们想要的效果,这时就需要我们去自定义widget,从Flutter构建、布局、绘制三部曲中我们了解到,实际的测量、布局、绘制操作都在RenderObject中,我们是可以进行继承相关的RenderObject来实现自定义的。但是其实flutter框架在设计之初就给我们预留出了自定义的入口,方便我们进行自定义。
CustomPaint自定义绘制
例:圆形进度条
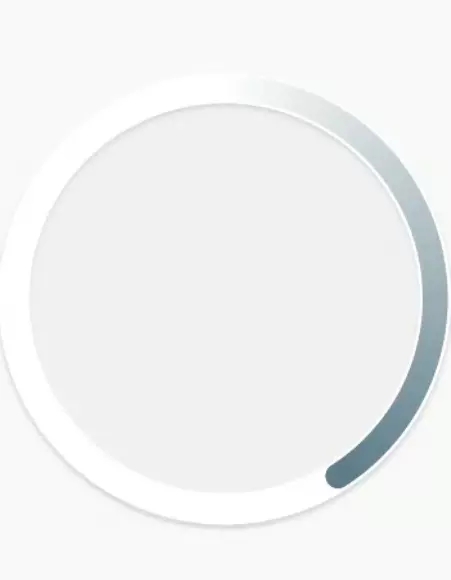
思路:使用CustomPaint绘制需要的效果
class CircleProgress extends StatelessWidget {
final Size size;
final double progress;
CircleProgress({@required this.size, @required this.progress});
@override
Widget build(BuildContext context) {
return CustomPaint(
size: size,
painter: CircleProgressPainter(endDegree: progress * 360),//在Painter中写真正的绘画逻辑
);
}
}
class CircleProgressPainter extends CustomPainter {
...省略
@override
void paint(Canvas canvas, Size size) {
...绘制的具体逻辑,size是画布的大小
}
}
CustomSingleChildLayout对单一child进行布局
例:实现对child约束成正方形

思路:使用CustomSingleChildLayout对child进行布局,并约束为正方形
class RectLayout extends StatelessWidget {
final Widget child;
RectLayout({@required this.child});
@override
Widget build(BuildContext context) {
return CustomSingleChildLayout(
delegate: RectLayoutDelegate(),//进行布局的代理
child: child,
);
}
}
class RectLayoutDelegate extends SingleChildLayoutDelegate {
//确定layout的size,constraints是parent传过来的约束
@override
Size getSize(BoxConstraints constraints) => super.getSize(constraints);
///是否需要relayout
@override
bool shouldRelayout(SingleChildLayoutDelegate oldDelegate) => false;
///确定child的位置,返回一个相对于parent的偏移值,size是layout的大小,由getsize确定,childSize由getConstraintsForChild得出的Constraints对child进行约束,得到child自身的size
@override
Offset getPositionForChild(Size size, Size childSize) {
double dx = (size.width - childSize.width) / 2;
double dy = (size.height - childSize.height) / 2;
return Offset(dx, dy);
}
///确定child的约束,用于确定child的大小
@override
BoxConstraints getConstraintsForChild(BoxConstraints constraints) {//
double maxEdge = min(constraints.maxWidth, constraints.maxHeight);
return BoxConstraints(maxWidth: maxEdge, maxHeight: maxEdge);
}
}
CustomSingleChildLayout对多个child进行布局
例:实现网格布局
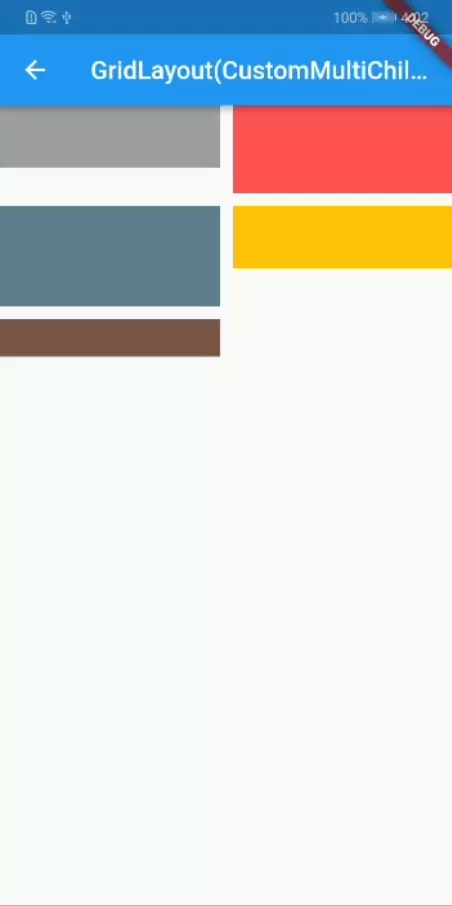
思路:使用CustomSingleChildLayout对child进行布局、定位,使其成为网格的布局
class GridLayout extends StatelessWidget {
final List<Widget> children;
final double horizontalSpace;
final double verticalSpace;
GridLayout(
{@required this.children,
@required this.horizontalSpace,
@required this.verticalSpace});
@override
Widget build(BuildContext context) {
List<Widget> layoutChildren = new List();
for (int index = 0; index < children.length; index++) {
layoutChildren.add(LayoutId(id: index, child: children[index]));
}
return CustomMultiChildLayout(
delegate: GridLayoutDelegate(//真正的布局实现
horizontalSpace: horizontalSpace,
verticalSpace: verticalSpace,
),
children: layoutChildren,
);
}
}
class GridLayoutDelegate extends MultiChildLayoutDelegate {
final double horizontalSpace;
final double verticalSpace;
List<Size> _itemSizes = List();
GridLayoutDelegate(
{@required this.horizontalSpace, @required this.verticalSpace});
@override
void performLayout(Size size) {
//对每个child进行逐一布局
int index = 0;
double width = (size.width - horizontalSpace) / 2;
var itemConstraints = BoxConstraints(
minWidth: width, maxWidth: width, maxHeight: size.height);
while (hasChild(index)) {
_itemSizes.add(layoutChild(index, itemConstraints));
index++;
}
//对每一个child逐一进行定位
index = 0;
double dx = 0;
double dy = 0;
while (hasChild(index)) {
positionChild(index, Offset(dx, dy));
dx = index % 2 == 0 ? width + horizontalSpace : 0;
if (index % 2 == 1) {
double maxHeight =
max(_itemSizes[index].height, _itemSizes[index - 1].height);
dy += maxHeight + verticalSpace;
}
index++;
}
}
@override
bool shouldRelayout(MultiChildLayoutDelegate oldDelegate) {
return oldDelegate != this;
}
//确定layout的size,constraints是parent传过来的约束
@override
Size getSize(BoxConstraints constraints) => super.getSize(constraints);
}
组合自定义
一般情况,组合自定义应该是我们最经常用的方式,通过继承自StatelessWidget或StatefulWidget,把多个Widget组合起来,从而达到我们需要的效果。
例:下拉刷新,上拉加载
实现一:通过自带的RefreshIndictor和ScrollController组合实现
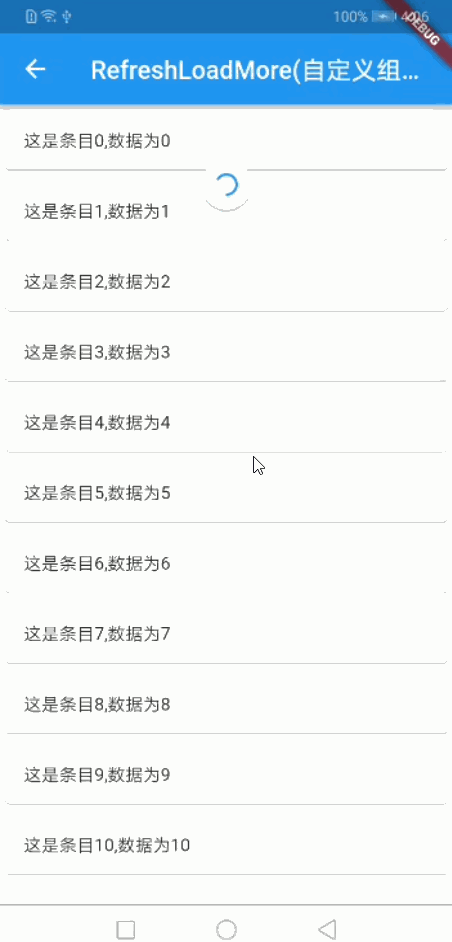
思路:通过对滚动进行监听来触发加载更多
_scrollController.addListener(() {
var maxScroll = _scrollController.position.maxScrollExtent;
if (_scrollController.offset >= maxScroll) {
if (widget.loadMoreStatus != LoadMoreStatus.noData) {
widget.onLoadMore();
}
}
});
实现二:通过NotificationListener监听scroll的整体状态,让后结合平移、动画来实现
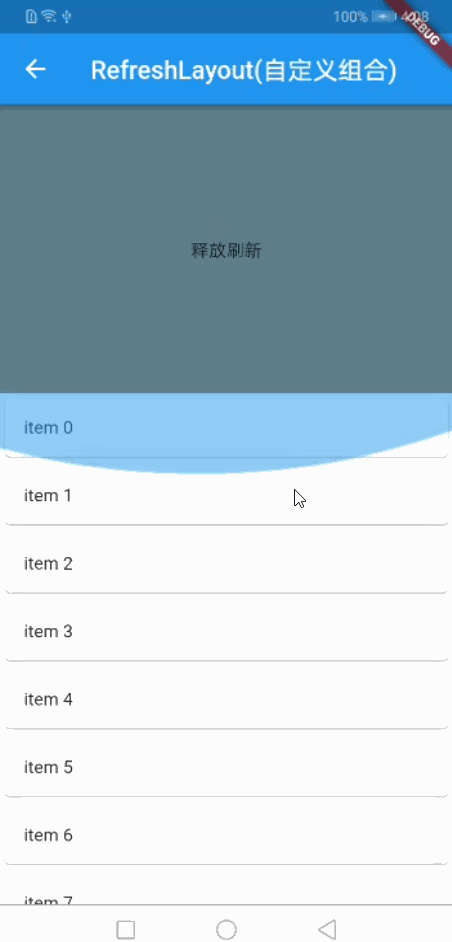
思路:通过监听用户overscroll的距离来平移内容区域,从而达到下拉刷新,上拉加载的效果
@override
Widget build(BuildContext context) {
double topHeight =
_pullDirection == PullDirection.DOWN ? _overScrollOffset.dy.abs() : 0;
double bottomHeight =
_pullDirection == PullDirection.UP ? _overScrollOffset.dy.abs() : 0;
return Stack(
children: <Widget>[
widget.headerBuilder.buildTip(_state, topHeight),
Align(
alignment: Alignment.bottomCenter,
child: widget.footerBuilder.buildTip(_state, bottomHeight),
),
Transform.translate(
offset: _overScrollOffset,
child: NotificationListener<ScrollNotification>(
onNotification: handleScrollNotification,
child: DecoratedBox(
decoration: BoxDecoration(color: Colors.grey[100]),
child: ListView.builder(
itemBuilder: buildItem,
itemCount: 30,
),
),
),
)
],
);
}
例:上下左右滑动的layout
实现:通过GestureDetector监听手势滑动,然后通过平移来达到效果
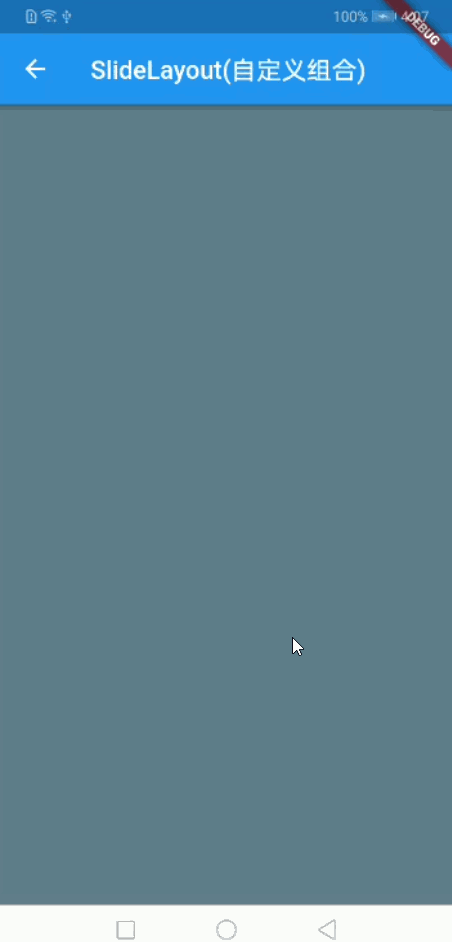
思路:主要处理滑动边界,以及开关的零界点
@override
Widget build(BuildContext context) {
//debugPrint('_slideOffset:${_slideOffset.toString()}');
return GestureDetector(
onPanUpdate: handlePanUpdate,
onPanEnd: handlePanEnd,
child: Stack(
children: <Widget>[
widget.background,
Transform.translate(
child: widget.foreground,
offset: _slideOffset,
),
],
),
);
}
以上的完整代码在这flutter知识点整理
Flutter学习总结
对Flutter的学习也有一段时间了,从最开始的Widget的使用,到后面的框架的一些研究,所有的心得与总结都会记录下来,主要是对自己知识点的整理,同样也为了能够与广大Flutter的学习者共同学习,相互探讨。
好了,以上就是这篇文章的全部内容了,希望本文的内容对大家的学习或者工作具有一定的参考学习价值,谢谢大家对的支持。
以上是 Flutter开发之Widget自定义总结 的全部内容, 来源链接: utcz.com/p/241782.html