Kotlin如何直接使用控件ID原理详析
前言
最近断断续续地把项目的界面部分的代码由JAva改成了Kotlin编写,并且如果应用了kotlin-android-extensions插件,一个显而易见的好处是再也不用写 findViewById()来实例化你的控件对象了,直接操作你在布局文件里的id即可,这一点我感觉比butterknife做的还简洁友好。
Activity
import android.support.v7.app.AppCompatActivity
import android.os.Bundle
import kotlinx.android.synthetic.main.activity_main.*
class MainActivity : AppCompatActivity() {
override fun onCreate(savedInstanceState: Bundle?) {
super.onCreate(savedInstanceState)
setContentView(R.layout.activity_main)
textview.text="hello world"
}
}
其中kotlinx.android.synthetic.main.activity_main.*是kotlin-android-extensions插件自动生成的。下面我们来解析下原理。因为kotlin也是一门JVM语言,最近也会和java一样编译成class字节码,所以我们直接来反编译看看生成的java文件。
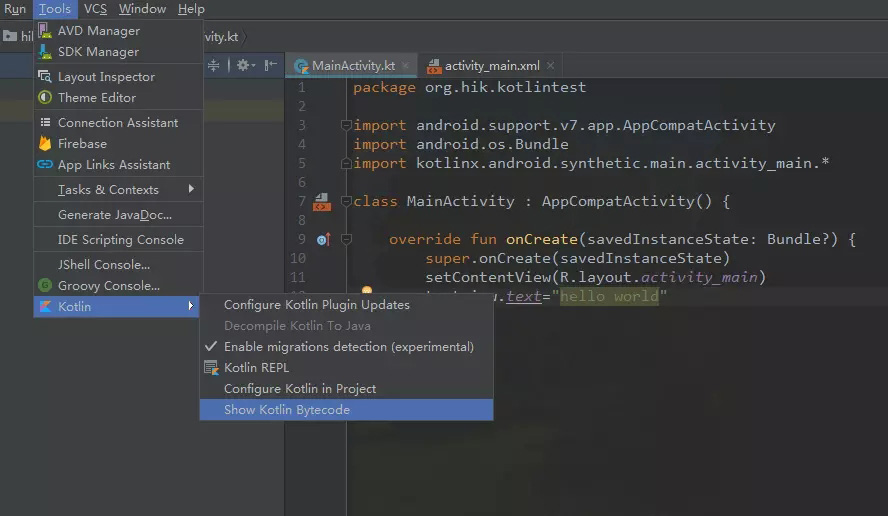
选择Decompile,解析出来的代码如下
public final class MainActivity extends AppCompatActivity {
private HashMap _$_findViewCache;
protected void onCreate(@Nullable Bundle savedInstanceState) {
super.onCreate(savedInstanceState);
this.setContentView(2131296284);
TextView var10000 = (TextView)this._$_findCachedViewById(id.textview);
Intrinsics.checkExpressionValueIsNotNull(var10000, "textview");
var10000.setText((CharSequence)"hello world");
}
public View _$_findCachedViewById(int var1) {
if (this._$_findViewCache == null) {
this._$_findViewCache = new HashMap();
}
View var2 = (View)this._$_findViewCache.get(var1);
if (var2 == null) {
var2 = this.findViewById(var1);
this._$_findViewCache.put(var1, var2);
}
return var2;
}
public void _$_clearFindViewByIdCache() {
if (this._$_findViewCache != null) {
this._$_findViewCache.clear();
}
}
}
可以很清楚看到最终还是调用了findViewById() ,不过获取View对象直接调用的是findCachedViewById,并且创建一个 HashMap 进行View对象的缓存,避免每次调用 View 时都会重新调用findViewById()进行查找。
Fragment
再来看下Fragment中的使用:
import android.os.Bundle
import android.support.v4.app.Fragment
import android.view.LayoutInflater
import android.view.View
import android.view.ViewGroup
import kotlinx.android.synthetic.main.fragment_blank.*
class BlankFragment : Fragment() {
override fun onCreateView(inflater: LayoutInflater, container: ViewGroup?, savedInstanceState: Bundle?): View? {
return inflater.inflate(R.layout.fragment_blank, container, false)
}
override fun onViewCreated(view: View, savedInstanceState: Bundle?) {
super.onViewCreated(view, savedInstanceState)
textview_fra.text="hello world"
}
}
反编译后代码如下
public final class BlankFragment extends Fragment {
private HashMap _$_findViewCache;
@Nullable
public View onCreateView(@NotNull LayoutInflater inflater, @Nullable ViewGroup container, @Nullable Bundle savedInstanceState) {
Intrinsics.checkParameterIsNotNull(inflater, "inflater");
return inflater.inflate(2131296285, container, false);
}
public void onViewCreated(@NotNull View view, @Nullable Bundle savedInstanceState) {
Intrinsics.checkParameterIsNotNull(view, "view");
super.onViewCreated(view, savedInstanceState);
TextView var10000 = (TextView)this._$_findCachedViewById(id.textview_fra);
Intrinsics.checkExpressionValueIsNotNull(var10000, "textview_fra");
var10000.setText((CharSequence)"hello world");
}
public View _$_findCachedViewById(int var1) {
if (this._$_findViewCache == null) {
this._$_findViewCache = new HashMap();
}
View var2 = (View)this._$_findViewCache.get(var1);
if (var2 == null) {
View var10000 = this.getView();
if (var10000 == null) {
return null;
}
var2 = var10000.findViewById(var1);
this._$_findViewCache.put(var1, var2);
}
return var2;
}
public void _$_clearFindViewByIdCache() {
if (this._$_findViewCache != null) {
this._$_findViewCache.clear();
}
}
// $FF: synthetic method
public void onDestroyView() {
super.onDestroyView();
this._$_clearFindViewByIdCache();
}
}
可以看到最终是通过调用getView().findViewById()来进行控件的实例化。
看下getView()源码
@Nullable
public View getView() {
return this.mView;
}
再看下mView成员变量的赋值时机:
void performCreateView(@NonNull LayoutInflater inflater, @Nullable ViewGroup container, @Nullable Bundle savedInstanceState) {
if (this.mChildFragmentManager != null) {
this.mChildFragmentManager.noteStateNotSaved();
}
this.mPerformedCreateView = true;
this.mViewLifecycleOwner = new LifecycleOwner() {
public Lifecycle getLifecycle() {
if (Fragment.this.mViewLifecycleRegistry == null) {
Fragment.this.mViewLifecycleRegistry = new LifecycleRegistry(Fragment.this.mViewLifecycleOwner);
}
return Fragment.this.mViewLifecycleRegistry;
}
};
this.mViewLifecycleRegistry = null;
this.mView = this.onCreateView(inflater, container, savedInstanceState);
if (this.mView != null) {
this.mViewLifecycleOwner.getLifecycle();
this.mViewLifecycleOwnerLiveData.setValue(this.mViewLifecycleOwner);
} else {
if (this.mViewLifecycleRegistry != null) {
throw new IllegalStateException("Called getViewLifecycleOwner() but onCreateView() returned null");
}
this.mViewLifecycleOwner = null;
}
}
可以看到mView其实就是onCreateView()的返回值,所以我们不能在onCreateView()方法里操作控件ID的方式操作View对象,会产生空指针异常。建议在onViewCreated()方法里使用。
其他(动态布局)
除了Activity和Fragment,我们用的最多的UI布局当属Adapter了,kotlin-android-extensions也提供了对这一类动态布局的支持。因为这一功能是实现性质的,默认关闭,我们需要手动打开,在build.gradle中开启:
androidExtensions {
experimental = true
}
然后再recycler.adapter中使用如下:
import kotlinx.android.extensions.LayoutContainer
import kotlinx.android.synthetic.main.item_recyclerview.*
class MyAdapter(val context: Context, val data: List<String>) :
RecyclerView.Adapter<MyAdapter.ViewHolder>() {
override fun onCreateViewHolder(parent: ViewGroup, viewType: Int): ViewHolder {
val view = LayoutInflater.from(context).inflate(R.layout.item_recyclerview, parent, false)
return ViewHolder(view)
}
override fun onBindViewHolder(holder: ViewHolder, position: Int) {
holder.name_tv.text = data[position]
holder.itemView.setOnClickListener {
Toast.makeText(context,"点击了第$position 项",Toast.LENGTH_SHORT).show()
}
}
override fun getItemCount(): Int {
return data.size
}
inner class ViewHolder(itemView: View) : RecyclerView.ViewHolder(itemView), LayoutContainer {
override val containerView: View = itemView
}
}
可以看到相比Activity和Fragment,我们的ViewHolder需要多实现一个接口LayoutContainer。看下它的源码:
public final class ViewHolder extends android.support.v7.widget.RecyclerView.ViewHolder implements LayoutContainer {
@NotNull
private final View containerView;
private HashMap _$_findViewCache;
@NotNull
public View getContainerView() {
return this.containerView;
}
public ViewHolder(@NotNull View itemView) {
Intrinsics.checkParameterIsNotNull(itemView, "itemView");
super(itemView);
this.containerView = itemView;
}
public View _$_findCachedViewById(int var1) {
if (this._$_findViewCache == null) {
this._$_findViewCache = new HashMap();
}
View var2 = (View)this._$_findViewCache.get(var1);
if (var2 == null) {
View var10000 = this.getContainerView();
if (var10000 == null) {
return null;
}
var2 = var10000.findViewById(var1);
this._$_findViewCache.put(var1, var2);
}
return var2;
}
public void _$_clearFindViewByIdCache() {
if (this._$_findViewCache != null) {
this._$_findViewCache.clear();
}
}
}
总结
以上就是这篇文章的全部内容了,希望本文的内容对大家的学习或者工作具有一定的参考学习价值,如果有疑问大家可以留言交流,谢谢大家对的支持。
以上是 Kotlin如何直接使用控件ID原理详析 的全部内容, 来源链接: utcz.com/p/241439.html