详解Angular路由之子路由
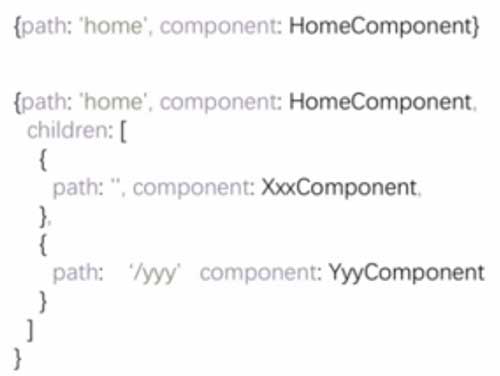
一、子路由语法
二、实例
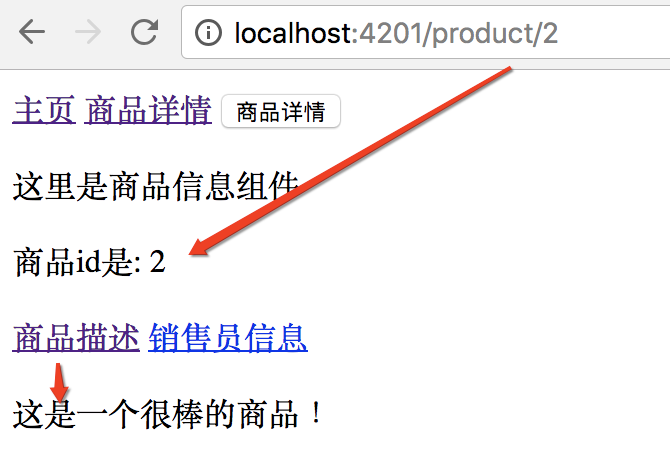
在商品详情页面,除了显示商品id信息,还显示了商品描述,和销售员的信息。
通过子路由实现商品描述组件和销售员信息组件展示在商品详情组件内部。
1、新建2个组件修改其内容
ng g component productDesc
ng g component sellerInfo
重点是修改销售员信息组件,显示销售员ID。
import { Component, OnInit } from '@angular/core';
import { ActivatedRoute } from '@angular/router';
@Component({
selector: 'app-seller-info',
templateUrl: './seller-info.component.html',
styleUrls: ['./seller-info.component.css']
})
export class SellerInfoComponent implements OnInit {
private sellerId: number;
constructor(private routeInfo: ActivatedRoute) { }
ngOnInit() {
this.sellerId = this.routeInfo.snapshot.params["id"];
}
}
2、修改路由配置
给商品组件加上子路由
const routes: Routes = [
{ path: '', redirectTo : 'home',pathMatch:'full' }, //路径为空
{ path: 'home', component: HomeComponent },
{ path: 'product/:id', component: ProductComponent, children:[
{ path: '', component : ProductDescComponent },
{ path: 'seller/:id', component : SellerInfoComponent }
] },
{ path: '**', component: Code404Component }
];
3、修改product.component.ts的模版
注意:routerLink里要配置成./,不能再用/。
<p>
这里是商品信息组件
</p>
<p>
商品id是: {{productId}}
</p>
<a [routerLink]="['./']">商品描述</a>
<a [routerLink]="['./seller',99]">销售员信息</a>
<router-outlet></router-outlet>
效果:
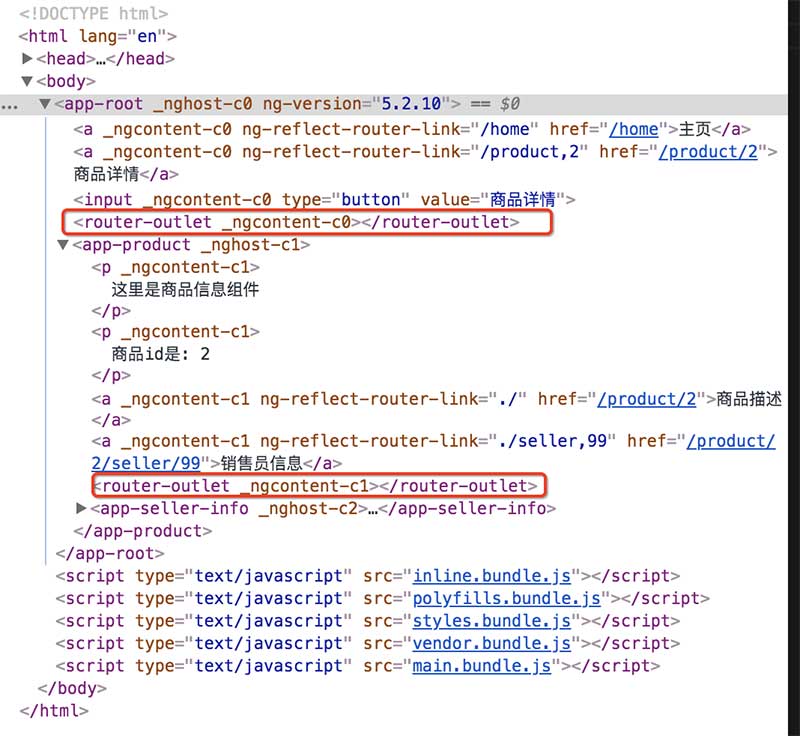
主路由是/product/2,子路由为空字符串:
主路由的商品详情组件显示出来了,子路由的空字符串对应的商品描述组件也显示出来了。
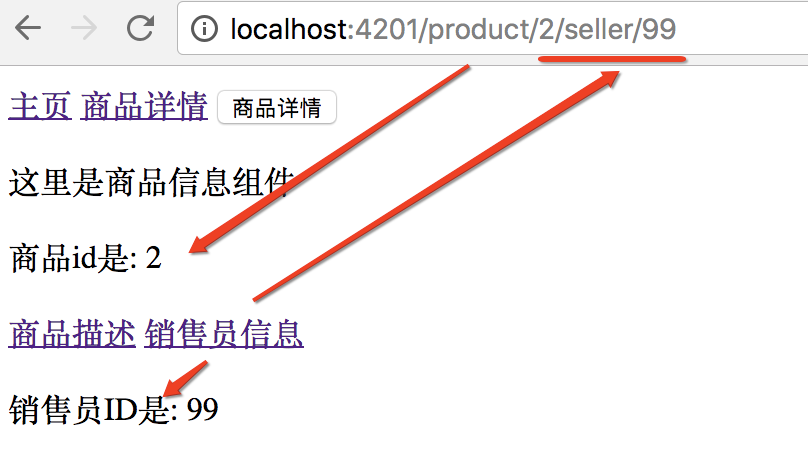
点销售员信息链接:
URL路径变成:http://localhost:4201/product/2/seller/99。
子路由seller/99,对应的sellerInfo组件也展示出来。
注意:
1、插座router-out形成父子关系,可以无限嵌套
2、所有的路由信息都是在模块层,在app.routing.module.ts中配置的。
路由信息都是在模块层,所有的组件本身,并不知道任何跟路由相关的信息。
插座之间的父子关系——子路由。
插座之间的兄弟关系——辅助路由。
以上就是详解Angular路由之子路由的详细内容,更多关于Angular的资料请关注其它相关文章!
以上是 详解Angular路由之子路由 的全部内容, 来源链接: utcz.com/p/220571.html