【JS】react 实现div缩放、旋转、拖拽的9个控制点
思路
在被控制的元素的四条边和四个角添加8个控制点控制点。拖拽控制点时判断拖拽的方向,计算偏移量。修改元素的top、left、width、height。
旋转功能是通过三角函数计算鼠标拖动后的角度。动态修改元素的rotate
画板(舞台)
想要对元素进行控制。 我们先定义一个画板,规定元素只能在指定的范围内变化。
然后在画板内插入一个被控制的 div 元素,就定义为drawing-item类名吧。drawing-item 需要绝对定位于画板
以及八个方向的控制点。这是最简单的结构了
import "./Drawing.css"
// 东南西北, 东北、西北、东南、西南
const points = ['e', 'w', 's', 'n', 'ne', 'nw', 'se', 'sw']
function Drawing() {
// const data = useState()
return <div className="drawing-wrap">
<div className="drawing-item">
{points.map(item => <div className={`control-point point-${item}`}></div>)}
</div>
</div>
}
export default Drawing;
给他们都加上样式
<style>.drawing-wrap{
width: 500px;
height: 500px;
border: 1px solid red ;
position: relative;
top: 100px ;
left: 100px;
}
.drawing-item {
cursor: move;
width: 100px;
height: 100px;
background-color: #ccc;
position: absolute;
top: 100px;
left: 100px;
box-sizing: border-box;
}
.control-point{
position: absolute;
box-sizing: border-box;
display: inline-block;
background: #fff;
border: 1px solid #c0c5cf;
box-shadow: 0 0 2px 0 rgba(86, 90, 98, .2);
border-radius: 6px;
padding: 8px;
margin-top: -8px !important;
margin-left: -8px !important;
user-select: none; // 注意禁止鼠标选中控制点元素,不然拖拽事件可能会因此被中断
}
.control-point.point-e{
cursor: ew-resize;
left: 100%;
top: 50%;
margin-left: 1px
}
.control-point.point-n{
cursor: ns-resize;
left: 50%;
margin-top: -1px
}
.control-point.point-s{
cursor: ns-resize;
left: 50%;
top: 100%;
margin-top: 1px
}
.control-point.point-w{
cursor: ew-resize;
top: 50%;
left: 0;
margin-left: -1px
}
.control-point.point-ne {
cursor: nesw-resize;
left: 100%;
margin-top: -1px;
margin-left: 1px
}
.control-point.point-nw {
cursor: nwse-resize;
margin-left: -1px;
margin-top: -1px
}
.control-point.point-se {
cursor: nwse-resize;
left: 100%;
top: 100%;
margin-left: 1px;
margin-top: 1px
}
.control-point.point-sw {
cursor: nesw-resize;
top: 100%;
margin-left: -1px;
margin-top: 1px
}
</style>
效果图: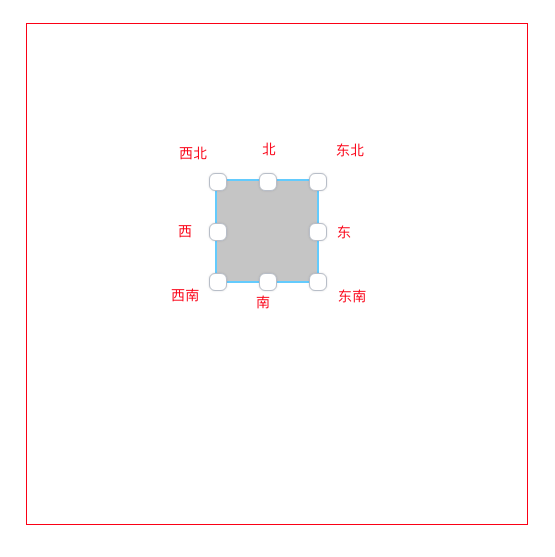
拖拽
元素结构安排好后就来准备写功能了。 先来分析下拖拽缩放最主要的功能是什么,拖拽嘛!拖拽算是常见的简单功能了,需要绑定三个事件:onMouseDown(鼠标按下)、onMouseMove(移动) 、onMouseUp (抬起)。
先来写拖拽的功能,以实现元素在画板内位移。元素的位置移动只需要动态修改 left 和top ,定义一个 style 对象给 drawing-item 加上
const [style, setStyle] = useState({left: 100,
top: 100,
width: 100,
height: 100
})
// html
<div className="drawing-item" style={style}>
我们给画板drawing-wrap绑定监听鼠标移动和抬起的事件,给drawing-item监听鼠标按下的事件。
// 鼠标被按下
function onMouseDown(e) {}
// 鼠标移动
function onMouseMove() {}
// 鼠标被抬起
function onMouseUp() {}
return <div className="drawing-wrap" onMouseUp={onMouseUp} onMouseMove={onMouseMove}>
<div className="drawing-item" style={style}>
{points.map(item => <div className={`control-point point-${item}`} ></div>)}
</div>
</div>
// 我们给每个控制点加了 `onMouseDown` 事件,当鼠标按下时将当前控制点的方向传进去。
当鼠标放在drawing-item 上按下时。 就能获取到当前元素的以及鼠标的位置。
偏移量
偏移量指的是元素相对于父元素的偏移距离
获取元素相对于画板的偏移量。
// 元素相对于画板的当前位置。const top = e.target.offsetTop;
const left = e.target.offsetLeft;
// 然后鼠标坐标是
const cY = e.clientY; // clientX 相对于可视化区域
const cX = e.clientX;
鼠标按下时, 需要将当前鼠标的位置和元素的位置保存起来。 每当鼠标移动时。 计算鼠标移动了多少距离。
// 画板的const wrapStyle = {
left: 100,
top: 100,
width: 500,
height: 500
}
const [style, setStyle] = useState({
left: 100,
top: 100,
width: 100,
height: 100
})
// 初始数据, 因为不需要重新render 所以用 useRef
const oriPos = useRef({
top: 0, // 元素的坐标
left: 0,
cX: 0, // 鼠标的坐标
cY: 0
})
const isDown = useRef(false)
// 鼠标被按下
function onMouseDown(e) {
// 阻止事件冒泡
e.stopPropagation();
isDown.current = true;
// 元素相对于画板的当前位置。
const top = e.target.offsetTop;
const left = e.target.offsetLeft;
// 然后鼠标坐标是
const cY = e.clientY; // clientX 相对于可视化区域
const cX = e.clientX;
oriPos.current = {
top, left, cX, cY
}
}
// 鼠标移动
function onMouseMove(e) {
// 判断鼠标是否按住
if (!isDown.current) return
// 元素位置 = 初始位置+鼠标偏移量
const top = oriPos.current.top + (e.clientY - oriPos.current.cY)
const left = oriPos.current.left + (e.clientX - oriPos.current.cX)
setStyle({
top,
left
})
}
// 鼠标被抬起
function onMouseUp(e) {
console.log(e, 'onMouseUp');
isDown.current = false;
}
看下效果。 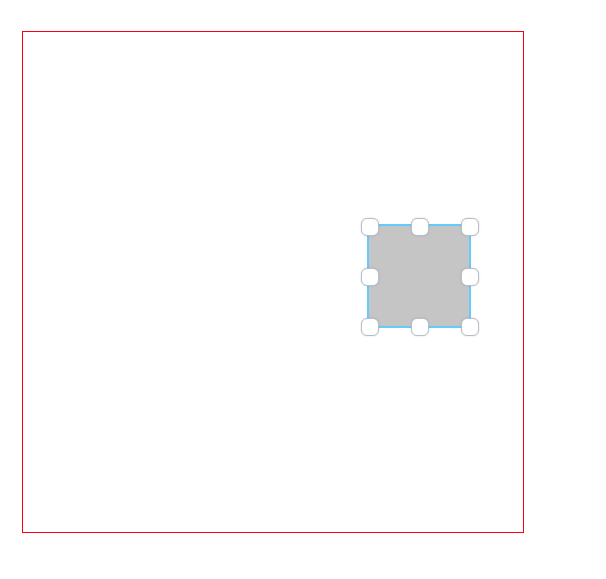
可以拖着跑了,但是再拖一下, 哎,拖出界了 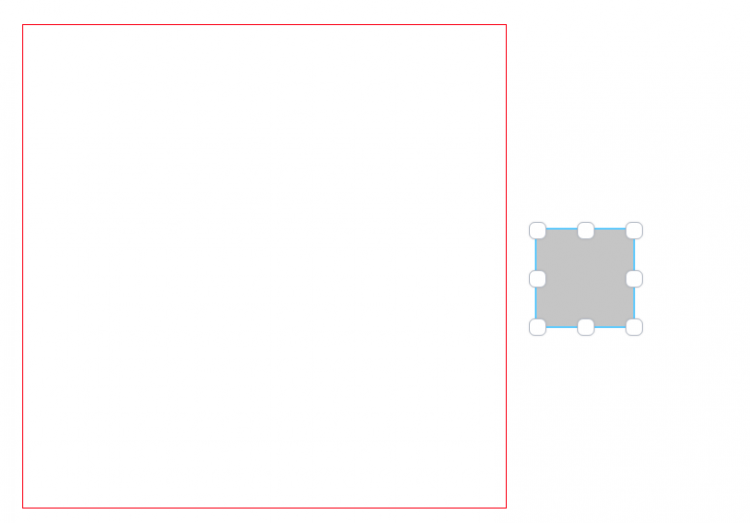
范围限制还没加上呢, 加一下限制
function onMouseMove(e) {// 判断鼠标是否按住
if (!isDown.current) return
let newStyle = {...style};
// 元素当前位置 + 偏移量
const top = oriPos.current.top + e.clientY - oriPos.current.cY;
const left = oriPos.current.left + e.clientX - oriPos.current.cX;
// 限制必须在这个范围内移动 画板的高度-元素的高度
newStyle.top = Math.max(0, Math.min(top, wrapStyle.height - style.height));
newStyle.left = Math.max(0, Math.min(left, wrapStyle.width - style.width));
setStyle(newStyle)
}
这下就拖不出去了。
上面的代码还有些小坑。我们定义的 三个方法onMouseMove、onMouseUp、onMouseDown 是直接通过 function 定义的,这回存在一些性能上的问题,每次设置style state 时会重新渲染组件,导致重新定义这三个方法。 这是没必要的性能浪费。
通过使用 react 的useCallback语法糖 定义方法,可以避免不断的重新定义。与上面的useRef 一样
const onMouseDown = useCallback((e) => { /*...*/ },[])const onMouseMove = useCallback((e) => { /*...*/ },[])
const onMouseUp = useCallback((e) => { /*...*/ },[])
缩放
接下来封装一个方法。 来计算元素的缩放。
我们在某个控制点上按下鼠标,将当前控制点的方向保存起来,鼠标拖动后根据当前方向计算元素位置和宽高
先将原先的 拖拽方法也封装进去。 顺便也将 onMouseMove 改一下。
/**
* 元素变化。 方法放在组件外部或者其他地方。
* @param direction 方向 // move 移动 / 'e', 'w', 's', 'n', 'ne', 'nw', 'se', 'sw'
* @param oriStyle 元素的属性 width height top left
* @param oriPos 鼠标按下时所记录的坐标
* @param e 事件event
*/
function transform(direction, oriPos, e) {
const style = {...oriPos.current}
const offsetX = e.clientX - oriPos.current.cX;
const offsetY = e.clientY - oriPos.current.cY;
switch (direction.current) {
// 拖拽移动
case 'move' :
// 元素当前位置 + 偏移量
const top = oriPos.current.top + offsetY;
const left = oriPos.current.left + offsetX;
// 限制必须在这个范围内移动 画板的高度-元素的高度
style.top = Math.max(0, Math.min(top, wrapStyle.height - style.height));
style.left = Math.max(0, Math.min(left, wrapStyle.width - style.width));
break
// 东
case 'e':
// 向右拖拽添加宽度
style.width += offsetX;
return style
// 西
case 'w':
// 增加宽度、位置同步左移
style.width -= offsetX;
style.left += offsetX;
return style
// 南
case 's':
style.height += offsetY;
return style
// 北
case 'n':
style.height -= offsetY;
style.top += offsetY;
break
// 东北
case 'ne':
style.height -= offsetY;
style.top += offsetY;
style.width += offsetX;
break
// 西北
case 'nw':
style.height -= offsetY;
style.top += offsetY;
style.width -= offsetX;
style.left += offsetX;
break
// 东南
case 'se':
style.height += offsetY;
style.width += offsetX;
break
// 西南
case 'sw':
style.height += offsetY;
style.width -= offsetX;
style.left += offsetX;
break
}
return style
}
// 鼠标被按下
const onMouseDown = useCallback((dir, e) => {
// 阻止事件冒泡
e.stopPropagation();
// 保存方向。
direction.current = dir;
isDown.current = true;
// 然后鼠标坐标是
const cY = e.clientY; // clientX 相对于可视化区域
const cX = e.clientX;
oriPos.current = {
...style,
cX, cY
}
})
// 鼠标移动
const onMouseMove = useCallback((e) => {
// 判断鼠标是否按住
if (!isDown.current) return
let newStyle = transform(direction, oriPos, e);
setStyle(newStyle)
}, [])
这就完成了对元素的拖拽缩放功能了。
旋转
给drawing-item 加一个 旋转按钮吧。
<style>.control-point.control-rotator{
cursor: pointer;
position: absolute;
left: 50%;
top: 130%;
background-image: url("data:image/svg+xml;charset=utf-8,%3Csvg width='24' height='24' xmlns='http://www.w3.org/2000/svg' fill='%23757575'%3E%3Cg fill='none' fill-rule='evenodd'%3E%3Ccircle stroke='%23CCD1DA' fill='%23FFF' cx='12' cy='12' r='11.5'/%3E%3Cpath d='M16.242 12.012a4.25 4.25 0 00-5.944-4.158L9.696 6.48a5.75 5.75 0 018.048 5.532h1.263l-2.01 3.002-2.008-3.002h1.253zm-8.484-.004a4.25 4.25 0 005.943 3.638l.6 1.375a5.75 5.75 0 01-8.046-5.013H5.023L7.02 9.004l1.997 3.004h-1.26z' fill='%23000' fill-rule='nonzero'/%3E%3C/g%3E%3C/svg%3E");
width: 22px;
height: 22px;
background-size: 100% 100%;
z-index: 4;
box-shadow: none;
border: none;
transform: translateX(-3px);
}
</style>
<div className="drawing-item" ...>
// ....
<div className="control-point control-rotator" onMouseDown={onMouseDown.bind(this, 'rotate')}></div>
</div>
OK ,剩下的就只需要在transform 方法内加 计算角度的代码就OK了
function transform(direction, oriPos, e) {
// ... 省略
switch (direction.current) {
// ... 省略
// 拖拽移动
case 'rotate':
// 先计算下元素的中心点, x,y 作为坐标原点
const x = style.width / 2 + style.left;
const y = style.height / 2 + style.top;
// 当前的鼠标坐标
const x1 = e.clientX;
const y1 = e.clientY;
// 运用高中的三角函数
style.transform = `rotate(${(Math.atan2((y1 - y), (x1 - x))) * (180 / Math.PI) - 90}deg)`;
break
}
}
测试下。
漂亮~ ,到这就完成了与元素的拖拽、缩放、旋转功能了 。
以上是 【JS】react 实现div缩放、旋转、拖拽的9个控制点 的全部内容, 来源链接: utcz.com/a/90858.html


