(手机免费方案)Mac支持NTFS数据文件视听说
目录
免费便捷方案--Mounty
借助ntfs-3g开源软件
一、使用Mounty
1.安装(https://mounty.app/)
brew cask install mounty
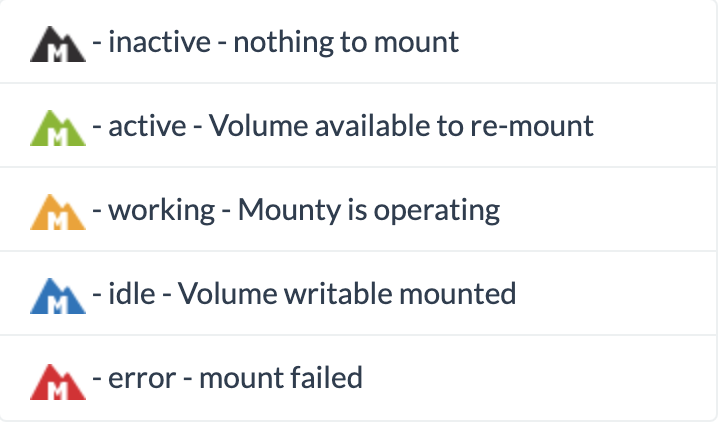
2.风险
My USB stick will not re-mount. An alert is popping up telling me to re-attach the stick, but this doesn't help.
This can happen when the USB stick is not cleanly unmounted from the Windows PC. If you simply unplug the USB stick from PC without using the little tray icon to detach the hardware correctly, the volume will be marked as "not cleanly unmounted". There might be some dirty sectors left and Mac OS X will not be able to re-mount in read-write mode for that reason.Suddenly all my files disappeared - please help!(所有的文件都找不到了!)
This is usually happen when not all files are written properly due to an unmount operation not finishing. The NTFS partition might be marked as "dirty" and the Apple NTFS driver cannot recover from that situation. Mounty will not delete anything by itself, please try to restore your files on a Windows PC using usual recovery s/w, i.e. chkdsk command line utility or professional tools like GetDataBack for Windows. If you do not own any Windows you can use tools for macOS that can deal with NTFS partition maintenance, like Paraogn Harddisk Manager or Tuxera Disk Manager.Sometimes the files are grayed out and cannot be modified anymore.
This is because the file has extended attributes, refer to the Manpage of xattr for further explanation. If you open the file path in terminal application, you can list the attributes with ls -l@ <filename>, and remove those attributes with xattr -d com-apple.<attribute> <filename>, i.e.: xattr -d com.apple.FinderInfo testfile.txtUnable to re-mount in read/write mode when trying to mount Windows 10 partition
If you try to mount a Windows System partition, Mounty might fail when Hibernation feature is enabled. There is a Fast Start feature in Windows which might be enabled by default, and this is causing the drive to be locked. Within Windows running, you need to run the command powercfg /hibernate off in an admin powershell and restart Windows to disable this feature and remove the lock to enable it for Mounty. Thanks to Art Schultz pointing that out.二、使用ntfs-3g开源软件
1.安装FUSE for macOS
https://github.com/osxfuse/osxfuse/releases
2.通过homebrew安装ntfs-3g
brew install ntfs-3g
3.在恢复模式下禁用System Integrity Protection(系统完整性保护)
①进入恢复模式。重启电脑,同时按下command+R
②在恢复模式下打开terminal,输入『csrutil disable』,禁用System Integrity Protection
4.重启电脑,重新挂载根目录,使得系统关键目录可写
挂在命令:sudo mount -uw /
5.备份原来的mount_ntfs命令,同时创建软链接指向ntfs-3g命令
备份原来的命令:sudo mv /sbin/mount_ntfs /sbin/mount_ntfs.original
创建软链接指向ntfs-3g:sudo ln -s /usr/local/sbin/mount_ntfs /sbin/mount_ntfs
6.重新进入恢复模式开启System Integrity Protection(系统完整性保护)
①进入恢复模式。重启电脑,同时按下command+R
②在恢复模式下打开terminal,输入『csrutil enable』,开启System Integrity Protection
操作完之后就可以进行ntfs文件系统的读写了
注意:更新系统会导致失效,需要重新进行一次操作!!!
三、站在巨人肩膀上摘苹果
https://medium.com/macoclock/enabling-ntfs-write-in-macos-10-15-catalina-the-open-source-way-a5fd0d1cb32e
以上是 (手机免费方案)Mac支持NTFS数据文件视听说 的全部内容, 来源链接: utcz.com/a/58339.html

