数据传输|dtle使用初探

作者:马莹乐
爱可生研发团队成员,负责 mysql 中间件和数据库管理平台的测试。擅长找茬(测试技术爱好者),欢迎大家试用 dtle~
本文来源:原创投稿
*爱可生开源社区出品,原创内容未经授权不得随意使用,转载请联系小编并注明来源。
dtle 是一款爱可生 MySQL 开源数据传输中间件,此文简要介绍初步使用方法。
项目地址:https://github.com/actiontech/dtle
一、下载安装
环境说明:
准备三台主机,主机名分别为:node4、node5、node6
三台均为 agent,另将 node4 和 node5 作为 manager
1.1 下载
下载 dtle 最新的 release rpm 包
地址:https://github.com/actiontech/dtle/releases
dtle 安装包下载:
wget https://github.com/actiontech/dtle/releases/download/v2.19.11.0/dtle-2.19.11.0.x86_64.rpm
1.2 安装
安装步骤
https://actiontech.github.io/dtle-docs-cn/4/4.0_installation.html
分别将 node4,node5 和 node6 的 dtle 安装完成。
1.3 启动 dtle
dtle 安装完成后,并未启动,需要先配置 dtle 的 conf 文件,再启动。
1.4 配置 dtle.conf
配置相关说明
https://actiontech.github.io/dtle-docs-cn/4/4.1_node_configuration.html
dtle.conf 准备:以下配置文件替分别替换原有 dtle.conf(/opt/dtle/etc/dtle/dtle.conf)
node4 的 dtle.conf
# Setup data dirdata_dir = "/opt/dtle/data"
log_level = "DEBUG"
log_file = "/opt/dtle.log"
#log_to_stdout = true
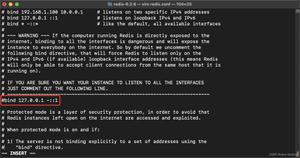
bind_addr = "172.100.9.4"
# Modify our port to avoid a collision with server
ports {
http = 8190
}
# Enable the manager
manager {
enabled = true
# Self-elect, should be 3 or 5 for production,
# Addresses to attempt to join when the server starts.
join = [ "172.100.9.4","172.100.9.5" ]
}
# Enable the agent
agent {
enabled = true
managers = ["172.100.9.4:8191","172.100.9.5:8191"]
}
metric{
collection_interval = "15s"
publish_allocation_metrics = "true"
publish_node_metrics = "true"
}
addresses {
http = "172.100.9.4"
rpc = "172.100.9.4"
serf = "172.100.9.4"
}
advertise {
http = "172.100.9.4"
rpc = "172.100.9.4"
serf = "172.100.9.4"
}
node5 的 dtle.conf
# Setup data dirdata_dir = "/opt/dtle/data"
log_level = "DEBUG"
log_file = "/opt/dtle.log"
#log_to_stdout = true
bind_addr = "172.100.9.5"
# Modify our port to avoid a collision with server
ports {
http = 8190
}
# Enable the manager
manager {
enabled = true
# Self-elect, should be 3 or 5 for production,
# Addresses to attempt to join when the server starts.
join = [ "172.100.9.4","172.100.9.5" ]
}
# Enable the agent
agent {
enabled = true
managers = ["172.100.9.4:8191","172.100.9.5:8191"]
}
metric{
collection_interval = "15s"
publish_allocation_metrics = "true"
publish_node_metrics = "true"
}
addresses {
http = "172.100.9.5"
rpc = "172.100.9.5"
serf = "172.100.9.5"
}
advertise {
http = "172.100.9.5"
rpc = "172.100.9.5"
serf = "172.100.9.5"
}
node6 的 dtle.conf
# Setup data dirdata_dir = "/opt/dtle/data"
log_level = "DEBUG"
log_file = "/opt/dtle.log"
#log_to_stdout = true
bind_addr = "172.100.9.6"
# Modify our port to avoid a collision with server
ports {
http = 8190
}
# Enable the manager
manager {
enabled = false
# Self-elect, should be 3 or 5 for production,
# Addresses to attempt to join when the server starts.
join = [ "172.100.9.4","172.100.9.5" ]
}
# Enable the agent
agent {
enabled = true
managers = ["172.100.9.4:8191","172.100.9.5:8191"]
}
metric{
collection_interval = "15s"
publish_allocation_metrics = "true"
publish_node_metrics = "true"
}
addresses {
http = "172.100.9.6"
rpc = "172.100.9.6"
serf = "172.100.9.6"
}
advertise {
http = "172.100.9.6"
rpc = "172.100.9.6"
serf = "172.100.9.6"
}
1.5 启动 dtle
启动命令说明
https://actiontech.github.io/dtle-docs-cn/4/4.2_command.html
1.6 查看 3 个节点 dtle 进程
node 4
node 5
node 6
1.7 尝试查看 dtle 架构是否符合预期
命令说明
https://actiontech.github.io/dtle-docs-cn/4/4.2_command.html
其中,members 展示的是集群中 manager 节点的信息
HTTP API
https://actiontech.github.io/dtle-docs-cn/4/4.4_http_api.html
输出内容为 json 格式,可以安装 jq,使之格式化展示。
二、源端/目标端准备
MySQL 迁移用户准备
2.1 创建用户
源端用户创建
目标端用户创建
有关源端/目标端用户的最小权限说明
https://actiontech.github.io/dtle-docs-cn/4/4.5_mysql_user_privileges.html
2.2 数据准备
源端数据准备
目标端测试前库表情况
2.3 创建 job
创建全量 + 增量,表级别迁移 job,分别使用 node5 和 node6 节点的 dtle 作为源端和目标端迁移的 agent
job 配置相关参数
https://actiontech.github.io/dtle-docs-cn/4/4.3_job_configuration.html
2.3.1 准备 job.json
job.json
{ "Name":"have_a_try",
"Failover":false,
"Orders":[],
"Type":"synchronous",
"Tasks":[
{
"Type":"Src",
"NodeId":"ee97dc49-85ed-febc-4d3c-cfbfa87f46bd",
"Config":{
"Gtid":"",
"DropTableIfExists":false,
"SkipCreateDbTable":false,
"ApproveHeterogeneous":true,
"ReplChanBufferSize":"600",
"ChunkSize":"2000",
"ExpandSyntaxSupport":false,
"MsgBytesLimit":"20480",
"MsgsLimit":"65536",
"BytesLimit":"67108864",
"GroupMaxSize":"1",
"GroupTimeout":"100",
"SqlFilter":[],
"ReplicateDoDb":[
{
"TableSchema":"test",
"Tables":[
{
"TableName":"test1"
}
]
}
],
"ConnectionConfig":{
"Host":"172.100.9.1",
"Port":"3306",
"User":"src_test",
"Password":"test"
}
}
},
{
"Type":"Dest",
"NodeId":"e623aedd-5c37-da67-4ddf-1a82ce1ac298",
"Config":{
"ParallelWorkers":"1",
"ConnectionConfig":{
"Host":"172.100.9.2",
"Port":"3306",
"User":"dest_test",
"Password":"test"
}
}
}
]
}
其中 NodeId 可通过命令或者 HTTP API 查询得知。
2.3.2 创建job
创建 job 试用 HTTP API
https://actiontech.github.io/dtle-docs-cn/4/4.4_http_api.html
创建完成后查询 job 状态为 running
job 详细信息可使用 HTTP API 查询,示例
[ {
"CreateIndex":109,
"ID":"ba13f3e1-0630-f141-4c60-a1f36c61cdb3",
"JobModifyIndex":2372,
"JobSummary":{
"Constraints":null,
"CreateIndex":109,
"Datacenters":[
"dc1"
],
"EnforceIndex":false,
"Failover":false,
"ID":"ba13f3e1-0630-f141-4c60-a1f36c61cdb3",
"JobModifyIndex":2372,
"ModifyIndex":2372,
"Name":"have_a_try",
"Orders":[
],
"Region":"global",
"Status":"running",
"StatusDescription":"",
"Tasks":[
{
"Config":{
"GroupMaxSize":"1",
"ChunkSize":"2000",
"BinlogFile":"1.000002",
"MsgsLimit":"65536",
"GroupTimeout":"100",
"DropTableIfExists":false,
"ExpandSyntaxSupport":false,
"BytesLimit":"67108864",
"MsgBytesLimit":"20480",
"ReplChanBufferSize":"600",
"NatsAddr":"172.100.9.6:8193",
"ApproveHeterogeneous":true,
"SqlFilter":[
],
"BinlogPos":4261,
"ConnectionConfig":{
"Host":"172.100.9.1",
"Port":"3306",
"User":"src_test",
"Password":"*"
},
"TrafficAgainstLimits":0,
"Gtid":"8868d98f-af5e-11e8-9aa9-0242ac110002:1-16",
"ReplicateDoDb":[
{
"TableSchema":"test",
"Tables":[
{
"TableName":"test1"
}
]
}
],
"SkipCreateDbTable":false
},
"ConfigLock":{
},
"Constraints":null,
"Driver":"MySQL",
"Leader":false,
"NodeID":"ee97dc49-85ed-febc-4d3c-cfbfa87f46bd",
"NodeName":"",
"Type":"Src"
},
{
"Config":{
"BinlogFile":"1.000002",
"BinlogPos":4261,
"ConnectionConfig":{
"Host":"172.100.9.2",
"Port":"3306",
"User":"dest_test",
"Password":"*"
},
"Gtid":"8868d98f-af5e-11e8-9aa9-0242ac110002:1-16",
"ParallelWorkers":"1",
"NatsAddr":"172.100.9.6:8193"
},
"ConfigLock":{
},
"Constraints":null,
"Driver":"MySQL",
"Leader":true,
"NodeID":"e623aedd-5c37-da67-4ddf-1a82ce1ac298",
"NodeName":"",
"Type":"Dest"
}
],
"Type":"synchronous"
},
"ModifyIndex":2372,
"Name":"have_a_try",
"Status":"running",
"StatusDescription":"",
"Type":"synchronous"
}
]
2.4 查询目标端迁移情况
目标端迁移前后对比:
新增两个库其中 test 库是我们 job 迁移的结果。
dtle 库相关说明
https://actiontech.github.io/dtle-docs-cn/3/3.3_impact_on_dest.html
2.5 在源端执行普通 DML 操作
2.6 在源端执行普通 DDL 操作
小结
更多用法,详见项目文档,欢迎试用~
https://actiontech.github.io/dtle-docs-cn/
以上是 数据传输|dtle使用初探 的全部内容, 来源链接: utcz.com/z/532908.html