webapi中使用token验证(JWT验证)

using System;using System.IdentityModel.Tokens.Jwt;
using System.Security.Claims;
using Microsoft.IdentityModel.Tokens;
namespace TokenTest
{
public class TokenHelper
{
/// <summary>
/// Use the below code to generate symmetric Secret Key
/// var hmac = new HMACSHA256();
/// var key = Convert.ToBase64String(hmac.Key);
/// </summary>
private const string Secret = "db3OIsj+BXE9NZDy0t8W3TcNekrF+2d/1sFnWG4HnV8TZY30iTOdtVWJG8abWvB1GlOgJuQZdcF2Luqm/hccMw==";
public static string GenerateToken(string username, int expireMinutes = 120)
{ // 此方法用来生成 Token
var symmetricKey = Convert.FromBase64String(Secret); // 生成二进制字节数组
var tokenHandler = new JwtSecurityTokenHandler(); // 创建一个JwtSecurityTokenHandler类用来生成Token
var now = DateTime.UtcNow; // 获取当前时间
var tokenDescriptor = new SecurityTokenDescriptor // 创建一个 Token 的原始对象
{
Subject = new ClaimsIdentity(new[] // Token的身份证,类似一个人可以有身份证,户口本
{
new Claim(ClaimTypes.Name, username) // 可以创建多个
}),
Expires = now.AddMinutes(Convert.ToInt32(expireMinutes)), // Token 有效期
SigningCredentials = new SigningCredentials(new SymmetricSecurityKey(symmetricKey), SecurityAlgorithms.HmacSha256)
// 生成一个Token证书,第一个参数是根据预先的二进制字节数组生成一个安全秘钥,说白了就是密码,第二个参数是编码方式
};
var stoken = tokenHandler.CreateToken(tokenDescriptor); // 生成一个编码后的token对象实例
var token = tokenHandler.WriteToken(stoken); // 生成token字符串,给前端使用
return token;
}
public static ClaimsPrincipal GetPrincipal(string token)
{ // 此方法用解码字符串token,并返回秘钥的信息对象
try
{
var tokenHandler = new JwtSecurityTokenHandler(); // 创建一个JwtSecurityTokenHandler类,用来后续操作
var jwtToken = tokenHandler.ReadToken(token) as JwtSecurityToken; // 将字符串token解码成token对象
if (jwtToken == null)
return null;
var symmetricKey = Convert.FromBase64String(Secret); // 生成编码对应的字节数组
var validationParameters = new TokenValidationParameters() // 生成验证token的参数
{
RequireExpirationTime = true, // token是否包含有效期
ValidateIssuer = false, // 验证秘钥发行人,如果要验证在这里指定发行人字符串即可
ValidateAudience = false, // 验证秘钥的接受人,如果要验证在这里提供接收人字符串即可
IssuerSigningKey = new SymmetricSecurityKey(symmetricKey) // 生成token时的安全秘钥
};
SecurityToken securityToken; // 接受解码后的token对象
var principal = tokenHandler.ValidateToken(token, validationParameters, out securityToken);
return principal; // 返回秘钥的主体对象,包含秘钥的所有相关信息
}
catch (Exception ex)
{
return null;
}
}
}
}
2. 创建过滤器类
当前端发送一个请求,需要接收并处理token在当前项目下创建一个名为Filter的文件夹
创建一个AuthenticationAttribute类,代码如下
using System;
using System.Collections.Generic;
using System.Security.Claims;
using System.Security.Principal;
using System.Threading;
using System.Threading.Tasks;
using System.Web.Http.Filters;
namespace TokenTest.Filter
{
// IAuthenticationFilter用来自定义一个webapi控制器方法属性
public class AuthenticationAttribute : Attribute, IAuthenticationFilter
{
public bool AllowMultiple => false;
public string Realm { get; set; }
public async Task AuthenticateAsync(HttpAuthenticationContext context, CancellationToken cancellationToken)
{
// 当api发送请求,自动调用这个方法
var request = context.Request; // 获取请求的请求体
var authorization = request.Headers.Authorization; // 获取请求的token对象
if (authorization == null || authorization.Scheme != "Bearer") return;
if(string.IsNullOrEmpty(authorization.Parameter))
{
// 给ErrorResult赋值需要一个类实现了IHttpActionResult接口
// 此类声明在AuthenticationFailureResult.cs文件中,此文件用来处理错误信息。
context.ErrorResult = new AuthenticationFailureResult("Missing Jwt Token", request);
return;
}
var token = authorization.Parameter; // 获取token字符串
var principal = await AuthenticateJwtToken(token); // 调用此方法,根据token生成对应的"身份证持有人"
if(principal == null)
{
context.ErrorResult = new AuthenticationFailureResult("Invalid token", request);
}
else
{
context.Principal = principal; // 设置身份验证的主体
}
// 此法调用完毕后,会调用ChallengeAsync方法,从而来完成WWW-Authenticate验证
}
private Task<IPrincipal> AuthenticateJwtToken(string token)
{
string userName;
if(ValidateToken(token, out userName))
{
// 这里就是验证成功后要做的逻辑,也就是处理WWW-Authenticate验证
var info = new List<Claim>
{
new Claim(ClaimTypes.Name, userName)
}; // 根据验证token后获取的用户名重新在建一个声明,你个可以在这里创建多个声明
// 作者注: claims就像你身份证上面的信息,一个Claim就是一条信息,将这些信息放在ClaimsIdentity就构成身份证了
var infos = new ClaimsIdentity(info, "Jwt");
// 将上面的身份证放在ClaimsPrincipal里面,相当于把身份证给持有人
IPrincipal user = new ClaimsPrincipal(infos);
return Task.FromResult(user);
}
return Task.FromResult<IPrincipal>(null);
}
private bool ValidateToken(string token, out string userName)
{
userName = null;
var simplePrinciple = TokenHelper.GetPrincipal(token); // 调用自定义的GetPrincipal获取Token的信息对象
var identity = simplePrinciple?.Identity as ClaimsIdentity; // 获取主声明标识
if (identity == null) return false;
if (!identity.IsAuthenticated) return false;
var userNameClaim = identity.FindFirst(ClaimTypes.Name); // 获取声明类型是ClaimTypes.Name的第一个声明
userName = userNameClaim?.Value; // 获取声明的名字,也就是用户名
if (string.IsNullOrEmpty(userName)) return false;
return true;
// 到这里token本身的验证工作已经完成了,因为用户名可以解码出来
// 后续要验证的就是浏览器的 WWW-Authenticate
/*
什么是WWW-Authenticate验证???
WWW-Authenticate是早期的一种验证方式,很容易被破解,浏览器发送请求给后端,后端服务器会解析传过来的Header验证
如果没有类似于本文格式的token,那么会发送WWW-Authenticate: Basic realm= "." 到前端浏览器,并返回401
*/
}
public Task ChallengeAsync(HttpAuthenticationChallengeContext context, CancellationToken cancellationToken)
{
// 此方法在AuthenticateAsync方法调用完成之后自动调用
ChallengeAsync(context);
return Task.FromResult(0);
}
private void ChallengeAsync(HttpAuthenticationChallengeContext context)
{
string parameter = null;
if (!string.IsNullOrEmpty(Realm))
{
parameter = "realm="" + Realm + """;
} // token的parameter部分已经通过jwt验证成功,这里只需要验证scheme即可
context.ChallengeWith("Bearer", parameter); // 这个自定义扩展方法定义在HttpAuthenticationChallengeContextExtensions.cs文件中
// 主要用来验证token的Schema是不是Bearer
}
}
}
创建AuthenticationFailureResult类,代码如下
using System;
using System.Collections.Generic;
using System.Linq;
using System.Net;
using System.Net.Http;
using System.Threading;
using System.Threading.Tasks;
using System.Web.Http;
namespace TokenTest.Filter
{
// 此类比较简单不做过多注释
public class AuthenticationFailureResult : IHttpActionResult
{
public string _FailureReason { get; }
public HttpRequestMessage _Request { get; }
public AuthenticationFailureResult(string FailureReason, HttpRequestMessage request)
{
_FailureReason = FailureReason;
_Request = request;
}
HttpResponseMessage HandleResponseMessage()
{
HttpResponseMessage response = new HttpResponseMessage(HttpStatusCode.Unauthorized)
{
RequestMessage = _Request,
ReasonPhrase = _FailureReason
};
return response;
}
public Task<HttpResponseMessage> ExecuteAsync(CancellationToken cancellationToken)
{
return Task.FromResult(HandleResponseMessage());
}
}
}
创建HttpAuthenticationChallengeContextExtensions类,写的context的扩展方法,代码如下
using System;
using System.Net.Http.Headers;
using System.Web.Http.Filters;
namespace TokenTest.Filter
{
public static class HttpAuthenticationChallengeContextExtensions
{
public static void ChallengeWith(this HttpAuthenticationChallengeContext context, string scheme)
{
ChallengeWith(context, new AuthenticationHeaderValue(scheme));
}
private static void ChallengeWith(HttpAuthenticationChallengeContext context, AuthenticationHeaderValue challenge)
{
if(context == null)
{
throw new ArgumentNullException(nameof(context));
}
context.Result = new AddChallengeOnUnauthorizedResult(challenge, context.Result);
}
public static void ChallengeWith(this HttpAuthenticationChallengeContext context, string scheme, string parameter)
{
// 第二个参数的作用是根据传进来的scheme也就是"Bearer"和parameter这里为null,创建一个验证头,和前端传过来的token是一样的
ChallengeWith(context, new AuthenticationHeaderValue(scheme, parameter));
}
}
}
创建AddChallengeOnUnauthorizedResult类,代码如下
using System.Linq;
using System.Net;
using System.Net.Http;
using System.Net.Http.Headers;
using System.Threading;
using System.Threading.Tasks;
using System.Web.Http;
namespace TokenTest.Filter
{
public class AddChallengeOnUnauthorizedResult: IHttpActionResult
{
public AuthenticationHeaderValue _Challenge { get; }
public IHttpActionResult _InnerResult { get; }
public AddChallengeOnUnauthorizedResult(AuthenticationHeaderValue challenge, IHttpActionResult innerResult)
{
_Challenge = challenge;
_InnerResult = innerResult;
}
public async Task<HttpResponseMessage> ExecuteAsync(CancellationToken cancellationToken)
{
// 这里讲schemee也就是"Bearer"生成后的response返回给浏览器去做判断,如果浏览器请求的Authenticate中含有含有名为"Bearer"的scheme会返回200状态码否则返回401状态码
HttpResponseMessage response = await _InnerResult.ExecuteAsync(cancellationToken);
if(response.StatusCode == HttpStatusCode.Unauthorized)
{
// 如果这里不成立,但是我们之前做的验证都是成功的,这是不对的,可能出现意外情况啥的
// 这时我们手动添加一个名为"Bearer"的sheme,让请求走通
// 到此,完毕。
if (response.Headers.WwwAuthenticate.All(h => h.Scheme != _Challenge.Scheme))
{
response.Headers.WwwAuthenticate.Add(_Challenge);
}
}
return response;
}
}
}
3.配置
在你的WebApiConfig.cs文件中添加config.Filters.Add(new AuthorizeAttribute()); // 开启全局验证服务
4. 代码使用
创建一个webapi的控制器测试,用户登录
[Route("yejiawei/haha")]
[HttpGet]
[AllowAnonymous] // 这个属性是必须的,表示这个类是不需要token验证的
public string Get(string username, string password)
{
if (CheckUser(username, password))
{
return TokenHelper.GenerateToken(username);
}
throw new HttpResponseException(HttpStatusCode.Unauthorized);
}
public bool CheckUser(string username, string password)
{
// 在这里你可以在数据库中查看用户名是否存在
return true;
}
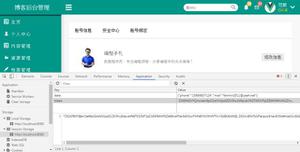
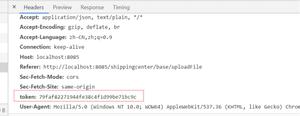
测试,访问后端api数据
[Route("yejiawei/haha")]
[HttpGet]
[Authentication] // 此方法验证的token需要调用Authentication属性方法
public string Get()
{
return "value";
}
以上是 webapi中使用token验证(JWT验证) 的全部内容, 来源链接: utcz.com/z/514109.html