Flutter之CustomPainter时钟绘制

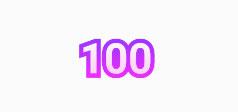
无意间在网上看到下图的绘制效果,便想着画一个时钟,正好学习一下,先上图。
环形圆
时钟
请大家忽略那个可恶的数字“0”。。。
环形圆关键代码
@override
void paint(Canvas canvas,Size size){
int n =20;
var range =List<int>.generate(n,(i)=> i +1);
for(int i in range){
double x =2* math.pi / n;
double dx = radius * math.sin(i * x);
double dy = radius * math.cos(i * x);
print("dx${i.toString()}=>${dx.toString()}");
print("dy${i.toString()}=>${dy.toString()}");
canvas.drawCircle(Offset(dx, dy), radius, myPaint);
}
}
时钟完整代码
classTimeClockWidgetextendsStatefulWidget{
@override
_TimeClockWidgetState createState()=>_TimeClockWidgetState();
}
class_TimeClockWidgetStateextendsState<TimeClockWidget>{
Timer timer;
@override
void initState(){
// TODO: implement initState
super.initState();
timer =Timer.periodic(Duration(seconds:1),(timer){
setState((){});
});
}
@override
void dispose(){
// TODO: implement dispose
super.dispose();
timer.cancel();
}
@override
Widget build(BuildContext context){
returnCenter(child:CustomPaint(painter:CustomTimeClock()));
}
}
classCustomTimeClockextendsCustomPainter{
//大外圆
Paint _bigCirclePaint =Paint()
..style =PaintingStyle.stroke
..isAntiAlias =true
..color =Colors.deepOrange
..strokeWidth =4;
//粗刻度线
Paint _linePaint =Paint()
..style =PaintingStyle.fill
..isAntiAlias =true
..color =Colors.deepOrange
..strokeWidth =4;
//圆心
Offset _centerOffset =Offset(0,0);
//圆半径
double _bigRadius =
math.min(Screen.screenHeightDp /3,Screen.screenWidthDp /3);
finalint lineHeight =10;
List<TextPainter> _textPaint =[
_getTextPainter("12"),
_getTextPainter("3"),
_getTextPainter("6"),
_getTextPainter("9"),
];
//文字画笔
TextPainter _textPainter =newTextPainter(
textAlign:TextAlign.left, textDirection:TextDirection.ltr);
@override
void paint(Canvas canvas,Size size){
// TODO: implement paint
print('_bigRadius: ${_bigRadius}');
//绘制大圆
canvas.drawCircle(_centerOffset, _bigRadius, _bigCirclePaint);
//绘制圆心
_bigCirclePaint.style =PaintingStyle.fill;
canvas.drawCircle(_centerOffset, _bigRadius /20, _bigCirclePaint);
//绘制刻度,秒针转一圈需要跳60下,这里只画6点整的刻度线,但是由于每画一条刻度线之后,画布都会旋转60°(转为弧度2*pi/60),所以画出60条刻度线
for(int i =0; i <60; i++){
_linePaint.strokeWidth = i %5==0?(i %3==0?10:4):1;//设置线的粗细
canvas.drawLine(Offset(0, _bigRadius - lineHeight),Offset(0, _bigRadius),
_linePaint);
canvas.rotate(math.pi /30);//2*math.pi/60
}
//方法一:绘制数字,此处暂时没想到更好的方法,TextPainter的绘制间距老有问题,不好控制
/* _textPaint[0].layout();
_textPaint[0].paint(canvas, new Offset(-12, -_bigRadius+20));
_textPaint[1].layout();
_textPaint[1].paint(canvas, new Offset(_bigRadius-30,-12));
_textPaint[2].layout();
_textPaint[2].paint(canvas, new Offset(-6,_bigRadius-40));
_textPaint[3].layout();
_textPaint[3].paint(canvas, new Offset(-_bigRadius+20,-12));*/
//方法二:绘制数字,
for(int i =0; i <12; i++){
canvas.save();//与restore配合使用保存当前画布
canvas.translate(0.0,-_bigRadius+30);//平移画布画点于时钟的12点位置,+30为了调整数字与刻度的间隔
_textPainter.text =TextSpan(
style:newTextStyle(color:Colors.deepOrange, fontSize:22),
text: i.toString());
canvas.rotate(-deg2Rad(30)* i);//保持画数字的时候竖直显示。
_textPainter.layout();
_textPainter.paint(
canvas,Offset(-_textPainter.width /2,-_textPainter.height /2));
canvas.restore();//画布重置,恢复到控件中心
canvas.rotate(deg2Rad(30));//画布旋转一个小时的刻度,把数字和刻度对应起来
}
//绘制指针,这个也好理解
int hours =DateTime.now().hour;
int minutes =DateTime.now().minute;
int seconds =DateTime.now().second;
print("时: ${hours} 分:${minutes} 秒: ${seconds}");
//时针角度//以下都是以12点为0°参照
//12小时转360°所以一小时30°
double hoursAngle =(minutes /60+ hours -12)* math.pi /6;//把分钟转小时之后*(2*pi/360*30)
//分针走过的角度,同理,一分钟6°
double minutesAngle =(minutes + seconds /60)* math.pi /30;//(2*pi/360*6)
//秒针走过的角度,同理,一秒钟6°
double secondsAngle = seconds * math.pi /30;
//画时针
_linePaint.strokeWidth =4;
canvas.rotate(hoursAngle);
canvas.drawLine(Offset(0,0),newOffset(0,-_bigRadius +80), _linePaint);
//画分针
_linePaint.strokeWidth =2;
canvas.rotate(-hoursAngle);//先把之前画时针的角度还原。
canvas.rotate(minutesAngle);
canvas.drawLine(Offset(0,0),newOffset(0,-_bigRadius +60), _linePaint);
//画秒针
_linePaint.strokeWidth =1;
canvas.rotate(-minutesAngle);//同理
canvas.rotate(secondsAngle);
canvas.drawLine(Offset(0,0),newOffset(0,-_bigRadius +30), _linePaint);
}
@override
bool shouldRepaint(CustomPainter oldDelegate){
// TODO: implement shouldRepaint
returntrue;
}
staticTextPainter _getTextPainter(String msg){
returnnewTextPainter(
text:TextSpan(
style:newTextStyle(color:Colors.deepOrange, fontSize:22),
text: msg),
textAlign:TextAlign.center,
textDirection:TextDirection.ltr);
}
//角度转弧度
num deg2Rad(num deg)=> deg *(math.pi /180.0);
}
Screen代码
Screen参考screenutil改的. https://github.com/OpenFlutter/flutter_ScreenUtil Screen.init()程序启动的时候调用就行。。。
import'package:flutter/material.dart';
import'dart:ui'as ui;
classScreen{
//一些固定的配置参数
staticfinaldouble width =1080;//px
staticfinaldouble height =1920;//px
staticfinalbool allowFontScaling =false;
///当前设备宽度 dp
staticdouble _screenWidthDp;
///当前设备高度 dp
staticdouble _screenHeightDp;
///设备的像素密度
staticdouble _screenPixelRatio;
///状态栏高度 dp 刘海屏会更高
staticdouble _topSafeHeight;
///底部安全区距离 dp
staticdouble _bottomSafeHeight;
///每个逻辑像素的字体像素数,字体的缩放比例
staticdouble _textScaleFactory;
staticvoid init(){
MediaQueryData mediaQueryData =MediaQueryData.fromWindow(ui.window);
_screenWidthDp=mediaQueryData.size.width;
_screenHeightDp=mediaQueryData.size.height;
_screenPixelRatio=mediaQueryData.devicePixelRatio;
_topSafeHeight=mediaQueryData.padding.top;
_bottomSafeHeight=mediaQueryData.padding.bottom;
_textScaleFactory=mediaQueryData.textScaleFactor;
}
///当前设备宽度 dp
staticdoubleget screenWidthDp =>_screenWidthDp;
///当前设备高度 dp
staticdoubleget screenHeightDp =>_screenHeightDp;
///当前设备宽度 px
staticdoubleget screenWidth => _screenWidthDp * _screenPixelRatio;
///当前设备高度 px
staticdoubleget screenHeight => _screenHeightDp * _screenPixelRatio;
///设备的像素密度
staticdoubleget screenPixelRatio =>_screenPixelRatio;
///状态栏高度 dp 刘海屏会更高
staticdoubleget topSafeHeight=>_topSafeHeight;
///底部安全区距离 dp
staticdoubleget bottomSafeHeight =>_bottomSafeHeight;
///每个逻辑像素的字体像素数,字体的缩放比例
staticdoubleget textScaleFactory =>_textScaleFactory;
///ToolBarHeight +status高度
staticdoubleget navigationBarHeight =>_topSafeHeight+toolBarHeight;
///TooBar高度
staticdoubleget toolBarHeight =>kToolbarHeight;
///实际的dp与设计稿px 的比例
staticget scaleWidth => screenWidthDp / width;
staticget scaleHeight => screenHeightDp / height;
///根据设计稿的设备宽度适配
///高度也根据这个来做适配可以保证不变形
static setWidth(double width)=> width * scaleWidth;
/// 根据设计稿的设备高度适配
/// 当发现设计稿中的一屏显示的与当前样式效果不符合时,
/// 或者形状有差异时,高度适配建议使用此方法
/// 高度适配主要针对想根据设计稿的一屏展示一样的效果
static setHeight(double height)=> height * scaleHeight;
///字体大小适配方法
///@param fontSize 传入设计稿上字体的px ,
///@param allowFontScaling 控制字体是否要根据系统的“字体大小”辅助选项来进行缩放。默认值为false。
///@param allowFontScaling Specifies whether fonts should scale to respect Text Size accessibility settings. The default is false.
static setSp(double fontSize)=> allowFontScaling
? setWidth(fontSize)
: setWidth(fontSize)/ textScaleFactory;
}
本文分享自微信公众号 - Flutter学习簿(gh_d739155d3b2c)。
如有侵权,请联系 support@oschina.cn 删除。
本文参与“OSC源创计划”,欢迎正在阅读的你也加入,一起分享。
以上是 Flutter之CustomPainter时钟绘制 的全部内容, 来源链接: utcz.com/z/510026.html


