java布局学习 (二)

前文中介绍了FlowLayout和BorderLayout 本文我们将会继续介绍java中的布局方式
(3)GridLayout 网格布局
这种布局会将整个容器划分成M行*N列的网格。
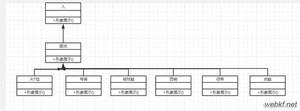
如下图:
由模型图我们可以知道这种布局,类似于我们常见的扫雷、计算器等软件的布局。
这种布局的构造函数有三种
1 GridLayout() //一行一列2
3 GridLayout(int rows, int cols)
4
5 GridLayout(int rows, int cols, int hgap, int vgap)//hgap 水平间距, vgap垂直间距
在向这种容器中添加控件时,会以向左后右,先上后下的顺序添加(防盗连接:本文首发自http://www.cnblogs.com/jilodream/ )控件。 而不能在指定的位置中添加控件,换言之控件之间不能留有空白。 下面我们来看代码
1 package com.thoughtworksclient.trains;2 import java.awt.*;
3 import javax.swing.*;
4
5 public class GridFrame extends JFrame
6 {
7 JPanel panel=new JPanel(new GridLayout(4,4,3,3));//构造指定布局的容器
8 String str[]={"7","8","9","/","4","5","6","*","1","2","3","-","0",".","=","+"};
9 public GridFrame(String name)
10 {
11 super(name);
12 setLayout(new BorderLayout());
13 JButton btnArray[];
14 btnArray=new JButton[str.length];
15 for(int i=0;i<str.length;i++)
16 {
17 btnArray[i]=new JButton(str[i]);
18 panel.add(btnArray[i]);
19 }
20 add(panel);
21 setVisible(true);
22 setSize(250,200);
23 setDefaultCloseOperation(JFrame.EXIT_ON_CLOSE);
24 setVisible(true);
25 }
26
27 public static void main(String[] args)
28 {
29 GridFrame gf=new GridFrame("网格布局计算机!");
30 }
31
32 }
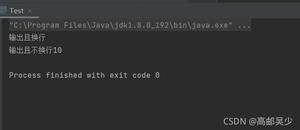
显示效果如下图
(4)GridBagLayout
GridBagLayout也是一种表格,但是可以通过设定规则更自由的将控件绑定到容器上:
如下图:
将容器切割为若干个小的格子Cell,然后向这些Cell中添加控件,同时可以在某一个(防盗连接:本文首发自http://www.cnblogs.com/jilodream/ )方向上连续的几个Cell进行拼接,组成一个大的Cell放置控件。
操作步骤如下:
(1)new GridBagLayout() 设置到指定容器上。
(2)GridBagConstraint gbc 新增这样的一个容器规则。(注意Constraint是规则、约束、条件的意思)
设定的参数规则如下
gridx gridy 索引
gridwidth gridheight 跨越的索引
fill 是否动态扩充
weightx、weighty 扩大的权重
(3)gb.setConstraints(控件,gbc) 将控件和规则绑定起来
(4)constainer.add(c) 添加容器,然后将控件添加到容器上。
同时gbc 可以重用,反复的设定骨子额,绑定规则,添加容器
重复 2、3、4步
请参照 如下代码 ,重点注意 addComponent()方法:
1 public class NumberPad { 2 private static final Insets insets = new Insets(0, 0, 0, 0);
3 public static void main(final String args[]) {
4 final JFrame frame = new JFrame("NumberPad");
5 frame.setDefaultCloseOperation(JFrame.EXIT_ON_CLOSE);//窗口操作
6 frame.setLayout(new GridBagLayout());//框架布局
7 JButton button;
8 //下面利用设立的类对按键进行布局
9 //第一行
10 button = new JButton("Num");
11 addComponent(frame, button, 0, 0, 1, 1, GridBagConstraints.CENTER, GridBagConstraints.BOTH);
12 button = new JButton("/");
13 addComponent(frame, button, 1, 0, 1, 1, GridBagConstraints.CENTER, GridBagConstraints.BOTH);
14 button = new JButton("*");
15 addComponent(frame, button, 2, 0, 1, 1, GridBagConstraints.CENTER, GridBagConstraints.BOTH);
16 button = new JButton("-");
17 addComponent(frame, button, 3, 0, 1, 1, GridBagConstraints.CENTER, GridBagConstraints.BOTH);
18 //第二行
19 button = new JButton("1");
20 addComponent(frame, button, 0, 1, 1, 1, GridBagConstraints.CENTER, GridBagConstraints.BOTH);
21 button = new JButton("2");
22 addComponent(frame, button, 1, 1, 1, 1, GridBagConstraints.CENTER, GridBagConstraints.BOTH);
23 button = new JButton("3");
24 addComponent(frame, button, 2, 1, 1, 1, GridBagConstraints.CENTER, GridBagConstraints.BOTH);
25 button = new JButton("+");
26 addComponent(frame, button, 3, 1, 1, 2, GridBagConstraints.CENTER, GridBagConstraints.BOTH);
27 // 第三行
28 button = new JButton("4");
29 addComponent(frame, button, 0, 2, 1, 1, GridBagConstraints.CENTER, GridBagConstraints.BOTH);
30 button = new JButton("5");
31 addComponent(frame, button, 1, 2, 1, 1, GridBagConstraints.CENTER, GridBagConstraints.BOTH);
32 button = new JButton("6");
33 addComponent(frame, button, 2, 2, 1, 1, GridBagConstraints.CENTER, GridBagConstraints.BOTH);
34 //第四行
35 button = new JButton("7");
36 addComponent(frame, button, 0, 3, 1, 1, GridBagConstraints.CENTER, GridBagConstraints.BOTH);
37 button = new JButton("8");
38 addComponent(frame, button, 1, 3, 1, 1, GridBagConstraints.CENTER, GridBagConstraints.BOTH);
39 button = new JButton("9");
40 addComponent(frame, button, 2, 3, 1, 1, GridBagConstraints.CENTER, GridBagConstraints.BOTH);
41 button = new JButton("Enter");
42 addComponent(frame, button, 3, 3, 1, 2, GridBagConstraints.CENTER, GridBagConstraints.BOTH);
43 //第五行
44 button = new JButton("0");
45 addComponent(frame, button, 0, 4, 2, 1, GridBagConstraints.CENTER, GridBagConstraints.BOTH);
46 button = new JButton(".");
47 addComponent(frame, button, 2, 4, 1, 1, GridBagConstraints.CENTER, GridBagConstraints.BOTH);
48 frame.setSize(250,250);
49 frame.setVisible(true);
50 }
51
52 private static void addComponent(Container container, Component component, int gridx, int gridy,
53 int gridwidth, int gridheight, int anchor, int fill) {
54 GridBagConstraints gbc = new GridBagConstraints(gridx, gridy, gridwidth, gridheight, 1.0, 1.0,
55 anchor, fill, insets, 0, 0);//建立网格包对象
56 container.add(component, gbc);//添加到容器中
57 }
ps 此代码来自http://blog.sina.com.cn/s/blog_6cea57330100pwvq.html
这里有几点要注意的
(1)控制动态扩充的fill参数,有四个值分别为 水平扩充、垂直扩充、水平垂直扩充、不扩充。大家根据自己的实际情况来选择
(2)weightx、weighty 是扩大的权重,这个权重表示的是,当横向(防盗连接:本文首发自http://www.cnblogs.com/jilodream/ )或纵向扩大N的倍数后,那么他占的比重是多少。这里要小心,就是权重大的话,如果往大拖容器size,那么这个控件增长的快,同时当size变小时,权重大的也缩小的更快。所以如果要想让权重大的控件始终大时,需要将几个控件的初始size设定的非常小,这样所有的控件都是在拖大的状态了。
以上是 java布局学习 (二) 的全部内容, 来源链接: utcz.com/z/392724.html