react router @4 和 vue路由 详解(全)

react router @4 和 vue路由
本文大纲:
1、vue路由基础和使用
2、react-router @4用法
3、什么是包容性路由?什么是排他性路由?
4、react路由有两个重要的属性:children和render的区别?
5、react如何在路由里面定义一个子路由?
6、vue如何在路由里面定义一个子路由?
7、react怎么通过路由传参?
8、vue怎么通过路由传参?
9、怎么在react里拿到router对象?
10、怎么在vue里拿到router对象?
11、路由怎么回退?
12、react路由守卫?
13、vue路由守卫?
1、vue路由基础和使用
a、大概目录
我这里建了一个router文件夹,文件夹下有index.html
b、准备工作:
npm install vue-router
或者 yarn add vue-router
c、配置
必须要通过 Vue.use() 明确地安装路由功能:
在你的文件夹下的 src 文件夹下的 main.js 文件内写入以下代码
import Vue from \'vue\'import VueRouter from \'vue-router\'
Vue.use(VueRouter)
附上我的代码:我是将router的内容写在了我的router文件夹下的index.html中,然后暴露出去,在main.js中引入
router文件夹下的index.html
import Vue from \'vue\'import VueRouter from \'vue-router\'
Vue.use(VueRouter)
import Home from \'pages/Home\'
import Map from \'components/Map\'
import Home1 from \'components/Home1\'
import Find from \'components/Find\'
import Mine from \'components/Mine\'
import Type from \'components/Type\'
import Publish from \'components/Publish\'
import Search from \'components/Search\'
import Success from \'components/Success\'
import Need from \'components/Need\'
import Position0 from \'components/Position\'
import Like from \'components/scrollX/Like\'
import S1 from \'components/scrollX/1\'
import S2 from \'components/scrollX/2\'
import Listall from \'components/mine/Listall\'
import Listone from \'components/mine/Listone\'
import Listchange from \'components/mine/Listchange\'
const routes = [
{
path:\'/\',
redirect:\'/ho\'
},
{
path: \'/ho\',
redirect:\'/ho/home\',
component: Home,
children: [
{
name: \'home\',
path: \'home\',
component: Home1,
redirect:\'/ho/home/like\',
children :[
{
name: \'like\',
path: \'like\',
component: Like
},
{
name: \'2000001\',
path: \'2000001\',
component: S1
},
{
name: \'2000022\',
path: \'2000022\',
component: S2
}
]
},
{
name: \'type\',
path: \'type\',
component: Type
},
{
name: \'need\',
path: \'need\',
component: Need
},
{
name: \'find\',
path: \'find\',
component: Find
},
{
name: \'mine\',
path: \'mine\',
component: Mine
}
]
},
{
name: \'search\',
path: \'/search\',
component: Search
},
{
name: \'position\',
path: \'/position\',
component: Position0
},
{
name: \'publish\',
path: \'/publish\',
component: Publish
},
{
name: \'success\',
path: \'/success\',
component: Success
},
{
name: \'listall\',
path: \'/listall\',
component: Listall
},
{
name: \'listone\',
path: \'/listone\',
component: Listone
},
{
name: \'listchange\',
path: \'/listchange\',
component: Listchange
},
{
name: \'map\',
path: \'/map\',
component: Map
}
]
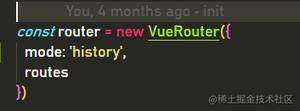
const router = new VueRouter({
mode: \'history\',
routes
})
export default router
main.js
import Vue from \'vue\'import App from \'./App.vue\'
import router from \'./router\'
Vue.use(MintUI)
Vue.use(ElementUI);
Vue.config.productionTip = false
new Vue({
router,
render: h => h(App)
}).$mount(\'#app\')
d、常规使用
<router-view></router-view>路由匹配到的组件将渲染在这里
你可以把他理解为一个版块,比如现在有一个home页面,分为两部分,内容部分和ibar部分,如图:
这五个页面共用下面的导航栏,只有导航栏上面的内容不同
<router-view></router-view>就可以写在<Ibar></Ibar>的上面
<template><div class="home">
<router-view></router-view>
<Ibar></Ibar>
</div>
</template>
那么在Ibar页面中如何切换路由呢?
<template><div class="ibar">
<router-link to="/ho/home" tag="span" active-class="active">首页</router-link>
<router-link to="/ho/type" tag="span" active-class="active">类别</router-link>
<router-link to="/ho/need" tag="span" active-class="active">需求</router-link>
<router-link to="/ho/find" tag="span" active-class="active">发现</router-link>
<router-link to="/ho/mine" tag="span" active-class="active">我的</router-link>
</div>
</template>
注意:此处的tag=“span”代表这个按钮是个span标签,你可以写样式的时候直接写span标签的样式即可
此处的active-class="active"代表点击哪个按钮哪个按钮高亮
此时我们详细看一下router文件夹下的index.js
//引入vue
import Vue from \'vue\'
//引入路由import VueRouter from \'vue-router\'
//把路由挂载到vue上Vue.use(VueRouter)
//引入我各个路由对应的component组件import Home from \'pages/Home\'
import Map from \'components/Map\'
import Home1 from \'components/Home1\'
import Find from \'components/Find\'
import Mine from \'components/Mine\'
import Type from \'components/Type\'
import Publish from \'components/Publish\'
import Search from \'components/Search\'
import Success from \'components/Success\'
import Need from \'components/Need\'
import Position0 from \'components/Position\'
import Like from \'components/scrollX/Like\'
import S1 from \'components/scrollX/1\'
import S2 from \'components/scrollX/2\'
import Listall from \'components/mine/Listall\'
import Listone from \'components/mine/Listone\'
import Listchange from \'components/mine/Listchange\'
const routes = [
{
//path是路由的路径path:\'/\',
//redirect代表重定向,因为当前路径\'/\'并没有对应的组件,所以需要重定向到其他路由页面
redirect:\'/ho\'
},
{
path: \'/ho\',
redirect:\'/ho/home\',
//当不需要重定向的时候,需要component写上当前路由对应的组件页面component: Home,
//有些路由还有子路由,需要用到children[],
//当访问的时候,<router-link>的属性to的时候要把所有的父组件都带上
//如:此处的/ho/home/likechildren: [
{
name: \'home\',
path: \'home\',
component: Home1,
redirect:\'/ho/home/like\',
children :[
{
name: \'like\',
path: \'like\',
component: Like
},
{
name: \'2000001\',
path: \'2000001\',
component: S1
},
{
name: \'2000022\',
path: \'2000022\',
component: S2
}
]
},
{
name: \'type\',
path: \'type\',
component: Type
},
{
name: \'need\',
path: \'need\',
component: Need
},
{
name: \'find\',
path: \'find\',
component: Find
},
{
name: \'mine\',
path: \'mine\',
component: Mine
}
]
},
{
name: \'search\',
path: \'/search\',
component: Search
},
{
name: \'position\',
path: \'/position\',
component: Position0
},
{
name: \'publish\',
path: \'/publish\',
component: Publish
},
{
name: \'success\',
path: \'/success\',
component: Success
},
{
name: \'listall\',
path: \'/listall\',
component: Listall
},
{
name: \'listone\',
path: \'/listone\',
component: Listone
},
{
name: \'listchange\',
path: \'/listchange\',
component: Listchange
},
{
name: \'map\',
path: \'/map\',
component: Map
}
]
const router = new VueRouter({
//此处设置mode为history,即不带#号,在处理数据的时候会更方便一些
mode: \'history\',
//ES6的写法,即routes:routes的简写,当key和value名字一样时,可简写routes
})
//把你创建的路由暴露出去,使得main.js可以将其引入并使用export default router
引申1:
路由有一个meta属性
可以给该路由挂载一些信息
设置一些自己title、显示隐藏、左右滑动的方向之类的
meta: { title: "HelloWorld", 要现实的title
show: true 设置导航隐藏显示
}
使用的时候:this.$route.meta.show
<Bottom v-show="this.$route.meta.show"></Bottom>
引申2:
动态路由
{ path:"/two/:id",
component:Two,
}
获取数据this.$route.params.动态路由的名字
此处是:this.$route.params.id
引申3:
路由别名alias
{     path: \'/a\',     component: A,     alias: \'/b\' }
//  /a 的别名是 /b
//意味着,当用户访问 /b 时,URL 会保持为 /b,但是路由匹配则为 /a
//就像用户访问 /a 一样
//简单的说就是给 /a 起了一个外号叫做 /b ,但是本质上还是 /a
2、react-router @4用法
a、大概目录
不需要像vue那样麻烦的用到一个单独的文件夹,react只需要在index.js中部分配置即可
b、准备工作
yarn add react-router-dom
index.js中
import { BrowserRouter } from \'react-router-dom\'
<BrowserRouter>
<App />
</BrowserRouter>
这样App内部组件都可以使用
c、使用
同样是上面那个例子,写法不一样:
import React, { Component } from \'react\';import {Bar} from \'components/common/ibar\'
import ShopDetail from \'pages/shopDetail/shopDetail\'
import NodeDe from \'pages/noteDetail/NodeDe\'
import Car from \'pages/car/Car\'
import Admin from \'pages/admin/Admin\'
import Admin1 from \'pages/admin/Admin1\'
import GoodDetail from \'pages/goodDetail/goodDetail\'
import { Route, Switch, Redirect } from \'react-router-dom\'
class App extends Component {
render() {
return (
//这里为什么要用Switch包裹呢?
//<Switch>是唯一的因为它仅仅只会渲染一个路径
<Switch>
//Redirect代表重定向,如果加了exact代表精准匹配
<Redirect exact from="/" to="/home"></Redirect>
<Route path=\'/home\' component={Bar}/>
<Route path="/shopDetail/:shopId/:shopName/:shopNote/:shopPic" component={ShopDetail} />
<Route path=\'/noteDetail/:noteId\' component={NodeDe} />
<Route path=\'/goodDetail/:goodId/:shopId\' component={GoodDetail} />
<Route path=\'/car\' component={Car} />
<Route path=\'/admin\' component={Admin}/>
<Route path=\'/admin1/:phone\' component={Admin1}/>
</Switch>
);
}
}
export default App;
当点击哪里需要跳转的时候,在标签外面包一个<Link to= \' 路由路径 \' ></Link>
动态路由/xxx/:xx,如上图
引申1:HashRouter和BrowserRouter
它们两个是路由的基本,就像盖房子必须有地基一样
我们需要将它们包裹在最外层,我们只要选择其一就可以了。
现在讲它们的不同:
HashRouter
如果你使用过react-router2或3或者vue-router
你经常会发现一个现象就是url中会有个#,
例如localhost:3000/#
HashRouter就会出现这种情况,它是通过hash值来对路由进行控制
如果你使用HashRouter,你的路由就会默认有这个#。
BrowserRouter
很多情况下我们则不是这种情况,我们不需要这个#
因为它看起来很怪,这时我们就需要用到BrowserRouter。
引申2:Link和NavLink的选择
两者都是可以控制路由跳转的,不同点是NavLink的api更多,更加满足你的需求。
Link:主要api是to,to可以接受string或者一个object,来控制url
NavLink:它可以为当前选中的路由设置类名、样式以及回调函数等。
引申3:withRouter高阶组件
//引入withRouter
import {Link,
withRouter
} from \'react-router-dom\'
//代码结尾暴露的时候,把要暴露的组件包裹在withRouter中,做成一个高阶组件,
//将react-router 的 history,location,match 三个对象传入
//将组件包一层withRouter,就可以拿到需要的路由信息
//获取路由信息的时候this.props.location
withRouter(GoodDetail)withRouter(connect(mapState, mapDispatch)(GoodDetail))
3、什么是包容性路由?什么是排他性路由?
包容性路由:
如果路由有/food 和 /food/1 那么在匹配 /food 的时候两个都能匹配到
react就是典型的包容性路由
所以react需要引入Switch标签,把路由变成排他性的
排他性路由:
只要匹配成功一个就不会往下面进行匹配了
vue是排他性路由
匹配从上到下,匹配到一个即止
4、react路由有两个重要的属性:children和render,这两个有什么区别?
a、Route 可以写行间render,render={()=>{return }}
b、也可以写行间children={()={return }}
c、不管匹配与否children都执行
d、render优先级比children高
5、react如何在路由里面定义一个子路由?
a、引入在需要子路由的页面引入Route标签
<Route path=\'/noteDetail/home\' component={NodeDe} />
b、举个
以上是 react router @4 和 vue路由 详解(全) 的全部内容, 来源链接: utcz.com/z/384439.html


