Vue 使用Lodop进行标签(条码)打印

一、使用到的插件:vue-barcode(vue条形码插件),Lodop打印控件(我这里使用windows64版,所以以此进行举例说明。)。
详述:前者(指vue-barcode)针对在前端界面上观察到的效果。
使用:
1.安装:npm install @xkeshi/vue-barcode vue
2.main.js中引入注册组件:import VueBarcode from \'@xkeshi/vue-barcode\'; Vue.component(\'barcode\', VueBarcode);
3.相应界面中使用:(注:这里仅提供简单使用的流程,具体有关barcode使用中的其它属性的设置请自行百度查询。)
<barcode
value="1234567890"
:options="{ widht:100,height:50, background:\'rgba(255,255,255,.0)\'}"
style="width: 100%;height: 100%;">
</barcode>
后者(指Lodop)在打印时需要使用到其专用的打印代码。(决定最终打印出来的条码)
说明:
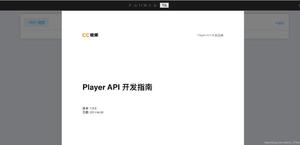
1.Lodop官网:http://www.lodop.net/
2.Lodop官网下载中心(下载自己所需的相应版本):http://www.lodop.net/download.html
3.Lodop在线样例:http://www.lodop.net/LodopDemo.html
使用:
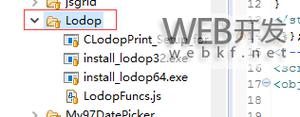
1.先去下载中心下载Lodop打印组件发行包。如图所示:
2.项目中创建LodopFun.js文件,该文件内容就是上一步中下载的安装包中的LodopFuncs.js文件。
注意:记得在该文件的最后 导出getLodop函数。例如:export default getLodop
3.在相应文件引入getLodop。如:import getLodop from \'@/utils/LodopFuncs\';
4.代码举例:
<div class="dayinID" v-for="(item,index) in goodCodeList" :key="item.uid" :id="\'dayinID_\'+index">
<div class="row5"> 品牌:{{ item.brandName }}</div>
<div class="row1">{{ item.goodName }}</div>
<div class="row2">{{ item.skuName }}</div>
<div class="row3">
价格:¥{{ item.price }}
</div>
<div class="row4">
<barcode
:value="item.code"
:options="{ widht:100,height:50, background:\'rgba(255,255,255,.0)\'}"
style="width: 100%;height: 100%;">
</barcode>
</div>
<div class="tiaoma-space"></div>
</div>
<el-button class="btnClass" type="primary" plain @click="toClick" >打印</el-button>
style:
.dayinID{width: 237px;height: 155px;border: 1px solid #000;margin-top: 10px;}
.row5,.row1{ width: 100%;height: 20px;line-height: 20px;color: #000;text-align: center;font-weight: 700;font-size: 0.8rem;}
.row2{ width: 100%;height: 25px;text-align: center;color: #000;font-weight: 700;font-size: 1.2rem;line-height: 25px;}
.row3{ width: 100%;height: 20px;line-height: 20px;text-align: center;font-size: 0.8rem;}
.row4{ width: 100%;height: 60px;}
.tiaoma-space{width: 100%;height: 10px;margin-top: 20px;}
data中:
goodCodeList:[
{uid: 1, brandName: \'苹果\',goodName: \'iphone13 Pro\',code: \'11112222333\',price: 900, unit:\'个\', skuName: \'8+526G\', num: 3},
],
methods中:
toClick() { // 商品条码
const LODOP = getLodop()
if (LODOP) {
this.goodCodeList.forEach( (item,index) => { // 这里为打印的商品条码
// 反之,则以商品的数量作为打印份数依据。(注:这里是该商品条码打印的份数)
for( let i=0; i<item.num; i++) {
var strBodyStyle = \'<style>\'
strBodyStyle += \'.dayinID { width: 200px;height: 155px;border: 1px solid #000;margin-top: 10px;}\'
strBodyStyle += \'.row5,.row1 { width: 100%;height: 20px;line-height: 20px;color: #000;text-align: center;font-weight: 700;font-size: 0.8rem;}\'
// strBodyStyle += \'.row1>span { width: 50%;height: 100%;text-align: center;line-height: 30px;color: #000;float: left;}\'
strBodyStyle += \'.row2 { width: 100%;height: 25px;text-align: center;color: #000;font-weight: 700;font-size: 1.2rem;line-height: 25px;}\'
strBodyStyle += \'.row3 { width: 100%;height: 20px;line-height: 20px;text-align: center;font-size: 0.8rem;}\'
strBodyStyle += \'.row4 { width: 100%;height: 60px;}\'
strBodyStyle += \'.tiaoma-space{width: 100%;height: 10px;margin-top: 20px;}\'
strBodyStyle += \'</style>\' // 设置打印样式
var strFormHtml = strBodyStyle + \'<body>\' + document.getElementById(\'dayinID_\'+index).innerHTML + \'</body>\' // 获取打印内容
LODOP.PRINT_INIT(\'\') //初始化
LODOP.SET_PRINT_PAGESIZE(3, 790, 0, \'\') // 设置横向(四个参数:打印方向及纸张类型(0(或其它):打印方向由操作者自行选择或按打印机缺省设置;1:纵向打印,固定纸张;2:横向打印,固定纸张;3:纵向打印,宽度固定,高度按打印内容的高度自适应。),纸张宽(mm),纸张高(mm),纸张名(必须纸张宽等于零时本参数才有效。))
LODOP.ADD_PRINT_HTM(\'1%\', \'1%\', \'98%\', \'98%\', strFormHtml) // 设置打印内容
// LODOP.ADD_PRINT_TEXT(\'1%\', \'1%\', \'98%\', \'98%\', strFormHtml) // 设置打印内容
LODOP.ADD_PRINT_BARCODE( 85, 55, 230, 60, \'128Auto\', item.code); // 条码(六个参数:Top,Left,Width,Height,BarCodeType,BarCodeValue)
// LODOP.SET_PREVIEW_WINDOW(2, 0, 0, 800, 600, \'\') // 设置预览窗口模式和大小
// LODOP.PREVIEW() // 预览。(这里可以进行预览,注意这里打开时记得把下面的print先注释。)另外,这里的预览只显示单个商品 打印出来的效果即该预览效果。
LODOP.PRINT(); // 打印
}
});
}
},
5.注:
1.我这里的代码没有默认设置打印机相关的代码。有需要的可自行去百度。当然我这里没有的情况下就需要去控制面板的设备和打印机中 将相应的打印机设为默认。
2.在设备和打印机中 右键打印机(设为默认的打印机)--->>>打印首选项。在其中设置自己相应的信息。
例如(我的:)
END:如果最后打印出来的出现样式不一致问题,请自己参考官网案例调整自己的代码。
如果打印机出现连续走纸情况,首先可以先进行虚拟打印(举例:可使用windows的导出为 WPS PDF查看),要是没问题则就需要对打印机进行相关设置,即上面两个图中的信息。
最后,以上信息仅供参考,具体问题具体分析。最终还是需要自己进行相应的分析。
以上是 Vue 使用Lodop进行标签(条码)打印 的全部内容, 来源链接: utcz.com/z/378238.html