vue-cli4脚手架搭建二

vue-cli4" title="vue-cli4">vue-cli4脚手架搭建一
vue create vue3
cd vue3
yarn serve
http://localhost:8080/#/
main.js文件
import Vue from 'vue'import App from './App.vue'
import router from './router'
Vue.config.productionTip = false
new Vue({
router,
render: h => h(App)
}).$mount('#app')
render: h => h(App) 这一行是ES6箭头函数的写法,等价于下面的写法
render:function(h){
    return h(App);
}

将App作为参数传入h函数


App.vue是组件的入口
<template><div id="app">
<div id="nav">
<router-link to="/">Home</router-link> |
<router-link to="/about">About</router-link>
</div>
<router-view/>
</div>
</template>
<router-view/>是组件内容显示的区域,一个组件只能有一个<router-view/>标签
router-link 是组件路由,按路径的不同,显示不同的组件
路由切换:上个组件销毁和新组件加载
由main.js文件中 import router from './router' 引入路由
main.js是项目的入口,也在main.js中完成Vue的初始化
new Vue({ router,
render: h => h(App)
}).$mount('#app')
运行项目看到的区域是App.vue的<router-view/>标签,App.vue是组件的入口,也可以说是视图的入口;点击不同的路径,会更换<router-view/>标签的内容
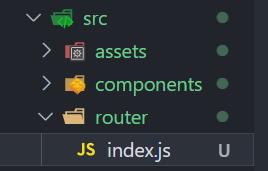
router/index.js
vue的中视图就是组件,路由由三部分组成:
url
名称:可以有,也可以没有
组件
这里的Home,是引入的Home.vue组件 import Home from '../views/Home.vue'
/about的组件是懒加载
const routes = [{
path: '/',
name: 'Home',
component: Home
},
{
path: '/about',
name: 'About',
// route level code-splitting
// this generates a separate chunk (about.[hash].js) for this route
// which is lazy-loaded when the route is visited.
component: () => import(/* webpackChunkName: "about" */ '../views/About.vue')
}
]
const router = new VueRouter({
routes
})
export default router
先看About.vue组件,这是一个非常简单的组件
<template><div class="about">
<h1>This is an about page</h1>
</div>
</template>
几个html dom元素,然后最外层是template标签;一个template标签内放一个div标签,就可形成一个组件。也是常见的html模板语法。
复杂一些的组件,会有更多的dom元素,为了更好地渲染这些dom元素,还会加入css样式/JS脚本,比如Home.vue组件
将一个组件命名并供外部使用
<template> <div> ... </div> </template>
<script>export default {
name: 'HelloWorld',
}
</script>
在另外一个组件中使用时,需要import
<scripts>// @ is an alias to /src
import HelloWorld from '@/components/HelloWorld.vue'
</scripts>
CSS样式全局导入
<template><div id="app">
<!-- 路由展示-->
<div></div>打
<!-- 底部导行-->
<div></div>
</div>
</template>
<style>
/*全局导入CSS样式*/
@import "./assets/css/index.css";
</style>
CSS样式私有导入,仅当前组件生效
<style scoped>@import "./assets/css/index.css";
</style>
路由样式
router/index.js
const router = new VueRouter({ linkActiveClass:'active',
routes
})
然后定义一个全局的样式
<style>.active {
color:rebeccapurple;
}
</style>
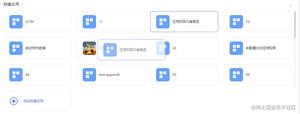
动态样式
<template><div class="home">
<img alt="Vue logo" src="../assets/logo.png">
<div class="index-category">
<!--key指定唯一键,实时渲染-->
<div class="category" v-for="(list,i) in lists":key="i">
<i class="iconfont" :style="{background:list.color}"></i>
<label>{{list.title}}</label>
</div>
</div>
</div>
</template>
<script>
export default {
name: 'Home',
data(){
return {
lists:[
{title:'标题1',color:'#ffbb78'},
{title:'标题2',color:'#b5cf6b'},
{title:'标题3',color:'#4169e1'}
]
}
}
}
</script>
vue中的花括号
<label>{{list.title}}</label> 标签中写上双花括号,里面是js表达式
v-for="(list,i) in lists":key="i" 对于 vue指令,不需要写花括号,直接就可以写js表达式
:style="{background:list.color}" 这里写上一个花括号,是因为里面是一个键值对 对象,js中定义键值的对的方式,比如 let data = {name:"zhangsan"},js对象本身带一个花括号
图片轮播
<template><div class="home">
<img alt="Vue logo" src="../assets/logo.png">
<div class="index-category">
<div class="banner">
<img alt="gu zi" v-for="(v,i) in imgArr":key="i" :src="v" v-show="imageShowSeq==i">
<div class="banner-circle">
<ul>
<li v-for="(v,i) in imgArr":key="i" :class="imageShowSeq==i?'selected':''" ></li>
</ul>
</div>
</div>
</div>
</div>
</template>
<script>
export default {
name: 'LunBo',
data(){
return {
imageShowSeq:1,
imageTimer:null,
imgArr:[
require('../assets/img/gu.png') ,
require('../assets/img/jian.png') ,
require('../assets/img/monitor.png')
]
}
},
methods:{
play(){
this.imageTimer = setInterval(this.autoPlay,2000);
},
autoPlay(){
this.imageShowSeq++
if (this.imageShowSeq == this.imgArr.length){
this.imageShowSeq = 0;
}
}
},
mounted:function () { //页面加载后,自动执行函数
this.play();
},
destroyed:function () {
clearInterval(this.imageTimer);
}
}
</script>
以上是 vue-cli4脚手架搭建二 的全部内容, 来源链接: utcz.com/z/377514.html