window 10 vscode+vue配置

一、下载并安装vscode
下载地址:https://code.visualstudio.com/
安装略...
二、配置vscode
1.设置中文,Ctrl+Alt+P 选择Configure Display language,选择中文简体安装后重启vscode
2.vscode终端由默认的powershell改为git bash
文件 -> 首选项 -> 配置,搜索shell:Window,点击在setting.json中编辑
新增配置,注意前提是已经先装好Git,按Ctrl+~ 切换即可调出终端。如果还是powershell删除再重新添加终端
"terminal.integrated.shell.windows": "C:\\Program Files\\Git\\bin\\bash.exe"三、vscode配置vue插件相关
1、安装插件
| 插件名 | 参考版本 | 备注 |
|---|---|---|
| Vetur | 0.23.0 | |
| Prettier | 3.20.0 | 代码格式化 |
| ESLint | 2.1.1 |
2、vscode vue设置格式化,文件 -> 首选项-> 设置 -> 在setting.json中编译,复制以下代码,保存即可。
功能:按Ctrl+s后自动格式化代码,用'代替",带换行没有分号等等
{ "workbench.colorTheme": "One Monokai",
"editor.fontLigatures": true,
"eslint.validate": [
"javascript",
"javascriptreact",
{
"language": "html",
"autoFix": true
},
{
"language": "vue",
"autoFix": true
}
],
"[javascript]": {
"editor.defaultFormatter": "vscode.typescript-language-features"
},
"files.exclude": {
"node_modules/": true
},
"editor.quickSuggestions": {
"other": true,
"comments": true,
"strings": true
},
"editor.detectIndentation": false,
"editor.tabSize": 2,
"editor.formatOnSave": true,
"eslint.autoFixOnSave": true,
"prettier.semi": true,
"prettier.singleQuote": true,
"javascript.format.insertSpaceBeforeFunctionParenthesis": true,
"vetur.format.defaultFormatter.html": "js-beautify-html",
"vetur.format.defaultFormatter.js": "vscode-typescript",
"vetur.format.defaultFormatterOptions": {
"js-beautify-html": {
"wrap_attributes": "force-aligned"
}
},
"stylusSupremacy.insertColons": false, // 是否插入冒号
"stylusSupremacy.insertSemicolons": false, // 是否插入分好
"stylusSupremacy.insertBraces": false, // 是否插入大括号
"stylusSupremacy.insertNewLineAroundImports": false, // import之后是否换行
"stylusSupremacy.insertNewLineAroundBlocks": false,
"diffEditor.ignoreTrimWhitespace": false, // 两个选择器中是否换行
"window.zoomLevel": 0, // 两个选择器中是否换行
/** Easy Sass 插件 **/
"easysass.formats": [
{
"format": "expanded", // 没有缩进的、扩展的css代码
"extension": ".css"
}
],
"easysass.targetDir": "./css/",
"[vue]": {
"editor.defaultFormatter": "octref.vetur"
},
"editor.codeActionsOnSave": {
"source.fixAll.eslint": true
}, // 自定义css输出文件路径
"powermode.enabled": true,
"powermode.presets": "flames",
"[jsonc]": {
"editor.defaultFormatter": "vscode.json-language-features"
},
"[html]": {
"editor.defaultFormatter": "vscode.html-language-features"
},
"workbench.iconTheme": "vscode-icons"
}
四、安装nodejs
下载地址:https://nodejs.org/en/
安装完成后检查nodejs的版本:node -v
在磁盘找创建一个文件夹用来专门存放后面需要用的npm包缓存,如 D:\nodejs下分别创建cache和global文件夹
npm配置缓存全局缓存(在cmd命令下执行)
npm config set prefix "D:\nodejs\global"npm config set cache "D:\nodejs\cache"
设置国内镜像,加速npm包
npm config set registry=http://registry.npm.taobao.org更新npm包
npm -vnpm install npm -g
系统环境变量Path加入global路径,如 D:\nodejs\global
先安装cnpm,安装完成后cnpm -v查看是否安装成功,可能需要重启系统
npm install express -gnpm install -g cnpm --registry=https://registry.npm.taobao.org
安装vue-cli 3.0的版本,安装完成后在global文件可以看到对应的包
cnpm install -g @vue/cli然后记得重启下电脑。
五、常见问题解决
1.npm run的时候出现报错:Module build failed (from ./node_modules/sass-loader/lib/loader.js):
问题原因是node-sass没安装好,需要重新安装,安装过程中有一步要从github.com下载东西,国内有时候github打不开,需要梯子!!
npm install node-sass --registry=https://registry.npm.taobao.org2.npm run的时候出现报错:SKIPPING OPTIONAL DEPENDENCY: fsevents@1.2.9 (node_modules\fsevents)
重新安装一下再试试npm run dev
npm install fsevents --registry=https://registry.npm.taobao.orgnpm install fsevents@1.2.9 --registry=https://registry.npm.taobao.org
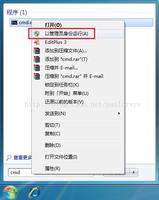
3.vscode不显示npm脚本
右键项目文件夹,勾选截图
以上是 window 10 vscode+vue配置 的全部内容, 来源链接: utcz.com/z/375367.html