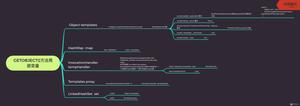
【手把手系列之】实现一个简易版vue2

说明
本文主要教大家一步一步实现一个简易的vue2" title="vue2">vue2,下一篇将会教大家实现vue3
实现的功能点:
- 利用snabbdom实现虚拟dom与patch等(vue的虚拟dom也是参考snabbdom的)
- 数据双向绑定(包括data, computed, watch)
- 实现绑定methods,以改变数据状态
- 实现定义组件
- 实现jsx,即我们可以写jsx代码来替代前面的写render函数
项目目录结构与vue2源码一致,通过本项目的学习,你也能对vue的具体实现有一个较全面的了解。相信当你去阅读vue源码时会更得心应手。
通过本文的学习,你可以了解
- 如何实现一个mvvm
- 如何把jsx代码转为虚拟dom,虚拟dom的结构是怎样的
- vue是如何实现计算属性,监听器等
- Vue组件是如何工作的
- 帮你理解vue的源码,并实现一个vue
- ……等等
下面我们就手把手实现一个vue2吧
代码已上传到 https://github.com/aoping/vue2-snabbdom
大家可以根据commit来看是如何一步一步实现vue2的(注意从下到上)
一、搭建项目
本节目标是用搭建项目的大概结构,我们用parcel打包我们的应用,入口是index.html
项目结构如下:
package.json 这个没什么好解释的
{ "name": "snabbdom-demo",
"version": "1.0.0",
"description": "",
"main": "index.html",
"scripts": {
"start": "parcel index.html --open",
"build": "parcel build index.html"
},
"dependencies": {
"snabbdom": "0.7.3"
},
"devDependencies": {
"@babel/core": "7.2.0",
"parcel-bundler": "^1.6.1"
},
"keywords": []
}
index.html 这个也不解释
<!DOCTYPE html><html>
<head>
<title>Parcel Sandbox</title>
<meta charset="UTF-8" />
</head>
<body>
<div ></div>
<script src="src/index.js">
</script>
</body>
</html>
index.js
console.log('sss')现在通过npm start就可以启动项目了
这样我们就完成了第一步
二、snabbdom实现render
在第一步的基础上修改index.js
实现的功能:
- 把data代理到Vue实例上,即我们可以通过this.title来访问data里的title
- 把title渲染到页面上
- 实现监听click事件,打印log
import { h, init } from 'snabbdom'// init 方法用来创建 patch 函数
// 注意这里要require这些包,才能监听点击事件等
const patch = init([
require('snabbdom/modules/class').default, // makes it easy to toggle classes
require('snabbdom/modules/props').default, // for setting properties on DOM elements
require('snabbdom/modules/style').default, // handles styling on elements with support for animations
require('snabbdom/modules/eventlisteners').default, // attaches event listeners
])
function someFn() {
console.log("got clicked");
}
// // 两秒之后重渲染
// setTimeout(() => {
// // 数据变更,产出新的 VNode
// const nextVnode = MyComponent({ title: 'next' })
// // 通过对比新旧 VNode,高效的渲染真实 DOM
// patch(prevVnode, nextVnode)
// }, 2000)
function Vue(options) {
debugger
this._init(options)
}
Vue.prototype._s = function (text) {
return this[text]
}
Vue.prototype._init = function(options){
this.$options = options
initData(this)
this.$mount(this.$options.el)
}
function initData(vm) {
let data = vm._data = vm.$options.data
const keys = Object.keys(data)
let i = keys.length
while (i--) {
const key = keys[i]
proxy(vm, `_data`, key)
}
}
function noop () {}
const sharedPropertyDefinition = {
enumerable: true,
configurable: true,
get: noop,
set: noop
}
function proxy (target, sourceKey, key) {
sharedPropertyDefinition.get = function proxyGetter () {
return this[sourceKey][key]
}
sharedPropertyDefinition.set = function proxySetter (val) {
this[sourceKey][key] = val
}
Object.defineProperty(target, key, sharedPropertyDefinition)
}
Vue.prototype.$mount =function (el) {
const vnode = this.$options.render.call(this)
debugger
patch(document.querySelector(el), vnode)
}
var vm = new Vue({
el: '#app',
data: {
title: 'prev',
},
render() {
return h('button', {on: {click: someFn}}, this.title);
}
})
执行npm start结果如下
三、调整一下目录
这节的目的就是把我们的目录调整的跟vue源码一致,方便我们以后阅读vue源码能一一对应上
修改后的index.js, 是不是跟vue一模一样
import Vue from './src/platforms/web/entry-runtime-with-compiler'var vm = new Vue({
el: '#app',
data: {
title: 'prev',
},
render(h) {
return h('button', {on: {click: this.$options.methods.someFn}}, this.title);
},
methods: {
someFn() {
console.log("got clicked");
}
}
})
这里就不贴全部的代码了,大家可以reset到chroe: 调整目录这个commit
四、优化:把methods绑定到Vue实例上
这节的目的是把methods绑定到Vue实例上,这样我们就能直接通过this.someFn来访问方法了,而不用像上一节通过this.$options.methods.someFn
改动如下:
五、实现双向绑定
先讲讲整个原理:
观察data的每个属性
observe(data)observe实现
data的每个key都有一个dep,这个是用来收集依赖,即watcher的(后面会介绍)
这里主要是给key设置了getter、setter,当我们获取key的时候就把watcher加入到dep里,当我们给key赋值时就通知dep执行依赖
Dep.target是用来保存目前是在哪个watcher里的
import Dep from "./dep";export function observe(data) {
if (!data || typeof data !== 'object') {
return;
}
for (var key in data) {
var dep = new Dep()
let val = data[key]
observe(val)
Object.defineProperty(data, key, {
enumerable: true,
configurable: true,
get() {
console.log('gggg')
if (Dep.target) {
dep.addSub(Dep.target)
}
return val
},
set(newVal) {
if (val === newVal) return;
console.log('sss')
val = newVal
dep.notify(); // 通知所有订阅者
},
})
}
}
// function Observer(key) {
// }
实现Dep
在上一步我们引入了一个Dep, 这个用来收集依赖,保存在subs这个数组里, 这里是简化版,目的是让大家先对这个原理有个了解
export default function Dep() { this.subs = [];
}
Dep.prototype.addSub = function(sub) {
this.subs.push(sub);
}
Dep.prototype.notify = function() {
this.subs.forEach(function(sub) {
sub.update();
});
}
Dep.target = null
渲染组件
当我们渲染组件的时候,我们会new一个watcher,这个我们称之为渲染watcher,后面还会介绍user watcher等
patch过程大家可以先不看,就是利用snabbdom来实现的,这里我们主要关心new Watcher(vm, updateComponent)
import { h } from 'snabbdom'import { noop, } from '../util/index'
import Watcher from '../observer/watcher'
import { patch } from 'web/runtime/patch'
export function mountComponent (vm, el) {
let updateComponent = () => {
const vnode = vm.$options.render.call(vm, h)
if (vm._vnode) {
patch(vm._vnode, vnode)
} else {
patch(document.querySelector(el), vnode)
}
vm._vnode = vnode
}
new Watcher(vm, updateComponent)
}
实现watcher
这个也很简单,需要注意的是new的时候会执行一次
import Dep from './dep'export default function Watcher(vm, cb) {
this.cb = cb;
this.vm = vm;
// 此处为了触发属性的getter,从而在dep添加自己,结合Observer更易理解
this.value = this.get();
}
Watcher.prototype.get = function() {
Dep.target = this
this.cb.call(this.vm)
Dep.target = null
}
Watcher.prototype.update = function() {
return this.get();
}
到这里我们就已经实现了一个简易的vue2
改一改render
为了看效果,我们稍微改一下render
import Vue from './src/platforms/web/entry-runtime'var vm = new Vue({
el: '#app',
data: {
title: 'prev',
num: 1,
deep: {
num: 1
}
},
render(h) {
return h('button', {on: {click: this.someFn}}, this.deep.num);
},
methods: {
someFn() {
this.deep.num++
}
}
})
查看效果
六、实现计算属性
目标:实现计算属性,改变它依赖的data时,计算属性相应的改变
修改new Vue
增加一个计算属性,并渲染它
import Vue from './src/platforms/web/entry-runtime'var vm = new Vue({
el: '#app',
data: {
title: 'prev',
num: 1,
deep: {
num: 1
}
},
computed: {
computedNum() {
return this.num * 10
}
},
render(h) {
return h('button', {on: {click: this.someFn}}, this.computedNum);
},
methods: {
someFn() {
this.num++
}
}
})
// setTimeout(() => {
// vm.deep.num++
// }, 3000)
修改core/instance/state.js
主要改动如下:
export function initState (vm) { ……
+ if (opts.computed) initComputed(vm, opts.computed)
……
}
function initComputed(vm, computed) {
vm._computedWatchers = Object.create(null) // 用于保存计算watcher
for (const key in computed) {
const userDef = computed[key]
const getter = typeof userDef === 'function' ? userDef : userDef.get
vm._computedWatchers[key] = new Watcher(vm, getter, computedWatcherOptions)
defineComputed(vm, key, userDef)
}
}
function defineComputed(target, key, userDef) {
Object.defineProperty(target, key, {
enumerable: true,
configurable: true,
get() {
debugger
const watcher = this._computedWatchers && this._computedWatchers[key]
if (watcher) {
if (watcher.dirty) {
watcher.evaluate()
}
if (Dep.target) {
watcher.depend()
}
return watcher.value
}
},
set: noop,
})
}
这里也是给key设置getter,并用_computedWatchers保存一个计算watcher,当获取key时就执行这个watcher,并把当前的Dep.target加入到key依赖的data的dep里(这里有点绕,在这个例子中就是当执行render(这时新建了一个渲染watcher)的时候会获取this.computedNum,这个是根据this.num计算出来的,所以就会把渲染watcher加入到num的dep里)
改造Dep
let uid = 0export default function Dep() {
this.id = ++uid // uid for batching
this.subs = [];
this.subIds = new Set();
}
Dep.prototype.addSub = function(sub) {
if (!this.subIds.has(sub.id)) {
this.subs.push(sub);
this.subIds.add(sub.id);
}
}
Dep.prototype.depend = function() {
if (Dep.target) {
Dep.target.addDep(this)
}
}
Dep.prototype.notify = function() {
this.subs.forEach(function(sub) {
sub.update();
});
}
Dep.target = null
const targetStack = []
export function pushTarget (target) {
targetStack.push(target)
Dep.target = target
}
export function popTarget () {
targetStack.pop()
Dep.target = targetStack[targetStack.length - 1]
}
这里targetStack是用来保存Dep.target的
改造watcher
import Dep, {pushTarget, popTarget} from './dep'let uid = 0
export default function Watcher(vm, expOrFn, options) {
this.id = ++uid // uid for batching
this.expOrFn = expOrFn;
this.vm = vm;
this.deps = []
this.depIds = new Set();
if (options) {
this.lazy = !!options.lazy
} else {
this.lazy = false
}
this.dirty = this.lazy // 用于渲染时不把计算watcher设置成Dep.target
// 此处为了触发属性的getter,从而在dep添加自己,结合Observer更易理解
this.value = this.lazy ? undefined :this.get();
}
Watcher.prototype.get = function() {
let value;
pushTarget(this)
// if (this.dirty) Dep.target = this
value = this.expOrFn.call(this.vm)
// if (this.dirty) Dep.target = null
popTarget()
return value
}
Watcher.prototype.update = function() {
if (this.lazy) {
this.dirty = true;
} else {
this.get();
}
}
Watcher.prototype.addDep = function(dep) {
const id = dep.id
if (!this.depIds.has(id)) {
this.deps.push(dep)
this.depIds.add(id)
dep.addSub(this)
}
}
Watcher.prototype.evaluate = function() {
this.value = this.get()
this.dirty = false
}
Watcher.prototype.depend = function() {
let i = this.deps.length
while (i--) {
this.deps[i].depend()
}
}
到这里我们就实现了计算属性
七、实现watch
目的:改变num,watchMsg的值也改变
修改render
import Vue from './src/platforms/web/entry-runtime'var vm = new Vue({
el: '#app',
data: {
num: 1,
watchMsg: 'init msg'
},
watch: {
num(newVal, oldVal) {
this.watchMsg = newVal + ' apples'
},
},
render(h) {
return h('button', {on: {click: this.someFn}}, this.watchMsg);
},
methods: {
someFn() {
this.num++
}
}
})
初始化watch
function initWatch(vm, watch) { debugger
for (const key in watch) {
const handler = watch[key]
if (Array.isArray(handler)) {
for (let i = 0; i < handler.length; i++) {
createWatcher(vm, key, handler[i])
}
} else {
createWatcher(vm, key, handler)
}
}
}
function createWatcher (vm, expOrFn, handler, options) {
if (isPlainObject(handler)) {
options = handler
handler = handler.handler
}
if (typeof handler === 'string') {
handler = vm[handler]
}
return vm.$watch(expOrFn, handler, options)
}
export function stateMixin(Vue) {
Vue.prototype.$watch = function (expOrFn, cb, options) {
const vm = this
if (isPlainObject(cb)) {
return createWatcher(vm, expOrFn, cb, options)
}
options = options || {}
options.user = true
const watcher = new Watcher(vm, expOrFn, cb, options)
// return function unwatchFn () {
// watcher.teardown()
// }
}
}
这里主要是new了一个Watcher
改造watcher
import Dep, {pushTarget, popTarget} from './dep'import { parsePath } from '../util/lang'
let uid = 0
export default function Watcher(vm, expOrFn, cb, options) {
this.id = ++uid // uid for batching
this.cb = cb
this.vm = vm;
this.deps = []
this.depIds = new Set();
if (options) {
this.user = !!options.user // user表示是否是用户定义的watcher,即我们在new Vue({watch:{}})里的watch
this.lazy = !!options.lazy
} else {
this.user = this.lazy = false
}
this.dirty = this.lazy // 用于渲染时不把计算watcher设置成Dep.target
this.getter = typeof expOrFn === 'function' ? expOrFn : parsePath(expOrFn);
this.value = this.lazy ? undefined :this.get();
}
Watcher.prototype.get = function() {
let value;
const vm = this.vm
pushTarget(this)
value = this.getter.call(vm, vm)
popTarget()
return value
}
Watcher.prototype.update = function() {
if (this.lazy) {
this.dirty = true;
} else {
this.run();
}
}
Watcher.prototype.addDep = function(dep) {
const id = dep.id
if (!this.depIds.has(id)) {
this.deps.push(dep)
this.depIds.add(id)
dep.addSub(this)
}
}
Watcher.prototype.evaluate = function() {
this.value = this.get()
this.dirty = false
}
Watcher.prototype.depend = function() {
let i = this.deps.length
while (i--) {
this.deps[i].depend()
}
}
Watcher.prototype.run = function() {
const value = this.get()
// 变化时才执行
if (value !== this.value) {
const oldValue = this.value
this.value = value
if (this.user) {
try {
this.cb.call(this.vm, value, oldValue)
} catch (e) {
console.error(`callback for watcher "${this.expression}"`)
}
} else {
this.cb.call(this.vm, value, oldValue)
}
}
}
Watcher.prototype.teardown = function() {
}
八、实现组件系统
到目前为止,我们都不能自定义一个组件,那本节的目的就是实现自定义组件
修改render
这里我们自定义了一个button-counter的组件
import Vue from './src/platforms/web/entry-runtime'Vue.component('button-counter', {
data: function () {
return {
num: 0
}
},
render(h) {
return h('button', {on: {click: this.someFn}}, this.num);
},
methods: {
someFn() {
this.num++
}
}
})
var vm = new Vue({
el: '#app',
data: {
msg: 'hello'
},
render(h) {
return h('div', {}, [
this._c('button-counter'),
h('span', {}, this.msg)
]);
},
})
实现Vue.component
这个api是通过initGlobalAPI(Vue)挂载到Vue上的
实现在core/global-api/assets.js里
import { ASSET_TYPES } from 'shared/constants'import { isPlainObject, } from '../util/index'
export function initAssetRegisters (Vue) {
/**
* Create asset registration methods.
*/
ASSET_TYPES.forEach(type => {
Vue[type] = function (id, definition) {
if (!definition) {
return this.options[type + 's'][id]
} else {
if (type === 'component' && isPlainObject(definition)) {
definition.name = definition.name || id
// 这里组件继承Vue
definition = this.options._base.extend(definition)
}
// TODO:暂时先不实现directive
// if (type === 'directive' && typeof definition === 'function') {
// definition = { bind: definition, update: definition }
// }
this.options[type + 's'][id] = definition
return definition
}
}
})
}
之前我们都是直接渲染根元素,这里我们要考虑怎么渲染一个组件
render组件
其实也是调用组件里的render方法
先拿到构造函数,然后调用render就可以了
import { h } from 'snabbdom'let cachaComp = {}
export function initRender (vm) {
vm._c = (tag, options) => {
var Ctor = vm.constructor.options['components'][tag]
var sub
// 缓存组件,避免已初始化的组件被重新初始化
if (cachaComp[tag]) {
sub = cachaComp[tag]
} else {
sub = cachaComp[tag] = new Ctor(Ctor.options)
}
return Ctor.options.render.call(sub, h)
// const vnode = createComponent(Ctor, data, context, children, tag)
// return vnode
}
}
function createComponent(Ctor) {
}
export function renderMixin (Vue) {
Vue.prototype._render = function () {
const vm = this
const { render, _parentVnode } = vm.$options
vm.$vnode = _parentVnode
let vnode
vnode = render.call(vm, h)
vnode.parent = _parentVnode
return vnode
}
}
九、实现compiler
目标:我们可以直接写jsx,即可以直接写 <button onClick={this.someFn}>{this.num}</button> 而不用像之前那样写个h('button', {on: {click: this.someFn}}, this.num)
修改render
import Vue, { compiler } from './src/platforms/web/entry-runtime-with-compiler'Vue.component('button-counter', {
data: function () {
return {
num: 0
}
},
render(h) {
var button = <button onClick={this.someFn}>{this.num}</button>
return button
// return h('button', {on: {click: this.someFn}}, this.num);
},
methods: {
someFn() {
this.num++
}
}
})
var vm = new Vue({
el: '#app',
data: {
msg: 'hello'
},
render(h) {
return (
<div>
{this._c('button-counter')}
<span>{this.msg}</span>
</div>
)
// return h('div', {}, [
// this._c('button-counter'),
// h('span', {}, this.msg)
// ]);
},
})
这里我们要借助@babel/plugin-transform-react-jsx实现jsx语法
配置@babel/plugin-transform-react-jsx
.babelrc
{ "plugins": [
[
"@babel/plugin-transform-react-jsx",
{
"pragma": "compiler"
}
]
]
}
这里compiler是我们定义的用来处理jsx的函数
实现compiler函数
其实就是返回h('button', {on: {click: this.someFn}}, this.num)
import Vue from './runtime/index'import { h } from 'snabbdom'
export function compiler(tag, attrs) {
let props = attrs || {}
let children = []
let options = {
on: {}
}
for (const k in props) {
if (k[0] === 'o' && k[1] === 'n') {
options.on[k.slice(2).toLocaleLowerCase()] = props[k]
}
}
for (let i = 2; i < arguments.length; i++) {
let vnode = arguments[i]
children.push(vnode)
}
return h(tag, options, children)
}
export default Vue
就是这么简单!!!
完结
本篇文章由一文多发平台ArtiPub自动发布
以上是 【手把手系列之】实现一个简易版vue2 的全部内容, 来源链接: utcz.com/z/375080.html