spring中Bean后置处理器实现总结
本文内容纲要:spring中Bean后置处理器实现总结
BeanPostProcessor接口 bean的后置处理器
实现功能主要是 可以在bean初始化之前和之后做增强处理。
自定义MyBeanProcessor实现BeanPostProcessor接口,重写里面的postProcessBeforeInitialization和postProcessAfterInitialization方法,这里两个方法的主要是用来bean初始化(init方法)之前和之后做增强处理。
| /** * @author liujian * @date 2018/1/9 */ public class MyBeanProcessor implements BeanPostProcessor{ @Override public Object postProcessBeforeInitialization(Object o, String s) throws BeansException { System.out.println("初始化之前做处理"); //bean初始化之前做处理的方法 if(s.equals("test")){ HelloWorld helloWorld=(HelloWorld)o; helloWorld.setMessage("helloworld 处理后"); return helloWorld; } return o; } @Override public Object postProcessAfterInitialization(Object o, String s) throws BeansException { System.out.println("初始化之后做处理"); return o; } } |
将自定义的MyBeanProcessor 添加到spring 容器中
自定义一个实体类HelloWorld,并添加到spring容器中
| /** * @author liujian * @date 2018/1/8 */ public class HelloWorld { private String message; public void getMessage(){ System.out.println("message is "+message); } public void setMessage(String message){ this.message=message; } public HelloWorld() { } //初始化方法 public void init(){ System.out.println("bean 初始化方法"); } //销毁方法 public void destory(){ System.out.println("bean 销毁方法"); } } |
bean.xml文件中 配置helloworld的bean
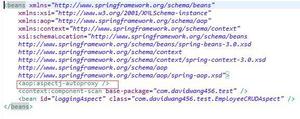
| <?xml version="1.0" encoding="UTF-8"?> <beans xmlns="http://www.springframework.org/schema/beans" xmlns:xsi="http://www.w3.org/2001/XMLSchema-instance" xsi:schemaLocation="http://www.springframework.org/schema/beans http://www.springframework.org/schema/beans/spring-beans.xsd"> <!--通过构造器方法创建bean,定义初始化方法initmethod 和销毁方法--> <bean id="test" class="com.spring.demo.HelloWorld" init-method="init" destroy-method="destory"> <property name="message" value="hello world 1111"></property> </bean> <!--自定义bean的后置处理器--> <bean class="com.spring.demo.MyBeanProcessor"/> </beans> |
测试工具类:
| /** * @author liujian * @date 2018/1/8 */ public class MainApp { public static void main(String []args){ /* ApplicationContext context=new ClassPathXmlApplicationContext("beans.xml"); HelloWorld obj=(HelloWorld) context.getBean("helloWorld"); obj.getMessage(); XmlBeanFactory xmlBeanFactory=new XmlBeanFactory(new ClassPathResource("beans.xml")); HelloWorld obj1=(HelloWorld) xmlBeanFactory.getBean("helloWorld"); obj1.getMessage();*/ AbstractApplicationContext context=new ClassPathXmlApplicationContext("beans.xml"); HelloWorld objA=(HelloWorld) context.getBean("test"); objA.getMessage(); context.registerShutdownHook(); } } |
输出结果:
|
本文内容总结:spring中Bean后置处理器实现总结
原文链接:https://www.cnblogs.com/aima1013/p/8250410.html
以上是 spring中Bean后置处理器实现总结 的全部内容, 来源链接: utcz.com/z/362502.html

