Spring AOP的注解方式实现
本文内容纲要:
- 1.开启AOP的注解配置方式- 2.将定制的类标志为一个切面
- 3.配置通知,指定切入点规则
- 4.重复使用同一个切入点表达式
- 5.额外配置一个returning属性
- 6.异常通知的注解
- 源码
spring也支持注解方式实现AOP,相对于配置文件方式,注解配置更加的轻量级,配置、修改更加方便。
1.开启AOP的注解配置方式
<!-- 开启aop属性注解 --> <aop:aspectj-autoproxy></aop:aspectj-autoproxy>
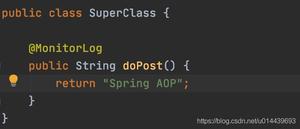
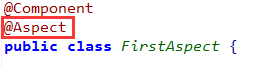
2.将定制的类标志为一个切面
3.配置通知,指定切入点规则
前置通知 @Before
环绕通知 @Around
后置通知 @AfterReturning
异常通知 @AfterThrowing
最终通知 @After
@Before("execution(* cn.tedu.service.*.*(..))") public void before(JoinPoint jp){
Class clz = jp.getTarget().getClass();
Signature signature = jp.getSignature();
String name = signature.getName();
System.out.println("before...["+clz+"]...["+name+"]...");
}
** 通过注解的配置 等价于 配置文件的配置
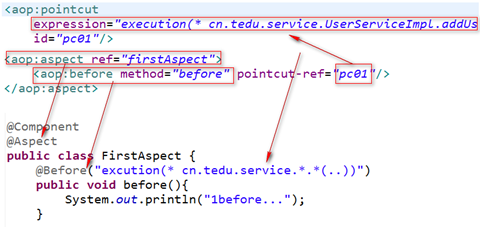
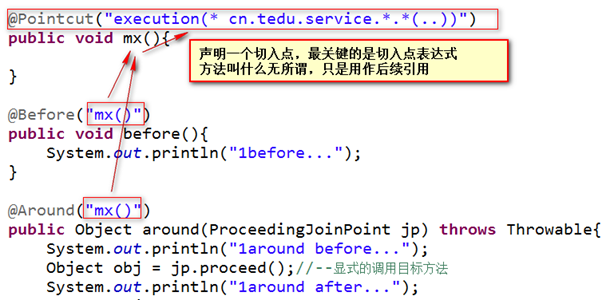
4.重复使用同一个切入点表达式
如果一个切面中多个通知 重复使用同一个切入点表达式,则可以将该切入点表达式单独定义,后续引用。
注意,在当前切面中通过注解定义的切入点只在当前切面中起作用,其他切面看不到。
5.额外配置一个returning属性
在后置通知的注解中,也可以额外配置一个returning属性,来指定一个参数名接受目标方法执行后的返回值。

6.异常通知的注解
在异常通知的注解中,也可以额外配置一个throwing属性,来指定一个参数名接受目标方法抛出的异常对象。

源码
<?xml version="1.0" encoding="UTF-8"?><beans
xmlns="http://www.springframework.org/schema/beans"
xmlns:context="http://www.springframework.org/schema/context"
xmlns:aop="http://www.springframework.org/schema/aop"
xmlns:xsi="http://www.w3.org/2001/XMLSchema-instance"
xsi:schemaLocation="http://www.springframework.org/schema/beans
http://www.springframework.org/schema/beans/spring-beans-3.2.xsd
http://www.springframework.org/schema/context
http://www.springframework.org/schema/context/spring-context-3.2.xsd
http://www.springframework.org/schema/aop
http://www.springframework.org/schema/aop/spring-aop-3.2.xsd "
>
<!-- 注解属性注入 -->
<context:annotation-config></context:annotation-config>
<!-- 注解bean扫描 -->
<context:component-scan base-package="cn.tedu.service,cn.tedu.aop"></context:component-scan>
<!-- 开启aop属性注解 -->
<aop:aspectj-autoproxy></aop:aspectj-autoproxy>
</beans>
package cn.tedu.service;
public interface UserService {
public String addUser(String name);
public void updateUser();
public void deleteUser();
public void query();
}
package cn.tedu.service;
import org.springframework.stereotype.Service;
@Service("userService")
public class UserServiceImple implements UserService {
@Override
public String addUser(String name) {
// int i = 10/0;
System.out.println("增加用户。。");
return "cjj";
}
@Override
public void updateUser() {
System.out.println("修改用户。。");
}
@Override
public void deleteUser() {
System.out.println("删除用户。。");
}
@Override
public void query() {
System.out.println("查询用户。。");
}
}
package cn.tedu.aop;
import org.aspectj.lang.JoinPoint;
import org.aspectj.lang.ProceedingJoinPoint;
import org.aspectj.lang.Signature;
import org.aspectj.lang.annotation.After;
import org.aspectj.lang.annotation.AfterReturning;
import org.aspectj.lang.annotation.AfterThrowing;
import org.aspectj.lang.annotation.Around;
import org.aspectj.lang.annotation.Aspect;
import org.aspectj.lang.annotation.Before;
import org.aspectj.lang.annotation.Pointcut;
import org.springframework.stereotype.Component;
@Component
@Aspect
public class FirstAspect {
@Pointcut("execution(* cn.tedu.service.*.*(..))")
public void ms(){
}
@Before("ms()")
public void before(JoinPoint jp){
Class clz = jp.getTarget().getClass();
Signature signature = jp.getSignature();
String name = signature.getName();
System.out.println("before...["+clz+"]...["+name+"]...");
}
@Around("ms()")
public Object around(ProceedingJoinPoint jp) throws Throwable{
System.out.println("1around before...");
Object obj = jp.proceed();//--显式的调用目标方法
System.out.println("1around after...");
return obj;
}
@AfterReturning(value="ms()",returning="msg")
public void afterReturn(String msg){
System.out.println("1 -- afterReturn..." + msg);
}
@AfterThrowing(value="ms()",throwing="e")
public void aftrThrow(Throwable e){
System.out.println("1 -- afterThrow..." + e.getMessage());
}
@After("ms()")
public void after(){
System.out.println("1 -- after..");
}
}
package cn.tedu.test;
import org.junit.Test;
import org.springframework.context.ApplicationContext;
import org.springframework.context.support.ClassPathXmlApplicationContext;
import cn.tedu.service.UserService;
public class AOPTest {
@Test
public void test01(){
ApplicationContext context = new ClassPathXmlApplicationContext("applicationContext.xml");
UserService userService = (UserService) context.getBean("userService");
userService.addUser("cjj"); // 一个连接点
}
}
本文内容总结:1.开启AOP的注解配置方式,2.将定制的类标志为一个切面,3.配置通知,指定切入点规则,4.重复使用同一个切入点表达式,5.额外配置一个returning属性,6.异常通知的注解,源码,
原文链接:https://www.cnblogs.com/chuijingjing/p/9808842.html
以上是 Spring AOP的注解方式实现 的全部内容, 来源链接: utcz.com/z/296950.html