淘宝一面:“说一下 Spring Boot 自动装配原理呗?”
本文内容纲要:
- 前言- 什么是 SpringBoot" title="SpringBoot">SpringBoot 自动装配?
- SpringBoot 是如何实现自动装配的?
- @EnableAutoConfiguration:实现自动装配的核心注解
- AutoConfigurationImportSelector:加载自动装配类
- 如何实现一个 Starter
- 总结
本文已经收录进 Github 95k+ Star 的Java项目JavaGuide 。JavaGuide项目地址 : https://github.com/Snailclimb/JavaGuide 。
作者:Miki-byte-1024 & Snailclimb
每次问到 Spring Boot, 面试官非常喜欢问这个问题:“讲述一下 SpringBoot 自动装配原理?”。
我觉得我们可以从以下几个方面回答:
- 什么是 SpringBoot 自动装配?
- SpringBoot 是如何实现自动装配的?如何实现按需加载?
- 如何实现一个 Starter?
篇幅问题,这篇文章并没有深入,小伙伴们也可以直接使用 debug 的方式去看看 SpringBoot 自动装配部分的源代码。
前言
使用过 Spring 的小伙伴,一定有被 XML 配置统治的恐惧。即使 Spring 后面引入了基于注解的配置,我们在开启某些 Spring 特性或者引入第三方依赖的时候,还是需要用 XML 或 Java 进行显式配置。
举个例子。没有 Spring Boot 的时候,我们写一个 RestFul Web 服务,还首先需要进行如下配置。
@Configurationpublic class RESTConfiguration
{
@Bean
public View jsonTemplate() {
MappingJackson2JsonView view = new MappingJackson2JsonView();
view.setPrettyPrint(true);
return view;
}
@Bean
public ViewResolver viewResolver() {
return new BeanNameViewResolver();
}
}
spring-servlet.xml
<beans xmlns="http://www.springframework.org/schema/beans" xmlns:xsi="http://www.w3.org/2001/XMLSchema-instance" xmlns:context="http://www.springframework.org/schema/context"
xmlns:mvc="http://www.springframework.org/schema/mvc"
xsi:schemaLocation="http://www.springframework.org/schema/beans http://www.springframework.org/schema/beans/spring-beans.xsd
http://www.springframework.org/schema/context/ http://www.springframework.org/schema/context/spring-context.xsd
http://www.springframework.org/schema/mvc/ http://www.springframework.org/schema/mvc/spring-mvc.xsd">
<context:component-scan base-package="com.howtodoinjava.demo" />
<mvc:annotation-driven />
<!-- JSON Support -->
<bean name="viewResolver" class="org.springframework.web.servlet.view.BeanNameViewResolver"/>
<bean name="jsonTemplate" class="org.springframework.web.servlet.view.json.MappingJackson2JsonView"/>
</beans>
但是,Spring Boot 项目,我们只需要添加相关依赖,无需配置,通过启动下面的 main 方法即可。
@SpringBootApplicationpublic class DemoApplication {
public static void main(String[] args) {
SpringApplication.run(DemoApplication.class, args);
}
}
并且,我们通过 Spring Boot 的全局配置文件 application.properties或application.yml即可对项目进行设置比如更换端口号,配置 JPA 属性等等。
为什么 Spring Boot 使用起来这么酸爽呢? 这得益于其自动装配。自动装配可以说是 Spring Boot 的核心,那究竟什么是自动装配呢?
什么是 SpringBoot 自动装配?
我们现在提到自动装配的时候,一般会和 Spring Boot 联系在一起。但是,实际上 Spring Framework 早就实现了这个功能。Spring Boot 只是在其基础上,通过 SPI 的方式,做了进一步优化。
SpringBoot 定义了一套接口规范,这套规范规定:SpringBoot 在启动时会扫描外部引用 jar 包中的
META-INF/spring.factories文件,将文件中配置的类型信息加载到 Spring 容器(此处涉及到 JVM 类加载机制与 Spring 的容器知识),并执行类中定义的各种操作。对于外部 jar 来说,只需要按照 SpringBoot 定义的标准,就能将自己的功能装置进 SpringBoot。
没有 Spring Boot 的情况下,如果我们需要引入第三方依赖,需要手动配置,非常麻烦。但是,Spring Boot 中,我们直接引入一个 starter 即可。比如你想要在项目中使用 redis 的话,直接在项目中引入对应的 starter 即可。
<dependency> <groupId>org.springframework.boot</groupId>
<artifactId>spring-boot-starter-data-redis</artifactId>
</dependency>
引入 starter 之后,我们通过少量注解和一些简单的配置就能使用第三方组件提供的功能了。
在我看来,自动装配可以简单理解为:通过注解或者一些简单的配置就能在 Spring Boot 的帮助下实现某块功能。
SpringBoot 是如何实现自动装配的?
我们先看一下 SpringBoot 的核心注解 SpringBootApplication 。
@Target({ElementType.TYPE})@Retention(RetentionPolicy.RUNTIME)
@Documented
@Inherited
<1.>@SpringBootConfiguration
<2.>@ComponentScan
<3.>@EnableAutoConfiguration
public @interface SpringBootApplication {
}
@Target({ElementType.TYPE})
@Retention(RetentionPolicy.RUNTIME)
@Documented
@Configuration //实际上它也是一个配置类
public @interface SpringBootConfiguration {
}
大概可以把 @SpringBootApplication看作是 @Configuration、@EnableAutoConfiguration、@ComponentScan 注解的集合。根据 SpringBoot 官网,这三个注解的作用分别是:
@EnableAutoConfiguration:启用 SpringBoot 的自动配置机制@Configuration:允许在上下文中注册额外的 bean 或导入其他配置类@ComponentScan: 扫描被@Component(@Service,@Controller)注解的 bean,注解默认会扫描启动类所在的包下所有的类 ,可以自定义不扫描某些 bean。如下图所示,容器中将排除TypeExcludeFilter和AutoConfigurationExcludeFilter。
@EnableAutoConfiguration 是实现自动装配的重要注解,我们以这个注解入手。
@EnableAutoConfiguration:实现自动装配的核心注解
EnableAutoConfiguration 只是一个简单地注解,自动装配核心功能的实现实际是通过 AutoConfigurationImportSelector类。
@Target({ElementType.TYPE})@Retention(RetentionPolicy.RUNTIME)
@Documented
@Inherited
@AutoConfigurationPackage //作用:将main包下的所欲组件注册到容器中
@Import({AutoConfigurationImportSelector.class}) //加载自动装配类 xxxAutoconfiguration
public @interface EnableAutoConfiguration {
String ENABLED_OVERRIDE_PROPERTY = "spring.boot.enableautoconfiguration";
Class<?>[] exclude() default {};
String[] excludeName() default {};
}
我们现在重点分析下AutoConfigurationImportSelector 类到底做了什么?
AutoConfigurationImportSelector:加载自动装配类
AutoConfigurationImportSelector类的继承体系如下:
public class AutoConfigurationImportSelector implements DeferredImportSelector, BeanClassLoaderAware, ResourceLoaderAware, BeanFactoryAware, EnvironmentAware, Ordered {}
public interface DeferredImportSelector extends ImportSelector {
}
public interface ImportSelector {
String[] selectImports(AnnotationMetadata var1);
}
可以看出,AutoConfigurationImportSelector 类实现了 ImportSelector接口,也就实现了这个接口中的 selectImports方法,该方法主要用于获取所有符合条件的类的全限定类名,这些类需要被加载到 IoC 容器中。
private static final String[] NO_IMPORTS = new String[0];public String[] selectImports(AnnotationMetadata annotationMetadata) {
// <1>.判断自动装配开关是否打开
if (!this.isEnabled(annotationMetadata)) {
return NO_IMPORTS;
} else {
//<2>.获取所有需要装配的bean
AutoConfigurationMetadata autoConfigurationMetadata = AutoConfigurationMetadataLoader.loadMetadata(this.beanClassLoader);
AutoConfigurationImportSelector.AutoConfigurationEntry autoConfigurationEntry = this.getAutoConfigurationEntry(autoConfigurationMetadata, annotationMetadata);
return StringUtils.toStringArray(autoConfigurationEntry.getConfigurations());
}
}
这里我们需要重点关注一下getAutoConfigurationEntry()方法,这个方法主要负责加载自动配置类的。
该方法调用链如下:
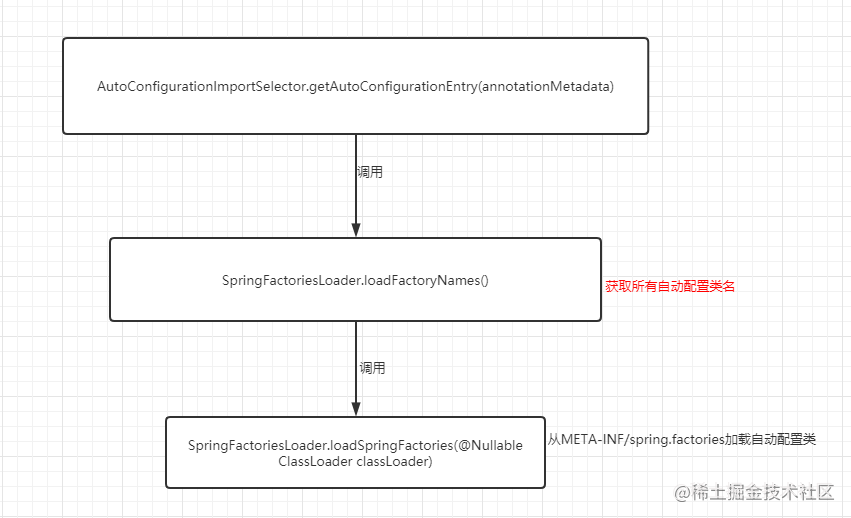
现在我们结合getAutoConfigurationEntry()的源码来详细分析一下:
private static final AutoConfigurationEntry EMPTY_ENTRY = new AutoConfigurationEntry();AutoConfigurationEntry getAutoConfigurationEntry(AutoConfigurationMetadata autoConfigurationMetadata, AnnotationMetadata annotationMetadata) {
//<1>.
if (!this.isEnabled(annotationMetadata)) {
return EMPTY_ENTRY;
} else {
//<2>.
AnnotationAttributes attributes = this.getAttributes(annotationMetadata);
//<3>.
List<String> configurations = this.getCandidateConfigurations(annotationMetadata, attributes);
//<4>.
configurations = this.removeDuplicates(configurations);
Set<String> exclusions = this.getExclusions(annotationMetadata, attributes);
this.checkExcludedClasses(configurations, exclusions);
configurations.removeAll(exclusions);
configurations = this.filter(configurations, autoConfigurationMetadata);
this.fireAutoConfigurationImportEvents(configurations, exclusions);
return new AutoConfigurationImportSelector.AutoConfigurationEntry(configurations, exclusions);
}
}
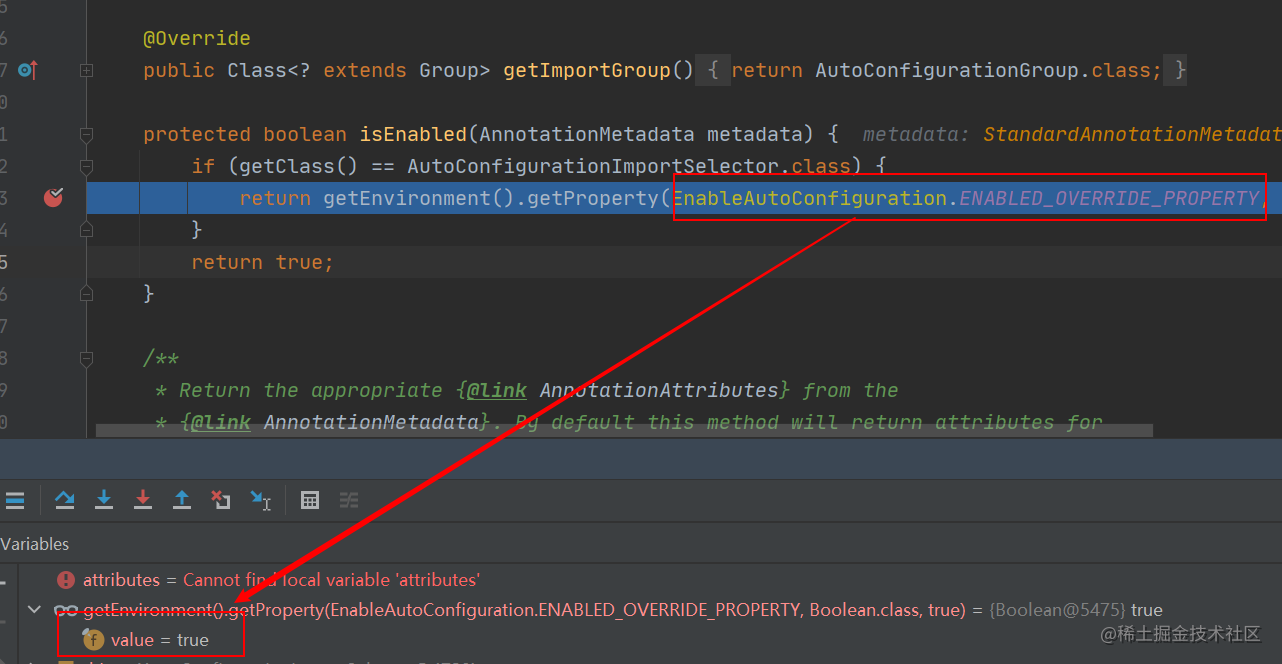
第 1 步:
判断自动装配开关是否打开。默认spring.boot.enableautoconfiguration=true,可在 application.properties 或 application.yml 中设置
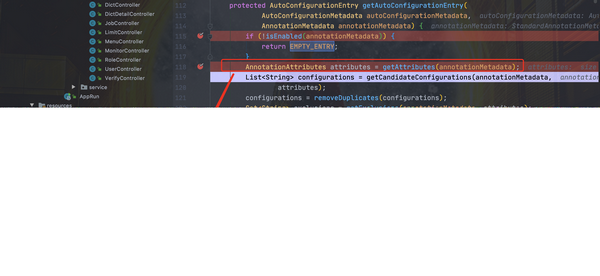
第 2 步 :
用于获取EnableAutoConfiguration注解中的 exclude 和 excludeName。
第 3 步
获取需要自动装配的所有配置类,读取META-INF/spring.factories
spring-boot/spring-boot-project/spring-boot-autoconfigure/src/main/resources/META-INF/spring.factories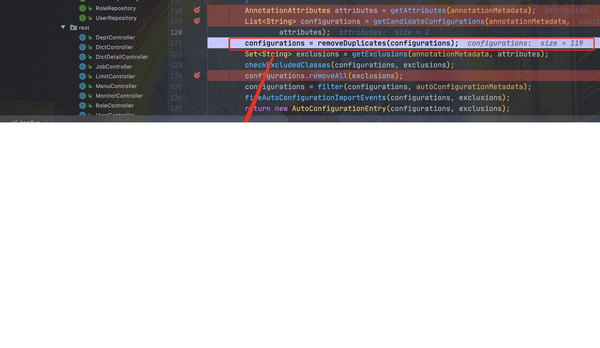
从下图可以看到这个文件的配置内容都被我们读取到了。XXXAutoConfiguration的作用就是按需加载组件。
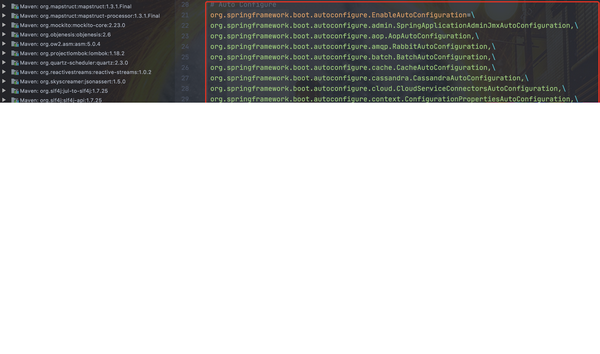
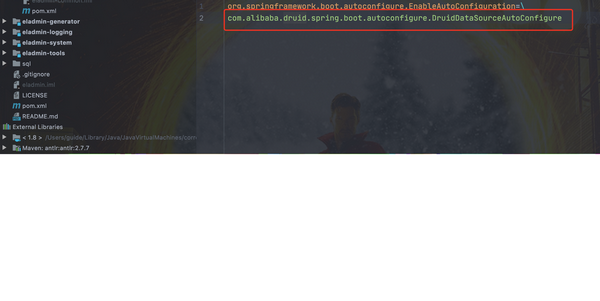
不光是这个依赖下的META-INF/spring.factories被读取到,所有 Spring Boot Starter 下的META-INF/spring.factories都会被读取到。
所以,你可以清楚滴看到, druid 数据库连接池的 Spring Boot Starter 就创建了META-INF/spring.factories文件。
如果,我们自己要创建一个 Spring Boot Starter,这一步是必不可少的。
第 4 步 :
到这里可能面试官会问你:“spring.factories中这么多配置,每次启动都要全部加载么?”。
很明显,这是不现实的。我们 debug 到后面你会发现,configurations 的值变小了。
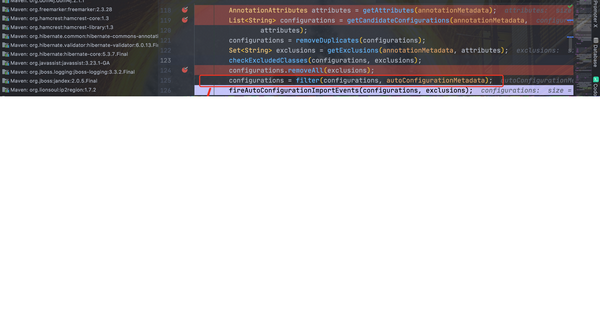
因为,这一步有经历了一遍筛选,@ConditionalOnXXX 中的所有条件都满足,该类才会生效。
@Configuration// 检查相关的类:RabbitTemplate 和 Channel是否存在
// 存在才会加载
@ConditionalOnClass({ RabbitTemplate.class, Channel.class })
@EnableConfigurationProperties(RabbitProperties.class)
@Import(RabbitAnnotationDrivenConfiguration.class)
public class RabbitAutoConfiguration {
}
有兴趣的童鞋可以详细了解下 Spring Boot 提供的条件注解
@ConditionalOnBean:当容器里有指定 Bean 的条件下@ConditionalOnMissingBean:当容器里没有指定 Bean 的情况下@ConditionalOnSingleCandidate:当指定 Bean 在容器中只有一个,或者虽然有多个但是指定首选 Bean@ConditionalOnClass:当类路径下有指定类的条件下@ConditionalOnMissingClass:当类路径下没有指定类的条件下@ConditionalOnProperty:指定的属性是否有指定的值@ConditionalOnResource:类路径是否有指定的值@ConditionalOnExpression:基于 SpEL 表达式作为判断条件@ConditionalOnJava:基于 Java 版本作为判断条件@ConditionalOnJndi:在 JNDI 存在的条件下差在指定的位置@ConditionalOnNotWebApplication:当前项目不是 Web 项目的条件下@ConditionalOnWebApplication:当前项目是 Web 项 目的条件下
如何实现一个 Starter
光说不练假把式,现在就来撸一个 starter,实现自定义线程池
第一步,创建threadpool-spring-boot-starter工程

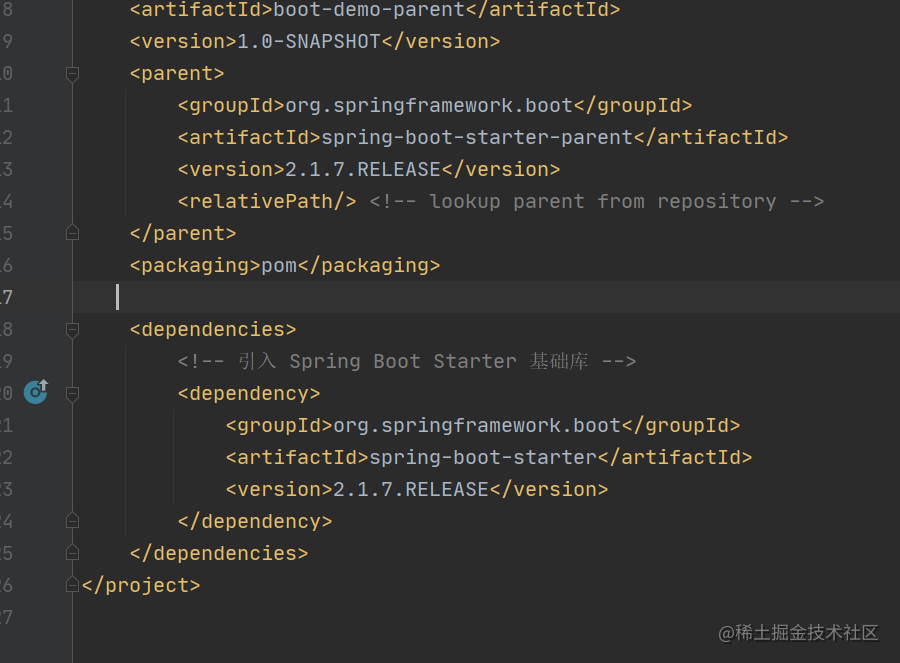
第二步,引入 Spring Boot 相关依赖
第三步,创建ThreadPoolAutoConfiguration

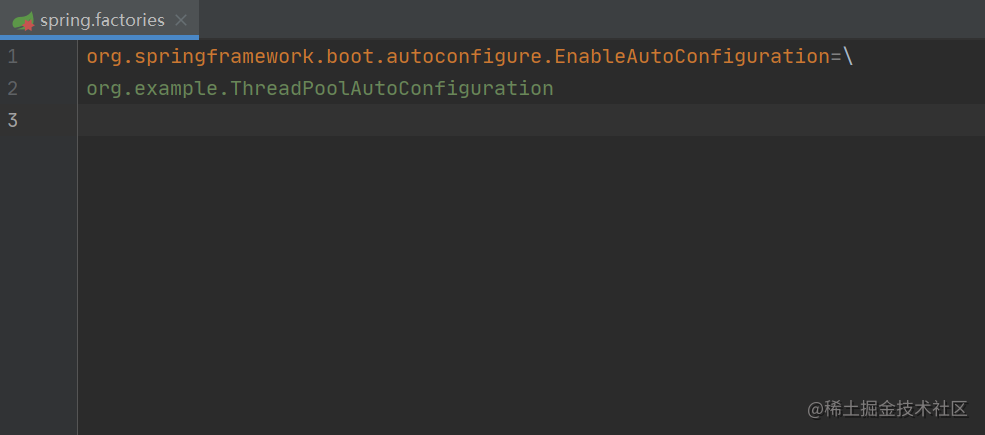
第四步,在threadpool-spring-boot-starter工程的 resources 包下创建META-INF/spring.factories文件
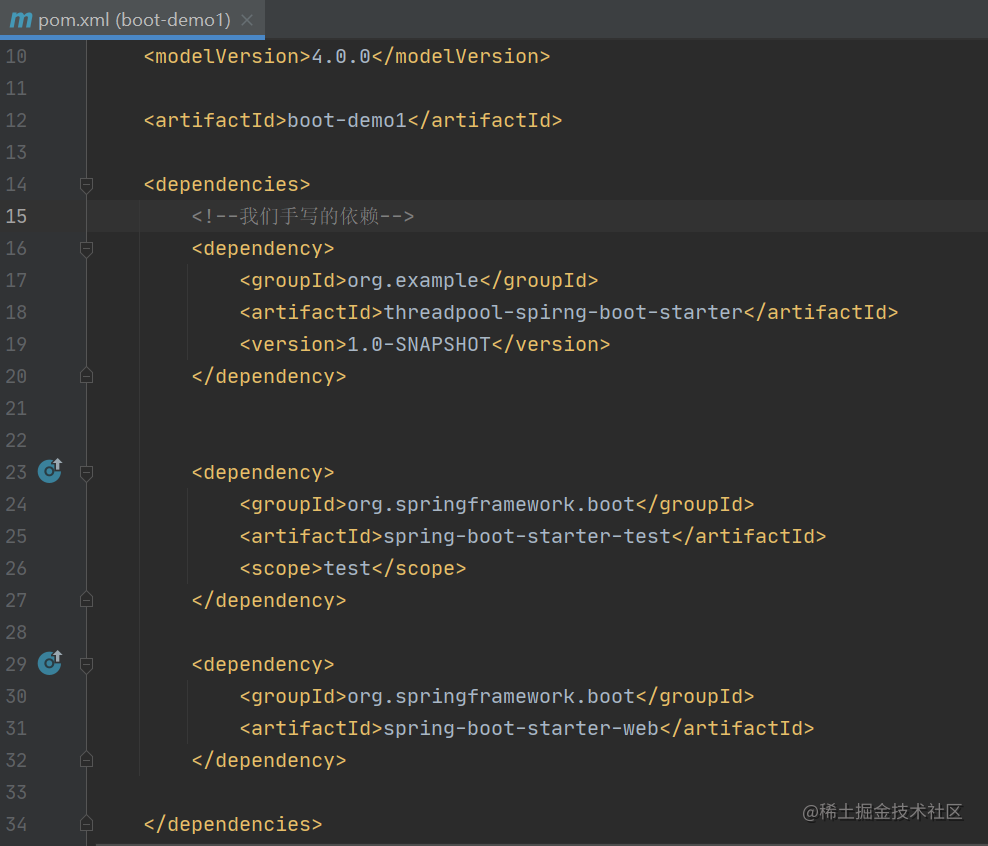
最后新建工程引入threadpool-spring-boot-starter
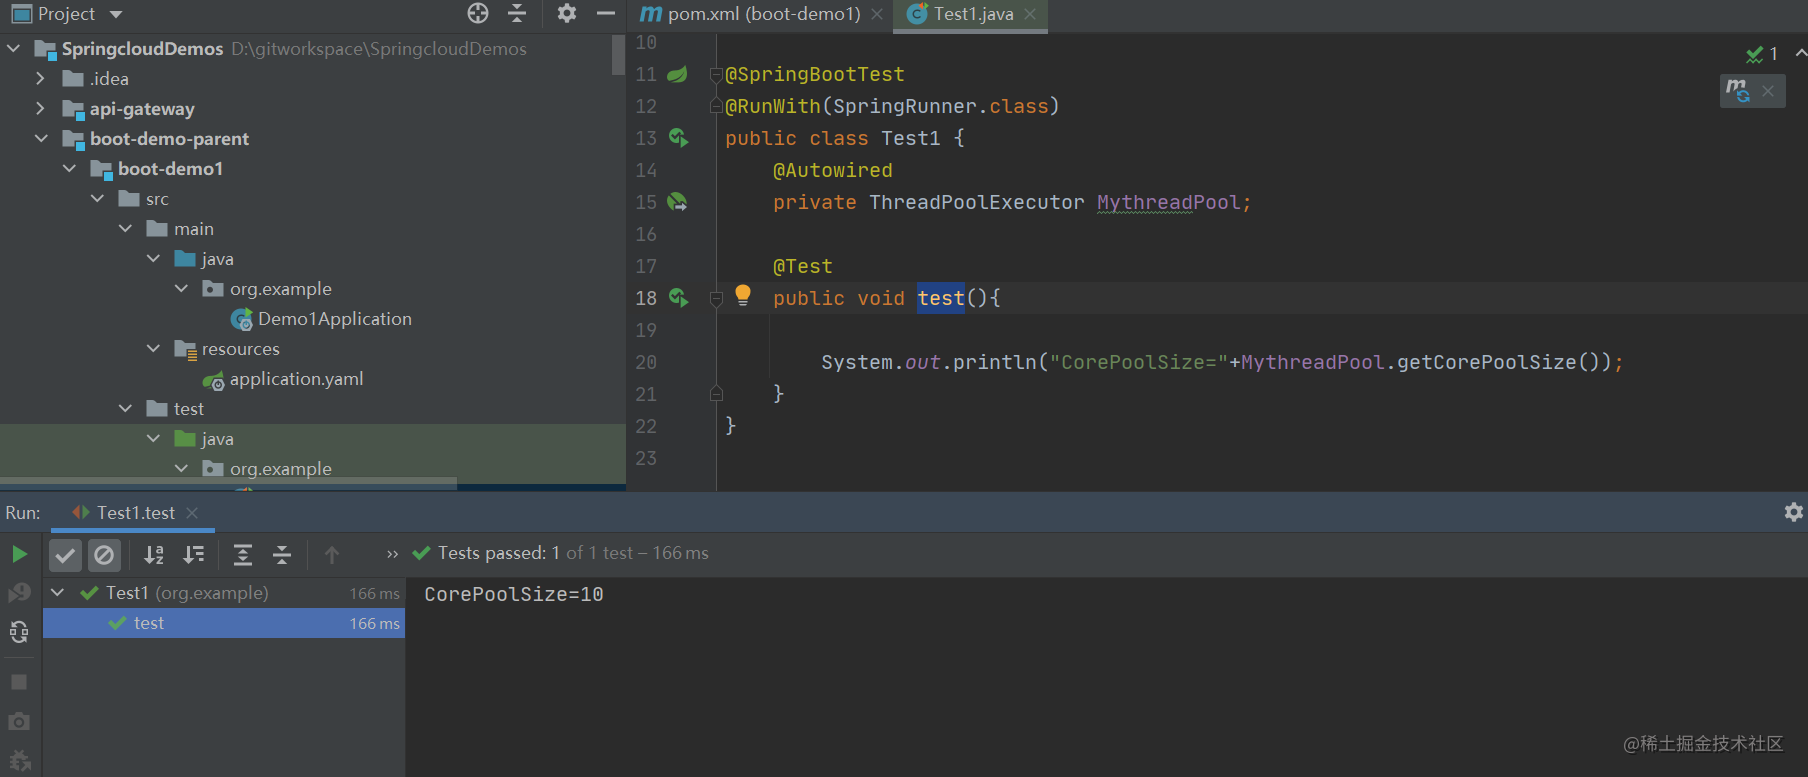
测试通过!!!
总结
Spring Boot 通过@EnableAutoConfiguration开启自动装配,通过 SpringFactoriesLoader 最终加载META-INF/spring.factories中的自动配置类实现自动装配,自动配置类其实就是通过@Conditional按需加载的配置类,想要其生效必须引入spring-boot-starter-xxx包实现起步依赖
本文内容总结:前言,什么是 SpringBoot 自动装配?,SpringBoot 是如何实现自动装配的?,@EnableAutoConfiguration:实现自动装配的核心注解,AutoConfigurationImportSelector:加载自动装配类,如何实现一个 Starter,总结,
原文链接:https://www.cnblogs.com/javaguide/p/springboot-auto-config.html
以上是 淘宝一面:“说一下 Spring Boot 自动装配原理呗?” 的全部内容, 来源链接: utcz.com/z/296068.html


