增强您的 Gruntfile:如何最大限度地利用您的构建配置
如果 Grunt 世界对您来说是新的,那么理想的起点是 Chris Coyier 的优秀文章“ Grunt for People who thinks like Grunt are Weird and Hard ”。 在 Chris 的介绍之后,您将建立自己的 Grunt 项目并体验 Grunt 提供的强大功能。
在本文中,我们不会关注大量 Grunt 插件对您的实际项目代码的作用,而是关注 Grunt 构建过程本身。 我们将为您提供以下方面的实用建议:
- 如何保持你的 Gruntfile 整洁,
- 如何显着缩短您的构建时间,
- 以及如何在构建发生时收到通知。
是时候快速声明一下了:Grunt 只是您可以用来完成任务的众多工具之一。 如果 Gulp 更符合您的风格,那就太好了! 如果在调查了那里的选项后,您仍然想构建自己的工具链,那也没关系! 由于其强大的生态系统和长期的用户群,我们选择在本文中关注 Grunt。
组织你的 Gruntfile
无论您包含大量 Grunt 插件还是必须在 Gruntfile 中编写大量手动任务,它都会很快变得非常笨拙且难以维护。 幸运的是,有相当多的插件专注于这个问题:让你的 Gruntfile 再次整洁。
优化前的 Gruntfile
这是我们的 Gruntfile 在我们对其进行任何优化之前的样子:
module.exports = function(grunt) { grunt.initConfig({
pkg: grunt.file.readJSON('package.json'),
concat: {
dist: {
src: ['src/js/jquery.js','src/js/intro.js', 'src/js/main.js', 'src/js/outro.js'],
dest: 'dist/build.js',
}
},
uglify: {
dist: {
files: {
'dist/build.min.js': ['dist/build.js']
}
}
},
imagemin: {
options: {
cache: false
},
dist: {
files: [{
expand: true,
cwd: 'src/',
src: ['**/*.{png,jpg,gif}'],
dest: 'dist/'
}]
}
}
});
grunt.loadNpmTasks('grunt-contrib-concat');
grunt.loadNpmTasks('grunt-contrib-uglify');
grunt.loadNpmTasks('grunt-contrib-imagemin');
grunt.registerTask('default', ['concat', 'uglify', 'imagemin']);
};
如果现在你说“嘿! 我期待更糟! 这实际上是可维护的!”,您可能是对的。 为简单起见,我们只包含了三个没有太多自定义的插件。 在本文中,使用实际生产的 Gruntfile 构建中等大小的项目需要无限滚动。 所以让我们看看我们能做些什么!
自动加载你的 Grunt 插件
提示:load-grunt-config 包含load-grunt-tasks,所以如果你不想详细了解它的作用而跳过这一块,它不会伤害我的感受。
当你想在你的项目中添加一个新的 Grunt 插件时,你必须将它 项添加到你的 package.json 作为 npm 依赖 文件中,然后在 Gruntfile 中加载它。 对于插件“ grunt-contrib-concat ”,它可能如下所示:
// tell Grunt to load that plugingrunt.loadNpmTasks('grunt-contrib-concat');
如果您现在通过 npm 卸载插件并更新您的 package.json,但忘记更新您的 Gruntfile,您的构建将会中断。 这就是漂亮的插件 load-grunt-tasks 可以提供帮助的地方。
之前,我们必须手动加载 Grunt 插件,如下所示:
grunt.loadNpmTasks('grunt-contrib-concat');grunt.loadNpmTasks('grunt-contrib-uglify');
grunt.loadNpmTasks('grunt-contrib-imagemin');
使用 load-grunt-tasks,您可以将其折叠为以下单行:
require('load-grunt-tasks')(grunt);在需要插件后,它会分析你的 package.json 文件,确定哪些依赖项是 Grunt 插件并自动加载它们。
将 Grunt 配置拆分为不同的文件
load-grunt-tasks 使 您的 Gruntfile 的代码和复杂性略有下降,但是当您配置一个大型应用程序时,它仍然会变成一个非常大的文件。 这就是 load-grunt-config 发挥作用的地方。 load-grunt-config 允许你按任务分解你的 Gruntfile 配置。 此外,它封装了 load-grunt-tasks 及其功能!
然而,重要的是:拆分您的 Gruntfile 可能并不总是适用于所有情况。 如果您的任务之间有很多共享配置(即使用大量 Grunt 模板),您应该小心一点。
使用 load-grunt-config ,您的 Gruntfile.js 将如下所示:
module.exports = function(grunt) { require('load-grunt-config')(grunt);
};
是的,就是这样,整个文件! 现在我们的任务配置在哪里?
创建一个名为 的文件夹 grunt/ 在 Gruntfile 的目录中 。 默认情况下,插件在该文件夹中包含与您要使用的任务名称匹配的文件。 我们的目录结构应该是这样的:
- myproject/-- Gruntfile.js
-- grunt/
--- concat.js
--- uglify.js
--- imagemin.js
现在,让我们将每个任务的任务配置直接放入各自的文件中(您将看到这些文件大多只是从原始 GrunFile 复制并粘贴到新结构中):
grunt/concat.js
module.exports = { dist: {
src: ['src/js/jquery.js', 'src/js/intro.js', 'src/js/main.js', 'src/js/outro.js'],
dest: 'dist/build.js',
}
};
grunt/uglify.js
module.exports = { dist: {
files: {
'dist/build.min.js': ['dist/build.js']
}
}
};
grunt/imagemin.js
module.exports = { options: {
cache: false
},
dist: {
files: [{
expand: true,
cwd: 'src/',
src: ['**/*.{png,jpg,gif}'],
dest: 'dist/'
}]
}
};
If JavaScript configuration blocks are not really your thing, load-grunt-tasks even allows you to use YAML or CoffeeScript syntax instead. Let’s write our final required file in YAML – the “aliases” file. This is a special file that registers task aliases, something we had to do as part of the Gruntfile before via the registerTask function. Here’s ours:
grunt/aliases.yaml
default:- 'concat'
- 'uglify'
- 'imagemin'
And that’s it! Execute the following command in your terminal:
$ grunt
If everything worked, this will now look at the “default” task and run everything in order. Now that we stripped down our main Gruntfile to three lines of code we never need to touch and externalized every task configuration, we’re done here. But man, it’s still pretty slow to get everything built. Let’s see what we can do to improve that.
Minimizing your build time
Even though your web app’s runtime and load time performance is much more business critical than the time required to execute a build, a slow build is still problematic. It will render it difficult to execute automatic builds with plugins like grunt-contrib-watch or after a Git commit fast enough, and introduces a “penalty” to actually run the build – the faster the build time, the more agile your workflow. If your production build takes longer than 10 minutes to run, you’ll only run the build when you absolutely have to, and you’ll wander off to get coffee while it runs. That’s a productivity killer. We’ve got things to speed up.
Only build files that actually changed: grunt-newer
After an initial build of your site, it’s likely that you’ll have only touched a few files in the project when you get around to building again. Let’s say that in our example, you changed an image in the src/img/ directory – running imagemin to re-optimize images would make sense, but only for that single image – and of course, re-running concat and uglify is just wasting precious CPU cycles.
Of course, you could always run $ grunt imagemin from your terminal instead of $ grunt to only selectively execute a task at hand, but there is a smarter way. It’s called grunt-newer.
Grunt-newer has a local cache in which it stores information about what files have actually changed, and only executes your tasks for the files that did, in fact, change. Let’s take a look on how to activate it.
Remember our aliases.yaml file? Change it from this:
default:- 'concat'
- 'uglify'
- 'imagemin'
to this:
default:- 'newer:concat'
- 'newer:uglify'
- 'newer:imagemin'
Simply prepending “newer:” to any of your tasks pipes your source and destination files through the grunt-newer plugin first, which then determines for what files, if any, the task should run.
Run multiple tasks in parallel: grunt-concurrent
grunt-concurrent is a plugin that becomes really useful when you have plenty of tasks that are independent from each other and consume a lot of time. It utilizes the number of CPUs in your device and executes multiple tasks in parallel.
Best of all, its configuration is super simple. Assuming you use load-grunt-config, create the following new file:
grunt/concurrent.js
module.exports = { first: ['concat'],
second: ['uglify', 'imagemin']
};
We just setup to parallel execution tracks with the names “first” and “second”. The concat task needs to run first, and there’s nothing else to run in the meantime in our example. In our second track, we put both uglify and imagemin, since these two are independent from each other, and both take a considerable amount of time.
This on its own does not do anything yet. We have to change our default task alias to point to the concurrent jobs instead of the direct ones. Here’s the new content of grunt/aliases.yaml:
default:- 'concurrent:first'
- 'concurrent:second'
If you now rerun your grunt build, the concurrent plugin will run the concat task first, and then spawn two threads on two different CPU cores to run both imagemin and uglify in parallel. Yay!
A word of advice though: Chances are that in our basic example, grunt-concurrent will not make your build significantly faster. The reason for this is the overhead created by spawning different instances of Grunt in different threads: In my case, at least +300ms pro spawn.
How much time did it take? time-grunt
Now that we’re optimizing every of our tasks, it would be really helpful to understand how much time every individual task required to execute. Fortunately, there’s a plugin for that as well: time-grunt.
time-grunt is not a classical grunt plugin that you load as npm task, but rather a plugin you include directly, similar to load-grunt-config. We’ll add a require for time-grunt to our Gruntfile, just like we did with load-grunt-config. Our Gruntfile should look like this now:
module.exports = function(grunt) { // measures the time each task takes
require('time-grunt')(grunt);
// load grunt config
require('load-grunt-config')(grunt);
};
And I’m sorry to disappoint, but that’s it – try rerunning Grunt from your Terminal and for every task (and additionally the total build), you should see a nicely formatted info panel on execution time:

Automatic system notifications
Now that you have a heavily optimized Grunt build that executes swiftly, and provided you auto-build it in some way (i.e. by watching files with grunt-contrib-watch, or after commits), wouldn’t it be great if your system could notify you when your fresh build is ready to consume, or when anything bad happened? Meet grunt-notify.
By default, grunt-notify provides automatic notifications for all Grunt errors and warnings using whatever notification system available on your OS: Growl for OS X or Windows, Mountain Lion’s and Mavericks’ Notification Center, and Notify-send. Amazingly, all you need in order to get this functionality is to install the plugin from npm and load it in your Gruntfile (remember, if you’re using grunt-load-config above, this step is automated!).
Here is how it will look like, depending on your operating system:
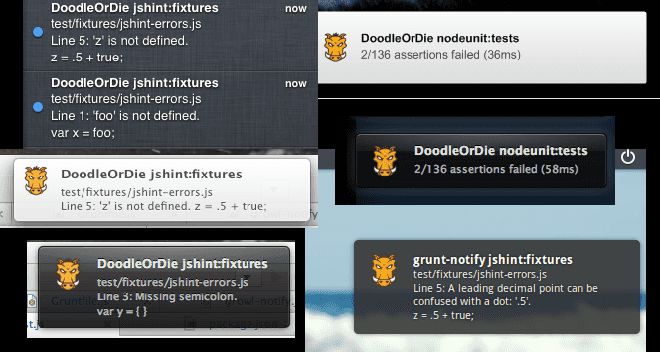
In addition to errors and warnings, let’s configure it so it runs after our last task finished executing. Assuming you are using grunt-load-config to split up tasks across files, this is the file we’ll need:
grunt/notify.js
module.exports = { imagemin: {
options: {
title: 'Build complete', // optional
message: '<%= pkg.name %> build finished successfully.' //required
}
}
}
}
In the first level of our config object, the key has to match the name of the task we want to connect it to. This example will cause the message to appear right after the imagemin task has executed, which is the last one in our build chain.
Wrapping it all up
If you’ve followed from the top, you are now the proud owner of a build process that is super tidy and organized, is blazingly fast due to parallelization and selective processing and notifies you when anything goes wrong.
If you discover another gem that improves Grunt and its plugins further, please do let us know! Until then, happy grunting!
Update (2/14/2014): To grab a copy of the full, working example Grunt project, click here.
以上是 增强您的 Gruntfile:如何最大限度地利用您的构建配置 的全部内容, 来源链接: utcz.com/z/264331.html