nginx部署多前端项目的几种方法
个人总结了3种方法来实现在一台服务器上使用nginx部署多个前端项目的方法。
- 基于域名配置
- 基于端口配置
- 基于location配置
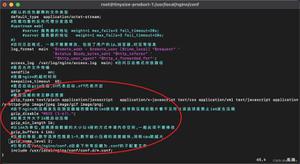
在正式开始之前,我们先来看一下nginx安装的默认配置文件: /etc/nginx/nginx.conf 文件

可以看到图中的:include /usr/nginx/modules/*.conf,这句话的作用就是可以在nginx启动加载所有 /usr/nginx/modules/ 目录下的 *.conf 文件。 所以,平时我们为了方便管理,可以在此目录下面定义自己的 xx.conf 文件即可。但是注意,一定要以.conf 结尾。
介绍完毕,下面我们先来说一下最常用,也是许多公司线上使用的方式。
基于域名配置
基于域名配置,前提是先配置好了域名解析。比如说你自己买了一个域名:www.fly.com。 然后你在后台配置了2个它的二级域名: a.fly.com、 b.fly.com。
配置文件如下:
配置 a.fly.com 的配置文件:
vim /usr/nginx/modules/a.conf
server {
listen 80;
server_name a.fly.com;
location / {
root /data/web-a/dist;
index index.html;
}
}
配置 b.fly.com 的配置文件:
vim /usr/nginx/modules/b.conf
server {
listen 80;
server_name b.fly.com;
location / {
root /data/web-b/dist;
index index.html;
}
}
这种方式的好处是,主机只要开放80端口即可。然后访问的话直接访问二级域名就可以访问。
基于端口配置
配置文件如下:
配置 a.fly.com 的配置文件:
vim /usr/nginx/modules/a.conf
server {
listen 8000;
location / {
root /data/web-a/dist;
index index.html;
}
}
# nginx 80端口配置 (监听a二级域名)
server {
listen 80;
server_name a.fly.com;
location / {
proxy_pass http://localhost:8000; #转发
}
}
配置 b.fly.com 的配置文件:
vim /usr/nginx/modules/b.conf
server {
listen 8001;
location / {
root /data/web-b/dist;
index index.html;
}
}
# nginx 80端口配置 (监听b二级域名)
server {
listen 80;
server_name b.fly.com;
location / {
proxy_pass http://localhost:8001; #转发
}
}
可以看到,这种方式一共启动了4个server,而且配置远不如第一种简单,所以不推荐。
基于location配置
配置文件如下:
配置 a.fly.com 的配置文件:
vim /usr/nginx/modules/ab.conf
server {
listen 80;
location / {
root /data/web-a/dist;
index index.html;
}
location /web-b {
alias /data/web-b/dist;
index index.html;
}
}
注意: 这种方式配置的话,location / 目录是root,其他的要使用alias。
可以看到,这种方式的好处就是我们只有一个server,而且我们也不需要配置二级域名。并且前端项目里要配置二级目录
react 配置请参考:https://blog.csdn.net/mollerlala/article/details/96427751
vue 配置请参考:https://blog.csdn.net/weixin_33868027/article/details/92139392
到此这篇关于nginx部署多前端项目的几种方法的文章就介绍到这了,更多相关nginx部署多前端项目内容请搜索以前的文章或继续浏览下面的相关文章希望大家以后多多支持!
以上是 nginx部署多前端项目的几种方法 的全部内容, 来源链接: utcz.com/p/253315.html