SpringBoot QQ邮箱发送邮件实例代码
SpringBoot整合邮件任务(QQ邮箱发送)
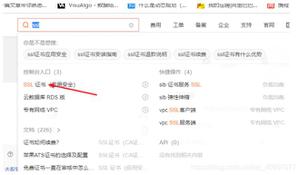
1.获取QQ邮箱授权码

2.导入邮箱发送依赖启动器
使用定制邮件模板的方法实现通用邮件发送,Thymeleaf构建邮件模板需要一起导入依赖。
<!-- Mail --><groupId>org.springframework.boot</groupId>
<artifactId>spring-boot-starter-mail</artifactId>
</dependency>
<!-- thymeleaf模板依赖 -->
<dependency>
<groupId>org.springframework.boot</groupId>
<artifactId>spring-boot-starter-thymeleaf</artifactId>
</dependency>
3.配置文件yml添加邮件服务配置
# Spring配置spring:
mail:
host: smtp.qq.com
username: ********@qq.com
# password是第一步QQ邮箱开通的smtp服务后得到的客户端授权码
password: ******************
default-encoding: UTF-8
properties:
mail:
smtp:
auth: true
starttls:
enable: true
required: true
#thymeleaf模板引擎配置太简单,就不贴出来了
4.编写接口IMailService
public interface IMailService { void sendHtmlMailThymeLeaf(String mailFrom, String mailFromNick, String mailTo, String cc, String subject, String content);
}
5.编写实现MailServiceImpl
@Servicepublic class MailServiceImpl implements IMailService {
/**
* JavaMailSender是Spring Boot在MailSenderPropertiesConfiguration 类中配直好的,该类在 Mail
* 自动配置类 MailSenderAutoConfiguration 中导入 因此这里注入 JavaMailSender 就可以使用了
*/
@Autowired
private JavaMailSender mailSender;
@Override
public void sendHtmlMailThymeLeaf(String mailFrom, String mailFromNick, String mailTo, String cc, String subject, String content) {
MimeMessage mimeMessage = mailSender.createMimeMessage();
try {
MimeMessageHelper mimeMessageHelper = new MimeMessageHelper(mimeMessage, true);
mimeMessageHelper.setFrom(new InternetAddress(mailFromNick + " <" + mailFrom + ">"));
// 设置多个收件人
String[] toAddress = mailTo.split(",");
mimeMessageHelper.setTo(toAddress);
if (!StringUtils.isEmpty(cc)) {
mimeMessageHelper.setCc(cc);
}
mimeMessageHelper.setSubject(subject);
// 第二个参数为true表示邮件正文是html格式的,默认是false
mimeMessageHelper.setText(content, true);
mailSender.send(mimeMessage);
} catch (MessagingException e) {
System.out.println(e);
}
}
}
6.Controller调用
// 发件人要跟yml配置文件里填写的邮箱一致String mailFrom = "******@qq.com";
// 收件人
String mailTo = "******@qq.com,******@qq.com";
// 抄送(可为空)
String cc = "******@qq.com";
// 注入mailService
@Autowired
private IMailService mailService;
// 注入TemplateEngine
@Autowired
TemplateEngine templateEngine;
@RequestMapping("/other/test")//请求路径
@ResponseBody
public void testMail() {
//注意1:这里我是查询对应的内容,使用富文本编辑器存储html标签的内容
Strategy strategy = strategyService.selectStrategyByStrategyId(Long.valueOf(1));
Context context = new Context(); // 导包是org.thymeleaf.context
//注意2:获取发送的内容传入thymeleaf模板中
context.setVariable("content", strategy.getStrategyContent());
String content = templateEngine.process("mailTemplate.html", context);
//System.out.println(content);
mailService.sendHtmlMailThymeLeaf(mailFrom, "定义发件人名字", mailTo, cc, "定义邮件标题", content);
System.out.println("邮件发送成功");
}
7.thymeleaf模板 mailTemplate.html
<!DOCTYPE html><html lang="en" xmlns:th="http://www.thymeleaf.org">
<head>
<meta charset="UTF-8">
<title>邮件发送</title>
</head>
<body>
<!--使用富文本框包含HTML标签 使用 th:utext标签 会解析html,显示相应的效果-->
<div th:utext="${content}">Some escaped text</div>
</body>
</html>
总结
到此这篇关于SpringBoot QQ邮箱发送邮件实例代码的文章就介绍到这了,更多相关SpringBoot 邮箱发信内容请搜索以前的文章或继续浏览下面的相关文章希望大家以后多多支持!
以上是 SpringBoot QQ邮箱发送邮件实例代码 的全部内容, 来源链接: utcz.com/p/251951.html