MyBatis-Ext快速入门实战
最近在工作中,接触到了一个MyBatis扩展工具包MyBatis-Ext,可以说很大程度上减轻了使用mybatis时的工作量,本文就和大家来分享一下这个轻量的扩展工具。
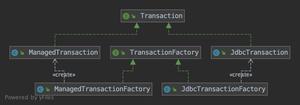
MyBatis-Ext是MyBatis的增强扩展,和我们平常用的Mybatis-plus非常类似,简化了MyBatis对单表增删改查的操作,提供通用的增删改查,支持函数式编程,支持分页查询,支持用户自定义通用方法,并且能够防止SQL注入。集成起来也非常简单,对MyBatis只做增强不做修改。
以spring-boot项目为例,集成非常简单。pom导入核心依赖:
<dependency>
<groupId>tech.wetech.mybatis</groupId>
<artifactId>mybatis-ext-core</artifactId>
<version>1.5.2</version>
</dependency>
<dependency>
<groupId>tech.wetech.mybatis</groupId>
<artifactId>mybatis-ext-spring-boot-starter</artifactId>
<version>1.5.2</version>
</dependency>
需要注意的是,引入mybatis-ext-spring-boot-starter后无需再引入mybatis-spring-boot-starter。
和以往一样,在application.yml配置一下数据源:
spring:
datasource:
username: dater
password: 123456
url: jdbc:mysql://127.0.0.1:3306/datacenter?useUnicode=true&characterEncoding=utf-8
driver-class-name: com.mysql.jdbc.Driver
type: com.alibaba.druid.pool.DruidDataSource
druid:
initial-size: 8
min-idle: 1
max-active: 20
mybatis:
mapper-locations: classpath:mapping/*Mapper.xml
type-aliases-package: com.mybatis.ext.test.mybatisexttest.entity
创建一个映射的实体类:
@Data
@Table(name = "user")
public class User {
@Id
String identifycard;
@Column(name="name")
String name;
String money;
String card;
String phone;
String rate;
}
mybatis-ext使用了Jpa的注解,目前实现了@Table、@Id、@Column、@Transient、@Version。其中@Table、@Id是必须添加的注解,其他非必须添加。使用@Table指定数据表名,@Id指定数据表主键。
查询的Mapper接口继承BaseMapper接口,泛型中填写实体类:
public interface UserMapper extends BaseMapper<User> {
}
我们来看一下能够直接调用的方法,为在BaseMapper中内置了很多通用方法,可以直接调用,非常简便:
int deleteByPrimaryKey(PK id);
<S extends T> int insert(S record);
<S extends T> int insertAll(Iterable<S> record);
<S extends T> int insertSelective(S record);
<S extends T> S selectByPrimaryKey(PK id);
<S extends T> Optional<S> selectByPrimaryKeyWithOptional(ID id);
<S extends T> int updateByPrimaryKey(S record);
<S extends T> int updateByPrimaryKeySelective(S record);
<S extends T> List<S> selectAll();
<S extends T> List<S> selectList(S record);
<S extends T> S selectOne(S record);
<S extends T> S selectOneWithOptional(S record);
boolean existsByPrimaryKey(PK id);
<S extends T> int count(S record);
<S extends T> List<S> selectByExample(Example<S, Object> example);
<S extends T> int countByExample(Example<S, Object> example);
<S extends T> int deleteByExample(Example<S, Object> example);
<S extends T> int updateByExample(@Param("record") S record, @Param("example") Example<S, Object> example);
<S extends T> int updateByExampleSelective(@Param("record") S record, @Param("example") Example<S, Object> example);
来进行一下接口调用的测试,先试一下selectAll方法:
@GetMapping("getUser")
public void getUser(){
List<User> users = userMapper.selectAll();
for (User user : users) {
System.out.println(user.getName()+" "+user.getIdentifycard());
}
}
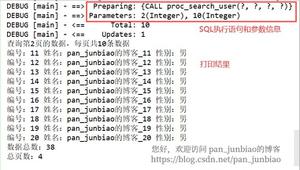
测试结果:
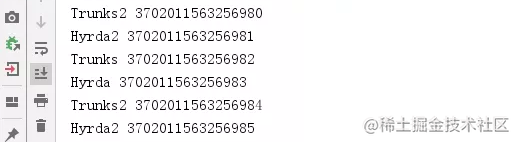
这样,通过调用内置方法就实现了不写sql语句直接进行查询。同样,如果想根据主键进行查询也很简单,直接调用selectByPrimaryKey方法:
@PostMapping("getUserById")
public void getUserByIdentifycard(@RequestBody User user){
User retUser = userMapper.selectByPrimaryKey(user);
System.out.println(retUser.toString());
}
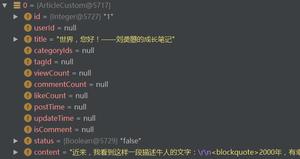
查询结果:
另外,还可以使用Optional包裹查询,修改一下上面主键查询的方法:
@PostMapping("getUserById")
public void getUserByIdentifycard(@RequestBody User user){
User retUser = userMapper.selectByPrimaryKeyWithOptional(user)
.orElseThrow(()->new RuntimeException("未查到数据"));
System.out.println(retUser.toString());
}
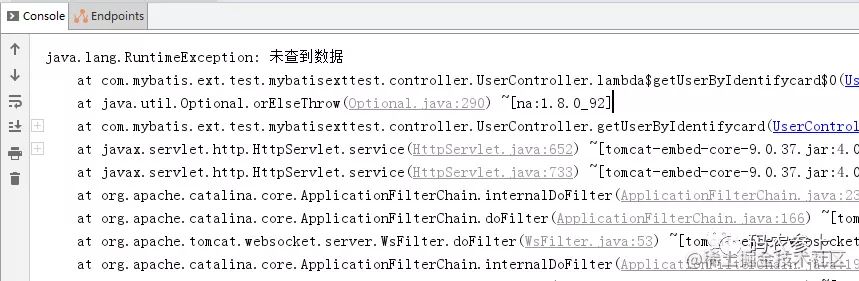
这样,在传入一个不存在的主键时,就会直接抛出自定义的异常:
还有其他很多简单的查询,大家可以根据上面列出api自行测试一下。此外,还可以使用Criteria,使用逻辑组合,进行函数式查询:
@GetMapping("criteriaTest")
public void testCreateCriteria(){
List<User> list = userMapper.createCriteria()
.andEqualTo(User::getName, "Trunks")
.andBetween(User::getMoney, 100, 300)
.andNotLike(User::getRate, "6")
.orIn(User::getCard, Arrays.asList("10"))
.selectList();
list.forEach(user -> {
System.out.println(user.toString());
});
}
查询结果:

也可以使用Example进行查询:
@GetMapping("exampleTest")
public void testExample(){
Example<User> example=Example.of(User.class);
example.createCriteria()
.andEqualTo(User::getName, "Trunks")
.andBetween(User::getMoney, 100, 300)
.andNotLike(User::getRate, "6")
.orIn(User::getCard, Arrays.asList("10"));
example.setDistinct(true);
List<User> list = userMapper.selectByExample(example);
list.forEach(user -> {
System.out.println(user.toString());
});
}
结果与使用Criteria结果相同。另外,还可以将多个条件组合使用:
GetMapping("testExampleWithSub")
public void selectByExampleWithSub(){
try (SqlSession session = sqlSessionFactory.openSession()) {
UserMapper userMapper1 = session.getMapper(UserMapper.class);
Example<User> example=Example.of(User.class);
example.and()
.andEqualTo(User::getName, "Trunks");
example.and()
.andEqualTo(User::getCard,"10");
example.and()
.andLessThanOrEqualTo(User::getRate,300);
Criteria<User> criteria=new Criteria<>();
criteria.andIsNotNull(User::getPhone);
example.and(criteria);
List<User> list = userMapper1.selectByExample(example);
list.forEach(user -> {
System.out.println(user.toString());
});
}
}
结果:

除了上面介绍的这些功能与基础的sql增删改查外,MyBatis-Ext还实现了很多其他功能,例如排序和分页,并且支持自定义通用接口方法等等,大家可以在使用中通过实践继续探索一下。
最后
到此这篇关于MyBatis-Ext快速入门实战的文章就介绍到这了,更多相关MyBatis-Ext 入门内容请搜索以前的文章或继续浏览下面的相关文章希望大家以后多多支持!
以上是 MyBatis-Ext快速入门实战 的全部内容, 来源链接: utcz.com/p/250086.html