Android本地验证码的生成代码
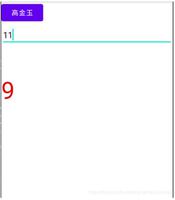
android客户端生成本地验证码主要用来限制用户随意按请求按钮,其实该示例也是来对自定义view的练练手而已,先给出效果图吧
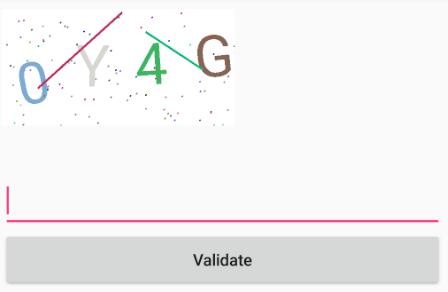
其中可定制:
*干扰线数目
*干扰点数目
*背景颜色
*验证码字体大小及字数
相信以上可以满足一般的需要了吧,不够的话可自行添加,下面就来讲实现的步骤了
继承view,重写构造方法,并初始化所需参数
public class ValidationCode extends View {
private Paint mTextPaint;//文字画笔
private Paint mPointPaint;//干扰点画笔
private Paint mPathPaint;//干扰线画笔
private Paint mBitmapPaint;//Bitmap图画笔
private String mCodeString;//随机验证码
private int mCodeCount;//验证码位数
private float mTextSize;//验证码字符大小
private int mPointNumber;//干扰点数目
private int mLineNumber;//干扰线数目
private int mBackGround;//背景颜色
private float mTextWidth;//验证码字符串的显示宽度
private static int mWidth;//控件的宽度
private static int mHeight;//控件的高度
private static Random mRandom = new Random();
private Bitmap bitmap = null;//生成验证码图片
public ValidationCode(Context context) {
this(context, null);
}
public ValidationCode(Context context, AttributeSet attrs) {
super(context, attrs);
getAttrValues(context, attrs);
init();
}
/**
* 获取布局文件中的值
*/
private void getAttrValues(Context context, AttributeSet attrs) {
TypedArray typedArray = context.obtainStyledAttributes(attrs, R.styleable.ValidationCode);
mCodeCount = typedArray.getInteger(R.styleable.ValidationCode_CodeCount, 4);
mPointNumber = typedArray.getInteger(R.styleable.ValidationCode_PointNumber, 100);
mLineNumber = typedArray.getInteger(R.styleable.ValidationCode_LineNumber, 2);
mTextSize = typedArray.getDimension(R.styleable.ValidationCode_CodeTextSize, 20);
mBackGround = typedArray.getColor(R.styleable.ValidationCode_BackGround,Color.WHITE);
typedArray.recycle();
}
@Override
protected void onMeasure(int widthMeasureSpec, int heightMeasureSpec) {
super.onMeasure(widthMeasureSpec, heightMeasureSpec);
setMeasuredDimension(measureWidth(widthMeasureSpec), measureHeight(heightMeasureSpec));
}
/**
* 初始化画笔
*/
private void init() {
//生成随机数字和字母组合
mCodeString = getValidationCode(mCodeCount);
//初始化文字画笔
mTextPaint = new Paint();
mTextPaint.setStrokeWidth(3);
mTextPaint.setTextSize(mTextSize);
//初始化干扰点画笔
mPointPaint = new Paint();
mPointPaint.setStrokeWidth(4);
mPointPaint.setStrokeCap(Paint.Cap.ROUND);//设置断点处为圆形
//初始化干扰线画笔
mPathPaint = new Paint();
mPathPaint.setStrokeWidth(5);
mPathPaint.setColor(Color.GRAY);
mPathPaint.setStyle(Paint.Style.STROKE);//设置画笔为空心
mPathPaint.setStrokeCap(Paint.Cap.ROUND);//设置断点处为圆形
//初始化Bitmap画笔
mBitmapPaint = new Paint();
mBitmapPaint.setColor(Color.RED);
//取得验证码字符串显示的宽度值
mTextWidth = mTextPaint.measureText(mCodeString);
}
}
getAttrValues方法是用来配置自定义的属性,需要在 values 中新建 * attrs.xml * 文件,并加上自定义的属性,如下:
<?xml version="1.0" encoding="utf-8"?>
<resources>
<declare-styleable name="ValidationCode">
<attr name="CodeCount" format="integer"/>
<attr name="PointNumber" format="integer"/>
<attr name="LineNumber" format="integer"/>
<attr name="CodeTextSize" format="dimension"/>
<attr name="BackGround" format="color"/>
</declare-styleable>
</resources>
onMeasure方法则是在你需要对自定义的view的大小做出处理时,通过setMeasuredDimension设置该控件大小,下面给出重新定义的宽高代码块
/**
* 对view的宽高进行重新定义
*/
private int measureWidth(int measureSpec) {
int result = 0;
int specMode = MeasureSpec.getMode(measureSpec);
int specSize = MeasureSpec.getSize(measureSpec);
if (specMode == MeasureSpec.EXACTLY) {
result = specSize;
} else {
result = (int) (mTextWidth * 2.0f);
if (specMode == MeasureSpec.AT_MOST) {
result = Math.min(result, specSize);
}
}
return result;
}
private int measureHeight(int measureSpec) {
int result = 0;
int specMode = MeasureSpec.getMode(measureSpec);
int specSize = MeasureSpec.getSize(measureSpec);
if (specMode == MeasureSpec.EXACTLY) {
result = specSize;
} else {
result = (int) (mTextWidth / 1.5f);
if (specMode == MeasureSpec.AT_MOST) {
result = Math.min(result, specSize);
}
}
return result;
}
重写onDraw(),绘制图形
1、绘制验证码文本字符串,干扰点,干扰线,生成验证码的bitmap图
/**
* 获取验证码
*
* @param length 生成随机数的长度
* @return
*/
public static String getValidationCode(int length) {
String val = "";
Random random = new Random();
for (int i = 0; i < length; i++) {
//字母或数字
String code = random.nextInt(2) % 2 == 0 ? "char" : "num";
//字符串
if ("char".equalsIgnoreCase(code)) {
//大写或小写字母
int choice = random.nextInt(2) % 2 == 0 ? 65 : 97;
val += (char) (choice + random.nextInt(26));
} else if ("num".equalsIgnoreCase(code)) {
val += String.valueOf(random.nextInt(10));
}
}
return val;
}
/**
* 生成干扰点
*/
private static void drawPoint(Canvas canvas, Paint paint) {
PointF pointF = new PointF(mRandom.nextInt(mWidth) + 10, mRandom.nextInt(mHeight) + 10);
canvas.drawPoint(pointF.x, pointF.y, paint);
}
/**
* 生成干扰线
*/
private static void drawLine(Canvas canvas, Paint paint) {
int startX = mRandom.nextInt(mWidth);
int startY = mRandom.nextInt(mHeight);
int endX = mRandom.nextInt(mWidth);
int endY = mRandom.nextInt(mHeight);
canvas.drawLine(startX, startY, endX, endY, paint);
}
/**
1. 绘制验证码并返回
*/
private Bitmap generateValidate(){
if(bitmap != null && !bitmap.isRecycled()){
//回收并且置为null
bitmap.recycle();
bitmap = null;
}
//创建图片和画布
Bitmap sourceBitmap = Bitmap.createBitmap(mWidth,mHeight, Bitmap.Config.ARGB_8888);
Canvas canvas = new Canvas(sourceBitmap);
//画背景颜色
canvas.drawColor(mBackGround);
//画上验证码
int length = mCodeString.length();
float charLength = mTextWidth / length;
for (int i = 1; i <= length; i++) {
int offsetDegree = mRandom.nextInt(15);
//这里只会产生0和1,如果是1那么正旋转正角度,否则旋转负角度
offsetDegree = mRandom.nextInt(2) == 1 ? offsetDegree : -offsetDegree;
canvas.save();
canvas.rotate(offsetDegree, mWidth / 2, mHeight / 2);
//给画笔设置随机颜色
mTextPaint.setARGB(255, mRandom.nextInt(200) + 20, mRandom.nextInt(200) + 20,
mRandom.nextInt(200) + 20);
canvas.drawText(String.valueOf(mCodeString.charAt(i - 1)), (i - 1) * charLength * 1.6f + 30,
mHeight * 2 / 3f, mTextPaint);
canvas.restore();
}
//产生干扰效果1 -- 干扰点
for (int i = 0; i < mPointNumber; i++) {
mPointPaint.setARGB(255, mRandom.nextInt(200) + 20, mRandom.nextInt(200) + 20,
mRandom.nextInt(200) + 20);
drawPoint(canvas, mPointPaint);
}
//生成干扰效果2 -- 干扰线
for (int i = 0; i < mLineNumber; i++) {
mPathPaint.setARGB(255, mRandom.nextInt(200) + 20, mRandom.nextInt(200) + 20,
mRandom.nextInt(200) + 20);
drawLine(canvas, mPathPaint);
}
canvas.save();
return sourceBitmap;
}
2、实现onDraw()方法,绘画出验证码
@Override
protected void onDraw(Canvas canvas) {
super.onDraw(canvas);
//获取控件的宽和高
mHeight = getHeight();
mWidth = getWidth();
if(bitmap == null){
bitmap = generateValidate();
}
canvas.drawBitmap(bitmap,0,0,mBitmapPaint);
}
添加触摸事件,点击切换验证码
@Override
public boolean onTouchEvent(MotionEvent event) {
switch (event.getAction()) {
case MotionEvent.ACTION_DOWN:
mCodeString = getValidationCode(mCodeCount);
bitmap = generateValidate();
invalidate();
break;
default:
break;
}
return super.onTouchEvent(event);
}
添加公开使用方法
我们总是需要提供给用户调用的方法,判断验证码是否一致之类的,方便用户进一步的操作,这里提供个几个方法
/**
* 判断验证码是否一致
*
* @String CodeString
* 这里忽略大小写
*/
public Boolean isEqualsIgnoreCase(String CodeString) {
return mCodeString.equalsIgnoreCase(CodeString);
}
/**
* 判断验证码是否一致
* 不忽略大小写
*/
public Boolean isEquals(String CodeString) {
return mCodeString.equals(CodeString);
}
/**
* 外界控件调用刷新验证码图片
*/
public void refresh(){
mCodeString = getValidationCode(mCodeCount);
bitmap = generateValidate();
invalidate();
}
以上就是生成本地验证码的一个简单的自定义view步骤,这里就给出源码地址,有需要的就去看看。
以上就是本文的全部内容,希望对大家的学习有所帮助,也希望大家多多支持。
以上是 Android本地验证码的生成代码 的全部内容, 来源链接: utcz.com/p/243252.html