解决Android Studio xml 格式化不自动换行的问题
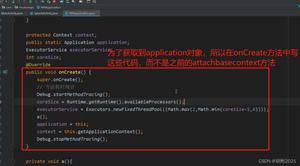
今天把Android Studio 2.3 更新为了3.0 遇到一个蛋疼的问题
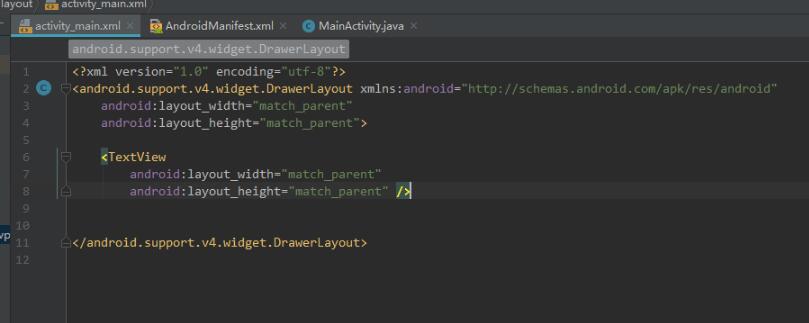
如图:

格式化完代码后发现不会自动换行了,看着真心不爽。
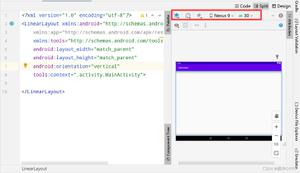
后来发现其实是设置问题,如图:
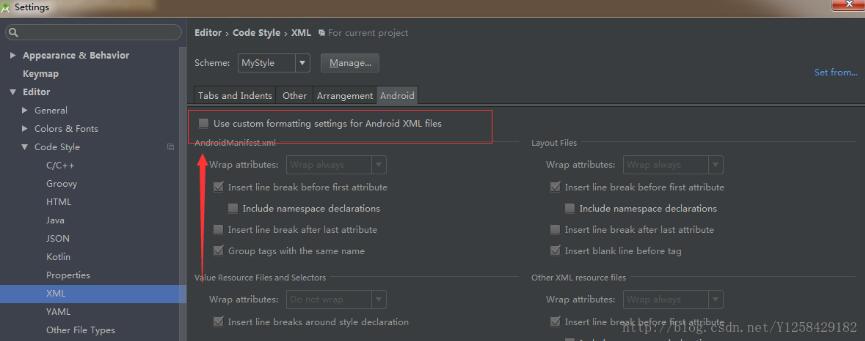
只要把这里打上√就可以了。
在此记录一下,希望可以帮到后面的小伙伴
补充知识:Android实现控件内自动换行(比如LinearLayout内部实现子控件换行 )
一、创建类AntoLineUtil(换行操作主要在这里实现)
package com.inpor.fmctv.util;
import android.content.Context;
import android.content.res.TypedArray;
import android.util.AttributeSet;
import android.view.View;
import android.view.ViewGroup;
import com.inpor.fmctv.R;
public class AntoLineUtil extends ViewGroup {
/**
* 子view左右间距
*/
private int mHorizontalSpacing;
/**
* 子view上下行距离
*/
private int mVerticalSpacing;
private Context context;
public AntoLineUtil(Context context) {
this(context, null);
this.context = context;
}
public AntoLineUtil(Context context, AttributeSet attrs) {
this(context, attrs, 0);
}
public AntoLineUtil(Context context, AttributeSet attrs, int defStyleAttr) {
super(context, attrs, defStyleAttr);
if (attrs != null) {
TypedArray array = context.obtainStyledAttributes(attrs,
R.styleable.AntoLineUtil);
mHorizontalSpacing = array.getDimensionPixelOffset(
R.styleable.AntoLineUtil_horizontalSpacing, 0);
mVerticalSpacing = array.getDimensionPixelOffset(
R.styleable.AntoLineUtil_verticalSpacing, 0);
array.recycle();
if (mHorizontalSpacing < 0) mHorizontalSpacing = 0;
if (mVerticalSpacing < 0) mVerticalSpacing = 0;
}
}
@Override
protected void onMeasure(int widthMeasureSpec, int heightMeasureSpec) {
int width = MeasureSpec.getSize(widthMeasureSpec);
int count = getChildCount();
for (int i = 0; i < count; i++) {
measureChild(getChildAt(i), widthMeasureSpec, heightMeasureSpec);
}
int widthMode = MeasureSpec.getMode(widthMeasureSpec);
if (widthMode != MeasureSpec.EXACTLY) {
widthMeasureSpec = MeasureSpec.makeMeasureSpec(
getAutoLinefeedWidth(width), widthMode);
}
int heightMode = MeasureSpec.getMode(heightMeasureSpec);
if (heightMode != MeasureSpec.EXACTLY) {
heightMeasureSpec = MeasureSpec.makeMeasureSpec(
getAutoLinefeedHeight(width), heightMode);
}
super.onMeasure(widthMeasureSpec, heightMeasureSpec);
}
/**
* 自动换行 计算需要的宽度
*
* @param width 可用宽度
* @return 需要的宽度
*/
private int getAutoLinefeedWidth(int width) {
int totalWidth = getPaddingLeft() + getPaddingRight();
for (int i = 0; i < getChildCount(); i++) {
if (i > 0) totalWidth += mHorizontalSpacing;
View child = getChildAt(i);
int childWidth = child.getMeasuredWidth();
totalWidth += childWidth;
if (totalWidth >= width) {
totalWidth = width;
break;
}
}
return totalWidth;
}
/**
* 自动换行 计算需要的高度
*
* @param width 可用宽度
* @return 需要的高度
*/
private int getAutoLinefeedHeight(int width) {
//一行最大可用宽度
int lineWidth = width - getPaddingLeft() - getPaddingRight();
//剩余可用宽度
int availableLineWidth = lineWidth;
//需要的高度
int totalHeight = getPaddingTop() + getPaddingBottom();
int lineChildIndex = 0;
//本行最大高度
int lineMaxHeight = 0;
for (int i = 0; i < getChildCount(); i++) {
View child = getChildAt(i);
int childWidth = child.getMeasuredWidth();
int childHeight = child.getMeasuredHeight();
//这个child需要的宽度 如果不是第一位的 那么需要加上间距
//这里是用来判断需不需要换行
int needWidth = i == 0 ? childWidth : (childWidth + mHorizontalSpacing);
//如果剩余可用宽度小于需要的长度 那么换行
if (availableLineWidth < needWidth) {
totalHeight = totalHeight + lineMaxHeight;
if (i > 0) totalHeight += mVerticalSpacing;
availableLineWidth = lineWidth;
lineMaxHeight = 0;
lineChildIndex = 0;
}
//这个child需要的宽度 如果不是第一位的 那么需要加上间距
int realNeedWidth = lineChildIndex == 0 ? childWidth : (childWidth + mHorizontalSpacing);
lineMaxHeight = Math.max(childHeight, lineMaxHeight);
availableLineWidth = availableLineWidth - realNeedWidth;
lineChildIndex++;
}
totalHeight = totalHeight + lineMaxHeight;
return totalHeight;
}
@Override
protected void onLayout(boolean changed, int l, int t, int r, int b) {
layout();
}
private void layout() {
int count = getChildCount();
int childLeft = getPaddingLeft();
int childTop = getPaddingTop();
int lineWidth = getMeasuredWidth() - getPaddingRight() - getPaddingLeft();
int availableLineWidth = lineWidth;
int lineChildIndex = 0;
//一行的最大高度
int lineMaxHeight = 0;
for (int i = 0; i < count; i++) {
View child = getChildAt(i);
int childWidth = child.getMeasuredWidth();
int childHeight = child.getMeasuredHeight();
int needWidth = i == 0 ? childWidth : (childWidth + mHorizontalSpacing);
if (availableLineWidth < needWidth) {
availableLineWidth = lineWidth;
childTop += lineMaxHeight;
if (i > 0) childTop += mVerticalSpacing;
lineMaxHeight = 0;
childLeft = getPaddingLeft();
lineChildIndex = 0;
}
int realNeedWidth = lineChildIndex == 0 ? childWidth : (childWidth + mHorizontalSpacing);
lineMaxHeight = Math.max(lineMaxHeight, childHeight);
child.layout(childLeft + realNeedWidth - childWidth, childTop, childLeft + realNeedWidth, childTop + childHeight);
availableLineWidth -= realNeedWidth;
childLeft += realNeedWidth;
lineChildIndex++;
}
}
public int getHorizontalSpacing() {
return mHorizontalSpacing;
}
public void setHorizontalSpacing(int horizontalSpacing) {
mHorizontalSpacing = horizontalSpacing;
}
public int getVerticalSpacing() {
return mVerticalSpacing;
}
public void setVerticalSpacing(int verticalSpacing) {
mVerticalSpacing = verticalSpacing;
}
}
二、在values中的attrs.xml中添加以下代码(实现子控件的边距):
<declare-styleable name="AntoLineUtil">
<attr name="horizontalSpacing" format="dimension"/>
<attr name="verticalSpacing" format="dimension"/>
</declare-styleable>
三、添加固定的xml布局父控件,事先写好,布局activity_video_preview.xml :
<com.inpor.fmctv.util.AntoLineUtil
android:id="@+id/camera_group"
android:layout_width="@dimen/size_dp_630"
android:layout_height="@dimen/size_dp_138"
android:layout_marginTop="@dimen/size_dp_18"
android:orientation="horizontal"
app:horizontalSpacing="@dimen/size_dp_18"
app:verticalSpacing="@dimen/size_dp_18">
</com.inpor.fmctv.util.AntoLineUtil>
四、添加固定的xml布局子控件,事先写好,动态添加进去,布局item_camera_info.xml :
<?xml version="1.0" encoding="utf-8"?>
<LinearLayout
xmlns:android="http://schemas.android.com/apk/res/android"
android:id="@+id/video_preview_item"
android:layout_width="@dimen/size_dp_198"
android:layout_height="@dimen/size_dp_60"
android:orientation="horizontal"
android:paddingLeft="@dimen/size_dp_18"
android:paddingRight="@dimen/size_dp_18"
android:gravity="center_vertical"
android:background="@color/textcolor_395878">
<TextView
android:id="@+id/video_preview_item_tv"
android:layout_width="@dimen/size_dp_120"
android:layout_height="wrap_content"
android:textSize="@dimen/size_sp_24"
android:textColor="@color/white"/>
<CheckBox
android:id="@+id/video_previ"
android:layout_width="@dimen/size_dp_24"
android:layout_height="@dimen/size_dp_24"
android:button="@null"
android:background="@drawable/radio_button_select_ico" />
</LinearLayout>
五、在其他方法中动态添加子控件:
AntoLineUtil cameraGroup = (AntoLineUitl) findViewById(R.id.camera_group); // 此处是找到父控件LinearLayout
for (int i = 0; i<6; i++) {
// 用以下方法将layout布局文件换成view
LayoutInflater inflater = getLayoutInflater();
View view = inflater.inflate(R.layout.item_camera_info,null);
TextView textView = view.findViewById(R.id.video_preview_item_tv);
textView.setText("摄像头"+ (cameraId+1));
cameraGroup.addView(view);
}
六、效果图:

以上这篇解决Android Studio xml 格式化不自动换行的问题就是小编分享给大家的全部内容了,希望能给大家一个参考,也希望大家多多支持。
以上是 解决Android Studio xml 格式化不自动换行的问题 的全部内容, 来源链接: utcz.com/p/242431.html