wepy--用vantUI 实现上弹列表并选择相应的值操作
vantUI就不多做介绍了,是一个相对来说比较好用的ui组件库,下面是地址大家可以自己去看看:
https://youzan.github.io/vant/#/zh-CN/actionsheet
接下来我们直接进入正题,在这个demo当中我是将这个弹出层封装成为一个组件,来供定义的页面去调用的,所以我们首先要做的就是先定义一个页面,在定义一个组件:下面是代码:
<template>
<view class="container">
<image src="{{localUser.avatarUrl}}" class="backimg" mode="aspectFill">
<view class='backimg' style='position:absolute;top:0;height:300rpx;width:100%;'></view>
</image>
<view class="touxiang_area">
<view class="touxiang_view">
<image src="{{localUser.avatarUrl}}" catchtap="changePic"></image>
</view>
<view class='touxiang-text'>
<text catchtap="changeName" class='name'>{{localUser.nickName}}</text>
</view>
</view>
<view style="margin-top:125px;">
<van-cell-group>
<block wx:if="{{saLogined}}">
<van-cell title="关联公众号" icon="add-o" >
已关注
</van-cell>
</block>
<block wx:else>
<van-cell title="关联公众号" icon="add-o" url="/pages/authPage" is-link>
</van-cell>
</block>
<van-cell title="编辑" icon="edit"></van-cell>
</van-cell-group>
</view>
<view class="body">
<form bindsubmit="formSubmit">
<view class="message messageTwo">
<view class="label">姓名</view>
<input placeholder="请输入您的真实姓名" placeholder-class="place" name="realName" value="{{realName}}"
confirm-type="done" />
</view>
<view class="message messageThree">
<view class="label">电话</view>
<input placeholder="请输入您的电话" placeholder-class="place" name="phone" value="{{phone}}" confirm-type="done" />
</view>
//此处引用的是vant的 cellGroup
//cell可以单独使用也可以配合group来使用,只不过不同的是:
//CellGroup可以为Cell提供上下外边框 其余的属性值 大家可以自行去官网看他的意思
//title代表的是你的者一行 选择的主题是什么
//value就是选择的相应的值 在刚开始的时候可以给一个默认值
// location: {
// id: -1,
// name: '未选择'
// },
//之后再更具获取到的值去替换
//@tap是绑定在他上面的方法。这里我主要是用它去invoke来给子组件当中的属性去赋值
<van-cell-group>
<van-cell
title="所在位置"
is-link
value="{{location.name}}"
@tap="popup"
>
</van-cell>
</van-cell-group>
//下面是一个按钮,按照提交的状态去变化一下按钮的内容
<bolck>
<button form-type='submit' class="submit">{{submit ? '重新提交': '提交'}}</button>
</bolck>
</form>
</view>
</view>
//下面这个就是我定义的选择组件 传递了两个值 showPopup来控制显示还是不显示
//setLocationId则是用来给父组件传递信息的方法
//在这里需要注意的是 根据值传递的方向 是有不同的传递方法的 大家可以去参阅我的另一篇博客 写了传
//递值的几种方式
<chooseSchoolPopup :show.sync="showPopup" v-on:setLocationId="setLocationId">
</chooseSchoolPopup>
</template>
<script>
import wepy from 'wepy';
import {
SYSTEM_INFO,
USER_INFO,
TOKEN
} from '@/utils/constant';
//request是我粉装的用来请求后端接口的方法
import { request } from '../utils/util';
//在这里首先引入组件,但是引入之后别忘了在地下声明
import chooseSchoolPopup from '../components/chooseSchoolPopup';
//我们根据page去定义一个页面
export default class UserInfo extends wepy.page {
//这里就是将你引入的组件做了声明
components = {
chooseSchoolPopup: chooseSchoolPopup,
};
//定义一些页面所用到的数据
data = {
active: 4,
localUser: {},
saLogined: false,
phone: '',
realName: '',
submit: false,
location: {
id: -1,
name: '未选择'
},
showPopup: true,
location_id:null
};
//这个则是定义页面的一些属性,以及将页面所要用到的ui组件导入进来
//这里需要注意的是,在父组件当中引入的组件,在子组件当中依旧是可以用的
config = {
navigationBarTitleText: '我的',
usingComponents: {
'van-cell': '../components/van/cell/index',
'van-cell-group': '../components/van/cell-group/index',
'van-row': '../components/van/row/index',
'van-col': '../components/van/col/index',
'van-field': '../components/van/field/index',
'van-popup': '../components/van/popup/index',
}
};
//在这里onshow方法我们将用户的基本信息去获取一遍,包括他的位置
async onShow(){
let servant = await request('/servant/getSelfInfo');
this.saLogined = servant.saLogined;
this.location = servant.location;
console.log('user onShow', servant);
this.$apply();
}
//onload当中我们同样在最初加载页面的时候去获取一遍
async onLoad() {
let user = wepy.getStorageSync(USER_INFO);
this.localUser = user;
try {
let servant = await request('/servant/getSelfInfo');
console.log('user onLoad', servant);
this.realName = servant.realName;
this.phone = servant.phone;
this.location = servant.location ? servant.location.name : null;
this.saLogined = servant.saLogined;
this.$apply();
} catch (e) {
console.error(e);
}
}
//来定义一些页面用到的方法
methods = {
//这个方法就是用来子组件向父组件传值的,将组件里选择条目的整条信息传递过来
//我们赋值给页面的参数,然后再页面上面去显示出来
//注意 若是你的方法是同步的,则组要手动去调用this.$apply();才能将值赋值给变量
setLocationId(e){
console.log('setLocationId',e)
this.location_id =e.id
this.location = e
},
//这个方法则是用来调用子组件内的方法,去给子组件的属性赋值
//用的就是invoke方法 ,
//第一个参数是你要往那个组件里面赋值,第二个是,相应组件里面的方法是什么,
//当然再这里我是直接再子组件当中去赋值的,所以这里没有去传递任何的值
//你可以传递一个或者是多个的值,只要再相应的方法当中去接受即可
popup() {
this.$invoke('chooseSchoolPopup', 'onPopup');
},
//这是一个提交form表单里面内容的方法
async formSubmit(e) {
var value = e.detail.value;
console.log('formSubmit', e.detail);
var params = {
realName: value.realName,
//这个id就是再子组件当中传递出来的值
location_id: this.location_id,
phone: value.phone
};
console.log('formSubmit',params)
//调用我后端编写的方法去提交
try {
await request('/servant/emdit/self', {
method: 'POST',
data: params
});
this.submit = true;
this.$apply();
} catch (e) {
console.log(e);
}
}
};
}
</script>
//一下是一些样式 使用的是less分割
<style lang="less">
//这是定义的全局样式,直接引入使用即可
@import "../style/global";
.body {
background: white;
.message {
margin-top: 10px;
display: flex;
width: 100%;
height: 100px;
align-items: center;
border-bottom: 1px solid #e8e8e8;
justify-content: space-between;
}
.label {
color: #333;
margin-left: 20px;
font-size: @font-size-normal;
}
.messageOne {
image {
height: 80px;
width: 120px;
margin-right: 20px;
/*border-radius: 50%;*/
}
}
input {
padding-left: 20px;
/*flex: 1;*/
color: #333;
font-size: @font-size-normal;
text-align: right;
margin-right: 20px;
width: 80%;
}
.submit {
position: fixed;
bottom: 20px;
left: 36px;
width: 90%;
background-color: #ea3333;
color: #fff;
}
}
.container {
display: flex;
flex-direction: column;
box-sizing: border-box;
overflow-x: hidden;
overflow-y: hidden;
}
.backimg {
height: 250px;
background: linear-gradient(to bottom, rgba(255, 255, 255, 0.9) 0%, rgba(255, 255, 255, 0.95) 40%, rgba(255, 255, 255, 1) 98%, #FFFFFF 100%);
overflow: hidden;
position: absolute;
top: 0;
width: 100%;
}
.touxiang_area {
height: 250px;
flex-direction: column;
align-items: center;
box-sizing: border-box;
border-bottom: 10px solid #e7e7eb;
width: 100%;
vertical-align: middle;
position: absolute;
}
.touxiang_view {
display: inline-block;
width: 35%;
}
.touxiang_view > image {
width: 130px;
height: 130px;
border-radius: 100%;
margin-top: 25%;
margin-left: 25%;
}
.touxiang-text {
display: inline-block;
width: 400px;
position: absolute;
top: 40%;
/* line-height: 60rpx; */
white-space: nowrap;
overflow: hidden;
text-overflow: ellipsis;
}
.touxiang-text > text {
font-size: 32px;
}
.touxiang_area > text {
margin-top: 20px;
}
.city {
/* margin-top:10rpx; */
padding-bottom: 15px;
font-size: 30px;
}
.city > text {
font-size: 30px;
}
.name {
overflow: hidden;
width: 250px;
display: inline-block;
-webkit-line-clamp: 1;
text-overflow: ellipsis;
white-space: nowrap;
}
button::after {
border: none;
}
input {
outline: none;
border: none;
list-style: none;
}
</style>
以上就是定义页面的及其属性方法的代码,下面我们来看一下相应组件的代码:
<template>
//同样我们先去定义模板
//showPopup 就是传递进来控制显示与不显示的值
//onclose方法则是主动关闭弹出层
//position控制的则是从底部弹出
<van-popup show="{{ showPopup }}" bind:close="onPopup" position="bottom">
<van-radio-group value="{{ lastSchool.id }}">
<van-cell-group>
//对赋值的数组进行遍历
<repeat for="{{ locationList }}">
//定义一个点击之间去调用我们再父组件当中绑定定义的向外传递参数的方法,将括号当中的当前的item
//传递出去
<van-cell title="{{item.name}}" clickable @tap="onClick({{item}})">
<van-radio name="{{item.id}}" >
</van-radio>
</van-cell>
</repeat>
</van-cell-group>
</van-radio-group>
</van-popup>
</template>
<script>
import wepy from 'wepy';
//我们用component 去定义一个组件
export default class myTabBar extends wepy.component {
//用props去去声明页面所需要的参数,这些值是再父组件调用子组件的时候,绑定在组件上面传递进来的
props = {
lastSchool: {
type: Object,
twoWay: true
}
};
//data则是父组件,或者是调用后端接口去赋值的属性
data = {
showPopup: false,
locationList: []
};
onLoad() {
//在这里我是事先将学校列表存入到缓存当中去使用的
//所以这里不会再去调用后端的接口 去获取值
let locationList = wepy.getStorageSync('locationList');
console.log('popup load');
if (locationList) {
this.locationList = locationList;
}
}
methods = {
//这个方法就是在上面定义的点击某头条信息的时候触发的方法,会将showPopup的逻辑值改变,从而控制
//显示还是不显示
onPopup(event) {
console.log('close', event);
this.showPopup = !this.showPopup;
},
//点击事件则是去向父组件去传递值
//用到的就是emit 在这里需要注意的是 若是传递一个组件直接写上就行,若是传递多个值,则要将其封装
//成一个对象再向外去传递相应的值
onClick(item, e) {
console.log('item', item, e);
this.lastSchool = item;
this.$emit('setLocationId', item);
this.showPopup = !this.showPopup;
},
};
};
</script>
//下面是一些自定义的样式
<style lang="less">
@import "../style/global";
.van-radio__icon--checked{
color:@theme-color !important;
}
</style>
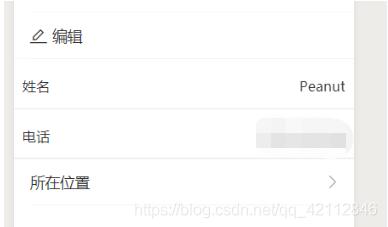
下面我们来看几张效果图:
这是没有选择时的情况:
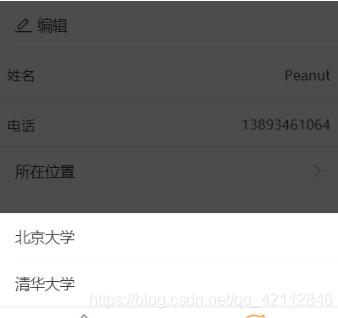
选择时:
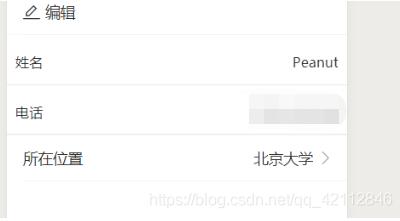
点击北大之后:
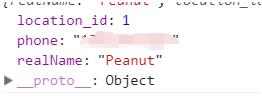
最后提交:提交时的参数:
以上就是一个见简单的,弹出层demo
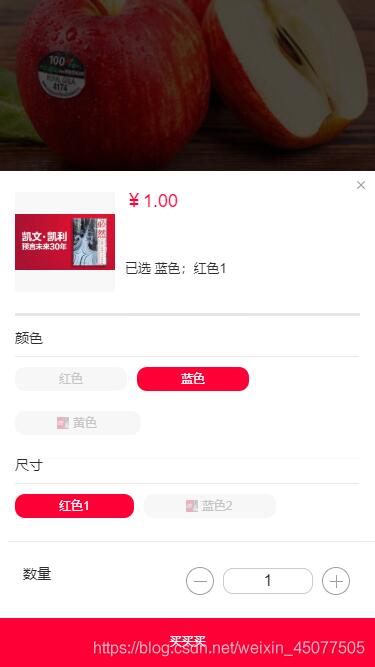
补充知识:vantUI的sku组件的使用(增加自定义提示信息、自定义按钮获取sku的选中值)
最近在做的移动电商项目,因为vantUI开发商城比较方便,最后决定使用vue结合vantUI结合开发,在使用sku组件的时候遇到了问题,先看一下使用了sku的效果图,
再来看一下设计图
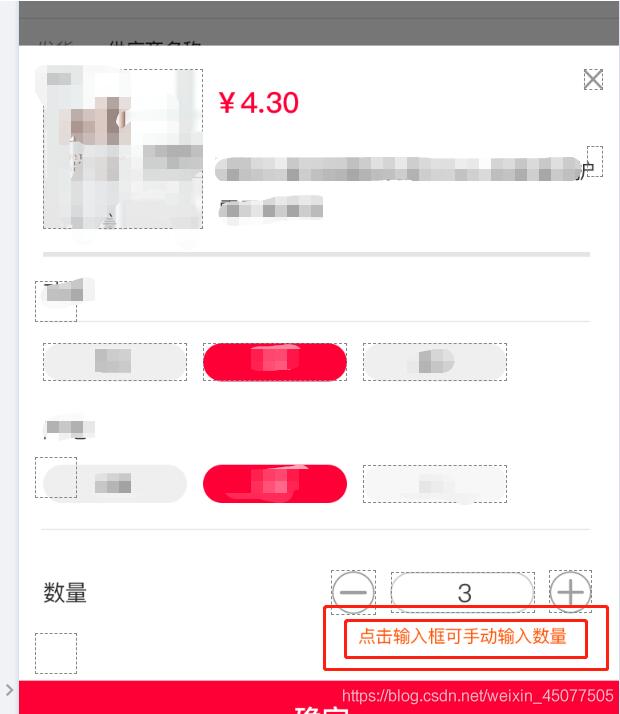
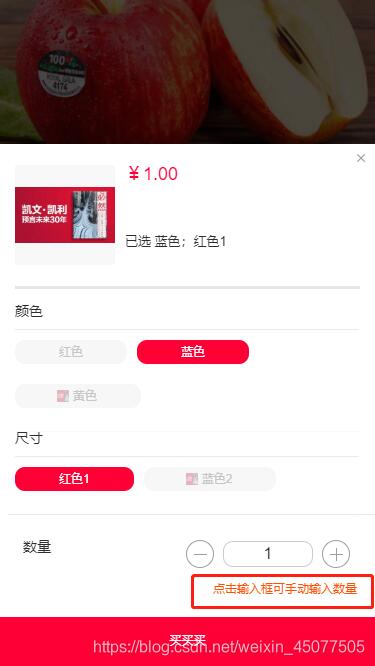
很明显少了一句提示,只需要写一个插槽来实现就可以了

最后看一下最终效果
补充:
获取选中规格的方法
1、首先给标签添加ref属性
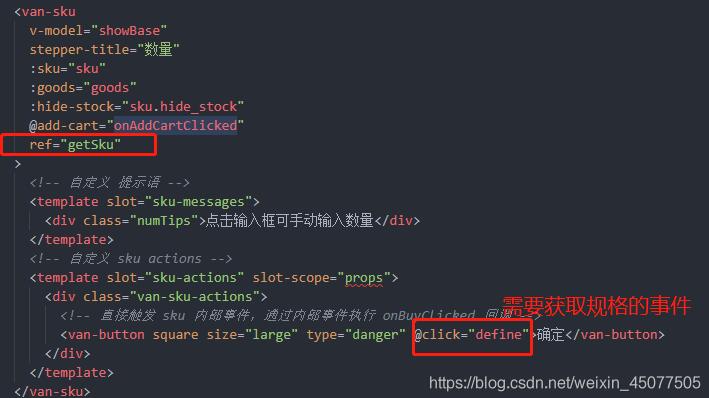
2、在你需要获取规格的事件中直接用this.$refs.(ref的属性值).(官方提供的getSkuData方法)获取就可以了
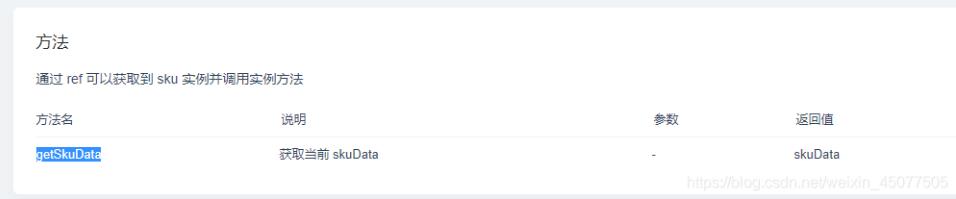
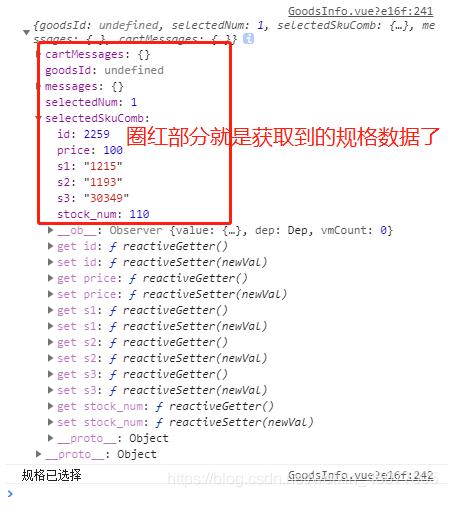
代码示例如下:

打印结果:
以上这篇wepy--用vantUI 实现上弹列表并选择相应的值操作就是小编分享给大家的全部内容了,希望能给大家一个参考,也希望大家多多支持。
以上是 wepy--用vantUI 实现上弹列表并选择相应的值操作 的全部内容, 来源链接: utcz.com/p/238393.html