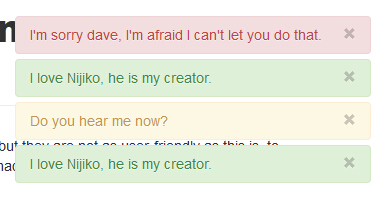
$.notify( string|object, [ options ])
string|object-通知数据
options-选项对象或类名字符串
$.notify( element, string|object, [ options ])
element-jQuery元素
string|object-通知数据
options-选项对象或类名字符串
$( selector ).notify( string|object, [ options ])
selector-jQuery 选择器
string|object-通知数据
options-选项对象或类名字符串
$.notify.addStyle( styleName, styleDefinition )
styleName-字符串(style 选项引用此名称)
styleDefinition-样式定义对象
$.notify.defaults( options )
options-Options对象(更新下面列出的默认值)
可选参数
上面列出的 Options 对象如下所示。下面的对象是用于检查选项有效性和设置默认值的实际对象。
{ // whether to hide the notification on click
clickToHide: true,
// whether to auto-hide the notification
autoHide: true,
// if autoHide, hide after milliseconds
autoHideDelay: 5000,
// show the arrow pointing at the element
arrowShow: true,
// arrow size in pixels
arrowSize: 5,
// position defines the notification position though uses the defaults below
position: '...',
// default positions
elementPosition: 'bottom left',
globalPosition: 'top right',
// default style
style: 'bootstrap',
// default class (string or [string])
className: 'error',
// show animation
showAnimation: 'slideDown',
// show animation duration
showDuration: 400,
// hide animation
hideAnimation: 'slideUp',
// hide animation duration
hideDuration: 200,
// padding between element and notification
gap: 2
}
自定义外观皮肤指南
可以将自己的样式添加到 Notify.js 中 $.notify.addStyle 方法。
样式定义对象的形式如下:
{ //required html representing each notification
html: "",
//optional object to be converted to css
classes: {
<className>: {
<propertyName>: <value>
},
<className>: {
...
},
...
},
//optional css to be inserted onto the page
css: ""
}
HTML
如果只有每个通知都需要修改的HTML元素,则应该将该元素的属性设置为data-notify-text或data-notify-html。使用data-notify-html如果希望在通知中显示任意HTML,则使用data-notify-text因为它更安全。
否则,如果希望在每个通知中修改多个HTML元素,则需要给每个元素提供上述两个属性中的一个。有关此问题的示例,请参阅下面的高级示例。
classes
该对象将用于构造CSS。它必须采用上述形式,下面是一个例子。
CSS
这个字符串只是原始 CSS。如果希望将样式定义保存在 js 文件中,请使用此属性。
类命名约定
在构造每个通知时,它的容器(在样式html中定义的最外层元素)将自动应用这个类:
notifyjs-<style name>-base
当您使用类名选项时(className)全班:
notifyjs-<style name>-<class name>
将被应用。因此如果在外部CSS文件或样式的CSS属性中定义样式,则必须使用此命名约定定义CSS规则。
简单例子
如果要定义样式:
$.notify.addStyle('happyblue', { html: "<div>☺<span data-notify-text/>☺</div>",
classes: {
base: {
"white-space": "nowrap",
"background-color": "lightblue",
"padding": "5px"
},
superblue: {
"color": "white",
"background-color": "blue"
}
}
});
运行此代码时,classes 对象将转换为以下 CSS:
.notifyjs-happyblue-base { white-space: nowrap;
background-color: lightblue;
padding: 5px;
}
.notifyjs-happyblue-superblue {
color: white;
background-color: blue;
}
现在可以通过检查 DOM (在头中查找标记样式元素)来确认这一点。您现在可以在以下方面使用您的新样式:
$.notify('hello !!', { style: 'happyblue'
});
而您可以使用 superblue 时:
$.notify('HELLO !!!!', { style: 'happyblue',
className: 'superblue'
});
高级用法
假设您希望在通知中使用按钮,那么您可以执行以下操作:
//add a new style 'foo'$.notify.addStyle('foo', {
html:
"<div>" +
"<div class='clearfix'>" +
"<div class='title' data-notify-html='title'/>" +
"<div class='buttons'>" +
"<button class='no'>Cancel</button>" +
"<button class='yes' data-notify-text='button'></button>" +
"</div>" +
"</div>" +
"</div>"
});
//listen for click events from this style
$(document).on('click', '.notifyjs-foo-base .no', function() {
//programmatically trigger propogating hide event
$(this).trigger('notify-hide');
});
$(document).on('click', '.notifyjs-foo-base .yes', function() {
//show button text
alert($(this).text() + " clicked!");
//hide notification
$(this).trigger('notify-hide');
});
注意没有classes属性。由于本例中的CSS并不简单,因此我们将使用一个外部CSS文件来代替:
注意:您还可以将此CSS代码转换为JavaScript字符串,并将其与css财产。它不是很可读的,虽然它更好的分发。
.notifyjs-foo-base { opacity: 0.85;
width: 200px;
background: #F5F5F5;
padding: 5px;
border-radius: 10px;
}
.notifyjs-foo-base .title {
width: 100px;
float: left;
margin: 10px 0 0 10px;
text-align: right;
}
.notifyjs-foo-base .buttons {
width: 70px;
float: right;
font-size: 9px;
padding: 5px;
margin: 2px;
}
.notifyjs-foo-base button {
font-size: 9px;
padding: 5px;
margin: 2px;
width: 60px;
}
您现在可以将此样式用于:
$.notify({ title: 'Would you like some Foo ?',
button: 'Confirm'
}, {
style: 'foo',
autoHide: false,
clickToHide: false
});
额外例子
如果使用上述方法仍然没有提供所需的内容,则可以将jQuery对象直接传递到通知中(前提是元素具有data-notify-html(属性):
var h5 = $("<h5/>").append("You MUST have some Foo !")$.notify({
title: h5,
button: 'YES !'
}, {
style: 'foo',
autoHide: false,
clickToHide: false
});
相关链接
- 官网:https://notifyjs.jpillora.com/
- Github 地址:https://github.com/jpillora/notifyjs

