linux二进制通用包安装mysql5.6.20教程
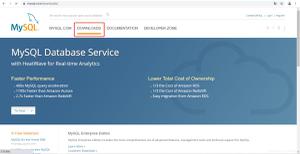
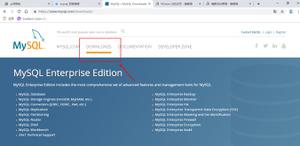
我们使用二进制通用包安装MySQL,这个类似于windows下的绿色软件,解压后配置即可使用,下载地址:
https://edelivery.Oracle.com/EPD/Search/handle_go

2.将二进制mysql安装文件解压到/usr/local下,这里使用软连接为mysql
[root@mysql1 soft]tar xvf mysql-advanced-5.6.20-linux-glibc2.5-x86_64.tar.gz -C /usr/local
[root@mysql1 local]ln -sv mysql-advanced-5.6.20-linux-glibc2.5-x86_64 mysql
[root@mysql1 local]# pwd
/usr/local
[root@mysql1 local]# ls -l
total 64
-rw-r--r--. 1 root root 20465 Aug 16 20:21 1
drwxr-xr-x. 2 root root 4096 Jun 28 2011 bin
drwxr-xr-x. 2 root root 4096 Jun 28 2011 etc
drwxr-xr-x. 2 root root 4096 Jun 28 2011 games
drwxr-xr-x. 2 root root 4096 Jun 28 2011 include
drwxr-xr-x. 2 root root 4096 Jun 28 2011 lib
drwxr-xr-x. 2 root root 4096 Jun 28 2011 lib64
drwxr-xr-x. 2 root root 4096 Jun 28 2011 libexec
lrwxrwxrwx. 1 root root 43 Aug 17 18:25 mysql -> mysql-advanced-5.6.20-linux-glibc2.5-x86_64
drwxr-xr-x. 13 root root 4096 Aug 17 18:37 mysql-advanced-5.6.20-linux-glibc2.5-x86_64
drwxr-xr-x. 2 root root 4096 Jun 28 2011 sbin
drwxr-xr-x. 5 root root 4096 Aug 16 19:14 share
drwxr-xr-x. 2 root root 4096 Jun 28 2011 src
3.添加mysql用户和组,如果已经存在可以跳过这一步
[root@mysql1 local]groupadd -r -g 306 mysql
#-r表示是伪用户,只是用来运行mysql程序,不能登录系统
[root@mysql1 local]useradd -g 306 -r -u 306 mysql
4.将安装文件的所属设置为mysql,这里将数据文件目录设置到/mydata/data下
[root@mysql1 mysql]# chown -R mysql.mysql /usr/local/mysql/*
[root@mysql1 mysql]# chown -R mysql.mysql /mydata
5.初始化mysql
[root@mysql1 mysql]#scripts/mysql_install_db --user=mysql --datadir=/mydata/data/
6.在support-files目录中将mysql.server复制到/etc/init.d中的mysqld中,创建初始化进程,并且加到服务中
[root@mysql1 mysql]# cp support-files/mysql.server /etc/init.d/mysqld
[root@mysql1 mysql]# ls -l /etc/init.d/mysqld
-rwxr-xr-x. 1 root root 10880 Aug 17 18:52 /etc/init.d/mysqld
[root@mysql1 mysql]# chkconfig --add mysqld
[root@mysql1 mysql]# chkconfig --list |grep mysqld
mysqld 0:off 1:off 2:on 3:on 4:on 5:on 6:off
7.配置mysql的配置文件
mysql的配置文件寻找顺序为/etc/my.cnf -> /etc/mysql/my.cnf -> $BASEDIR/my.cnf -> ~/my.cnf
如果存在多个配置文件,那么后者覆盖前者,主要加上datadir为数据文件目录位置
[root@mysql1 support-files]# grep -v '^#' /etc/my.cnf
[mysqld]
basedir = /usr/local/mysql
datadir = /mydata/data
port = 3306
sql_mode=NO_ENGINE_SUBSTITUTION,STRICT_TRANS_TABLES
8.启动进入mysql
[root@mysql1 support-files]# service mysqld start
Starting MySQL. [ OK ]
[root@mysql1 support-files]# netstat -tnlp
Active Internet connections (only servers)
Proto Recv-Q Send-Q Local Address Foreign Address State PID/Program name
tcp 0 0 0.0.0.0:111 0.0.0.0:* LISTEN 1224/rpcbind
tcp 0 0 0.0.0.0:22 0.0.0.0:* LISTEN 1567/sshd
tcp 0 0 127.0.0.1:631 0.0.0.0:* LISTEN 1439/cupsd
tcp 0 0 127.0.0.1:25 0.0.0.0:* LISTEN 1781/master
tcp 0 0 0.0.0.0:49830 0.0.0.0:* LISTEN 1347/rpc.statd
tcp 0 0 :::111 :::* LISTEN 1224/rpcbind
tcp 0 0 :::22 :::* LISTEN 1567/sshd
tcp 0 0 ::1:631 :::* LISTEN 1439/cupsd
tcp 0 0 ::1:25 :::* LISTEN 1781/master
tcp 0 0 :::58044 :::* LISTEN 1347/rpc.statd
tcp 0 0 :::3306 :::* LISTEN 3899/mysqld
这里还需要将mysql的环境变量加到profile文件中
[root@mysql1 ~]# grep PATH .bash_profile
PATH=$PATH:$HOME/bin:/usr/local/mysql/bin
export PATH
可以进入mysql了
[root@mysql1 ~]# mysql
Welcome to the MySQL monitor. Commands end with ; or \g.
Your MySQL connection id is 5
Server version: 5.6.20-enterprise-commercial-advanced MySQL Enterprise Server - Advanced Edition (Commercial)
Copyright (c) 2000, 2014, Oracle and/or its affiliates. All rights reserved.
Oracle is a registered trademark of Oracle Corporation and/or its
affiliates. Other names may be trademarks of their respective
owners.
Type 'help;' or '\h' for help. Type '\c' to clear the current input statement.
mysql> show databases;
+--------------------+
| Database |
+--------------------+
| information_schema |
| mysql |
| performance_schema |
| test |
+--------------------+
4 rows in set (0.00 sec)
mysql>
9.还有一些小配置
1)、添加MySQL的man帮助文档
修改/etc/man.conf,加入相应的配置,添加一行
MANPATH /usr/local/mysql/man
[root@mysql1 data]# vi /etc/man.config
2)、添加mysql的库文件
[root@mysql1 data]# cd /etc/ld.so.conf.d
[root@mysql1 ld.so.conf.d]# ls
atlas-x86_64.conf ctapi-x86_64.conf kernel-2.6.32-358.el6.x86_64.conf qt-x86_64.conf
[root@mysql1 ld.so.conf.d]# vi /etc/ld.so.conf.d/mysql.conf
/usr/local/mysql/lib
[root@mysql1 ld.so.conf.d]# ldconfig -v
使库文件生效
3)、添加mysql的头文件
[root@mysql1 ld.so.conf.d]# ln -sv /usr/local/mysql/include /usr/include/mysql
`/usr/include/mysql/include' -> `/usr/local/mysql/include'
精彩专题分享:mysql不同版本安装教程 mysql5.7各版本安装教程 mysql5.6各版本安装教程
以上就是本文的全部内容,希望对大家的学习有所帮助,也希望大家多多支持。
以上是 linux二进制通用包安装mysql5.6.20教程 的全部内容, 来源链接: utcz.com/p/227935.html

