Docker实现Mariadb分库分表及读写分离功能
一、简介
本文使用docker实现mysql主从配置,读写分离、分库分表等功能。
二、环境准备
1.基础环境
java
java version "1.8.0_111"
Java(TM) SE Runtime Environment (build 1.8.0_111-b14)
Java HotSpot(TM) 64-Bit Server VM (build 25.111-b14, mixed mode)
docker
Client:
Version: 18.03.0-ce
API version: 1.37
Go version: go1.9.4
Git commit: 0520e24
Built: Wed Mar 21 23:09:15 2018
OS/Arch: linux/amd64
Experimental: false
Orchestrator: swarm
Server:
Engine:
Version: 18.03.0-ce
API version: 1.37 (minimum version 1.12)
Go version: go1.9.4
Git commit: 0520e24
Built: Wed Mar 21 23:13:03 2018
OS/Arch: linux/amd64
Experimental: false
三、安装Mysql主从配置
1.部署信息
| 节点名称 | 数据名称 | 节点IP | 端口 |
|---|---|---|---|
| master | marster | 192.168.92.50 | 3306 |
| slave | slave | 192.168.92.51 | 3307 |
| mycat | mycat | 192.168.92.50 | 8066/9066 |
2.主节点配置文件
创建mysql主节点配置文件
mkdir /usr/local/mysql/master
mkdir conf data
创建主节点配置文件docker.cnf
[mysqld]
server-id=1
log-bin=master-bin #只是读写,就只要主库配置即可.如果要做主从切换,那么主库和从库都需要开启.
skip-host-cache
skip-name-resolve
collation-server = utf8_unicode_ci
init-connect='SET NAMES utf8'
character-set-server = utf8
[mysql]
default-character-set=utf8
[client]
default-character-set=utf8
创建从节点配置文件 docker.conf
mkdir /usr/local/mysql/slave
mkdir conf data
[mysqld]
server-id=2
log-bin=master-bin
skip-host-cache
skip-name-resolve
collation-server = utf8_unicode_ci
init-connect='SET NAMES utf8'
character-set-server = utf8
[mysql]
default-character-set=utf8
[client]
default-character-set=utf8
3.创建mysql容器
此处使用mariadb最新稳定镜像创建容器
创建主节点myslq
docker run --name master -p 3306:3306 -v /usr/local/mysql/master/conf:/etc/mysql/conf.d -v /usr/local/mysql/master/data:/var/lib/mysql -e MYSQL_ROOT_PASSWORD=123456 -idt mariadb:latest --character-set-server=utf8mb4 --collation-server=utf8mb4_unicode_ci
创建从节点mysql
docker run --name slave -p 3307:3306 -v /usr/local/mysql/slave/conf:/etc/mysql/conf.d -v /usr/local/mysql/slave/data:/var/lib/mysql -e MYSQL_ROOT_PASSWORD=123456 -idt mariadb:latest --character-set-server=utf8mb4 --collation-server=utf8mb4_unicode_ci
4.开启主从复制
step 1 进入主节点
docker exec -it master /bin/bash
mysql -uroot -p
step 2 创建用户
create user 'backUser'@'%' identified by 'root';
grant replication slave on *.* to 'backUser'@'%';
flush privileges;
show master status;
MariaDB [(none)]> show master status;
+-------------------+----------+--------------+------------------+
| File | Position | Binlog_Do_DB | Binlog_Ignore_DB |
+-------------------+----------+--------------+------------------+
| master-bin.000003 | 787 | | |
+-------------------+----------+--------------+------------------+
1 row in set (0.000 sec)
step 3 进入从节点创建用户开启同步
docker exec -it slave /bin/bash
mysql -uroot -proot
change master to master_host='192.168.92.51',master_port=3306,master_user='backUser',master_password='root',master_log_file='master-bin.000003',master_log_pos=787;
开启主从复制:
start slave;
从节点设置日志和文件名要跟主节点信息对应,包括日志记录起始位置position
检查主从复制是否OK
show slave status \G;
*************************** 1. row ***************************
Slave_IO_State: Waiting for master to send event
Master_Host: 192.168.92.50
Master_User: backUser
Master_Port: 3306
Connect_Retry: 60
Master_Log_File: master-bin.000005
Read_Master_Log_Pos: 343
Relay_Log_File: mysqld-relay-bin.000002
Relay_Log_Pos: 556
Relay_Master_Log_File: master-bin.000005
Slave_IO_Running: Yes
Slave_SQL_Running: Yes
Slave出现2个YES,代表主从复制设置成功。
5、安装Mycat
下载mycat在50节点实现安装
tar -zxvf Mycat-server-1.6.7.1-release-20190213150257-linux.tar.gz
mv mycat/ /usr/local/
修改mycat目录下 conf的server.xml 文件,指定用户名和密码
<?xml version="1.0" encoding="UTF-8"?>
<!-- - - Licensed under the Apache License, Version 2.0 (the "License");
- you may not use this file except in compliance with the License. - You
may obtain a copy of the License at - - http://www.apache.org/licenses/LICENSE-2.0
- - Unless required by applicable law or agreed to in writing, software -
distributed under the License is distributed on an "AS IS" BASIS, - WITHOUT
WARRANTIES OR CONDITIONS OF ANY KIND, either express or implied. - See the
License for the specific language governing permissions and - limitations
under the License. -->
<!DOCTYPE mycat:server SYSTEM "server.dtd">
<mycat:server xmlns:mycat="http://io.mycat/">
<system>
<property name="nonePasswordLogin">0</property> <!-- 0为需要密码登陆、1为不需要密码登陆 ,默认为0,设置为1则需要指定默认账户-->
<property name="useHandshakeV10">1</property>
<property name="useSqlStat">0</property> <!-- 1为开启实时统计、0为关闭 -->
<property name="useGlobleTableCheck">0</property> <!-- 1为开启全加班一致性检测、0为关闭 -->
<property name="sequnceHandlerType">0</property>
<property name="subqueryRelationshipCheck">false</property>
<property name="processorBufferPoolType">0</property>
<property name="handleDistributedTransactions">0</property>
<property name="useOffHeapForMerge">1</property>
<!--单位为m-->
<property name="memoryPageSize">64k</property>
<!--单位为k-->
<property name="spillsFileBufferSize">1k</property>
<property name="useStreamOutput">0</property>
<!--单位为m-->
<property name="systemReserveMemorySize">384m</property>
<!--是否采用zookeeper协调切换 -->
<property name="useZKSwitch">false</property>
<!-- XA Recovery Log日志名称 -->
<!--<property name="XARecoveryLogBaseName">tmlog</property>-->
<!--如果为 true的话 严格遵守隔离级别,不会在仅仅只有select语句的时候在事务中切换连接-->
<property name="strictTxIsolation">false</property>
<property name="useZKSwitch">true</property>
</system>
<user name="root">
<property name="password">123456</property>
<property name="schemas">test</property>
</user>
</mycat:server>
上述配置,指定以root为用户名,密码为123456,访问虚拟逻辑数据库test。
配置rule规则
修改mycat conf 文件夹下的schema.xml 配置数据库对应规则
<?xml version="1.0"?>
<!DOCTYPE mycat:schema SYSTEM "schema.dtd">
<mycat:schema xmlns:mycat="http://io.mycat/">
<schema name="test" checkSQLschema="false" sqlMaxLimit="100">
<table name="tb_user" primaryKey="id" autoIncrement="true" dataNode="dn1,dn2,dn3,dn4" rule="userrule" />
<table name="tb_category" primaryKey="id" dataNode="dn1,dn2,dn3,dn4" rule="categoryrule" />
</schema>
<dataNode name="dn1" dataHost="localhost1" database="db1" />
<dataNode name="dn2" dataHost="localhost1" database="db2" />
<dataNode name="dn3" dataHost="localhost1" database="db3" />
<dataNode name="dn4" dataHost="localhost1" database="db4" />
<dataHost name="localhost1" maxCon="1000" minCon="10" balance="1"
writeType="0" dbType="mysql" dbDriver="native" switchType="1" slaveThreshold="100">
<heartbeat>select user()</heartbeat>
<!-- 读写分离配置 -->
<writeHost host="hostM1" url="192.168.92.50:3306" user="root"
password="123456">
<readHost host="hostS2" url="192.168.92.51:3307" user="root" password="123456" />
</writeHost>
</dataHost>
</mycat:schema>
上述配置scheam name 对应server配置文件的虚拟数据库,指定了2个表信息,tb_user 表主键实现自增长,有4个数据库节点,使用userrule表规则。
dataNode 指定了真实对应的物理数据库节点,对应dataHost说明了读写指定的用户和节点信息。
配置表分片规则文件rule.xml
<?xml version="1.0" encoding="UTF-8"?>
<!-- - - Licensed under the Apache License, Version 2.0 (the "License");
- you may not use this file except in compliance with the License. - You
may obtain a copy of the License at - - http://www.apache.org/licenses/LICENSE-2.0
- - Unless required by applicable law or agreed to in writing, software -
distributed under the License is distributed on an "AS IS" BASIS, - WITHOUT
WARRANTIES OR CONDITIONS OF ANY KIND, either express or implied. - See the
License for the specific language governing permissions and - limitations
under the License. -->
<!DOCTYPE mycat:rule SYSTEM "rule.dtd">
<mycat:rule xmlns:mycat="http://io.mycat/">
<!-- 配置数据库规则 -->
<tableRule name="userrule">
<rule>
<columns>id</columns>
<algorithm>func1</algorithm>
</rule>
</tableRule>
<!-- 配置数据库test tb_category规则 -->
<tableRule name="categoryrule">
<rule>
<columns>id</columns>
<algorithm>jump-consistent-hash</algorithm>
</rule>
</tableRule>
<function name="murmur"
class="io.mycat.route.function.PartitionByMurmurHash">
<property name="seed">0</property><!-- 默认是0 -->
<property name="count">2</property><!-- 要分片的数据库节点数量,必须指定,否则没法分片 -->
<property name="virtualBucketTimes">160</property><!-- 一个实际的数据库节点被映射为这么多虚拟节点,默认是160倍,也就是虚拟节点数是物理节点数的160倍 -->
<!-- <property name="weightMapFile">weightMapFile</property> 节点的权重,没有指定权重的节点默认是1。以properties文件的格式填写,以从0开始到count-1的整数值也就是节点索引为key,以节点权重值为值。所有权重值必须是正整数,否则以1代替 -->
<!-- <property name="bucketMapPath">/etc/mycat/bucketMapPath</property>
用于测试时观察各物理节点与虚拟节点的分布情况,如果指定了这个属性,会把虚拟节点的murmur hash值与物理节点的映射按行输出到这个文件,没有默认值,如果不指定,就不会输出任何东西 -->
</function>
<function name="crc32slot"
class="io.mycat.route.function.PartitionByCRC32PreSlot">
</function>
<function name="hash-int"
class="io.mycat.route.function.PartitionByFileMap">
<property name="mapFile">partition-hash-int.txt</property>
</function>
<function name="rang-long"
class="io.mycat.route.function.AutoPartitionByLong">
<property name="mapFile">autopartition-long.txt</property>
</function>
<function name="mod-long" class="io.mycat.route.function.PartitionByMod">
<!-- how many data nodes -->
<property name="count">3</property>
</function>
<function name="func1" class="io.mycat.route.function.PartitionByLong">
<property name="partitionCount">8</property>
<property name="partitionLength">128</property>
</function>
<function name="latestMonth"
class="io.mycat.route.function.LatestMonthPartion">
<property name="splitOneDay">24</property>
</function>
<function name="partbymonth"
class="io.mycat.route.function.PartitionByMonth">
<property name="dateFormat">yyyy-MM-dd</property>
<property name="sBeginDate">2015-01-01</property>
</function>
<function name="rang-mod" class="io.mycat.route.function.PartitionByRangeMod">
<property name="mapFile">partition-range-mod.txt</property>
</function>
<function name="jump-consistent-hash" class="io.mycat.route.function.PartitionByJumpConsistentHash">
<property name="totalBuckets">3</property>
</function>
</mycat:rule>
上述文件重点关注第一个tableRule、rule指定了分片规则在哪个表字段,algorithm指定了分片的算法,其中 func1 与文件后面function名称为func1对应,此处使用了PartitionByLong分片算法。
conf下增加sequence_conf.properties文件,其内容如下:
TB_USER.HISIDS=
TB_USER.MINID=1
TB_USER.MAXID=20000
TB_USER.CURID=1
主要申明了主键增长的策略。
四、Mycat分库分表实践测试
1.master节点手动创建数据库
master节点手动创建4个数据库db1,db2,db3,db4 (不要操作从节点)
此时打开slave节点,会观察到slave也会自动创建4个数据库。

2.开启mycat
使用命令 ./mycat start 开启mycat
./mycat start 启动
./mycat stop 停止
./mycat console 前台运行
./mycat restart 重启服务
./mycat pause 暂停
./mycat status 查看启动状态
如果启动失败,请查看 /usr/local/mycat的wrapper.log 日志文件信息。
FATAL | wrapper | 2019/04/21 14:36:09 | ERROR: Could not write pid file /usr/local/mycat/logs/mycat.pid: No such file or directory
如果遇到上述错误,请在mycat 目录创建logs 文件夹,重新启动即可。
[root@localhost mycat]# bin/mycat status
Mycat-server is running (5065).
上述消息则表示mycat启动成功。
2.放行mycat通信端口
firewall-cmd --zone=public --add-port=8066/tcp --permanent
firewall-cmd --zone=public --add-port=9066/tcp --permanent
firewall-cmd --reload
使用docker镜像开启mycat容器实例
docker run --name mycat -v /usr/local/mycat/conf/schema.xml:/usr/local/mycat/conf/schema.xml -v /usr/local/mycat/conf/rule.xml:/usr/local/mycat/conf/rule.xml -v /usr/local/mycat/conf/server.xml:/usr/local/mycat/conf/server.xml -v /usr/local/mycat/conf/sequence_conf.properties:/usr/local/mycat/conf/sequence_conf.properties --privileged=true -p 8066:8066 -p 9066:9066 -e MYSQL_ROOT_PASSWORD=123456 -d longhronshens/mycat-docker
或者关闭防火墙。
3. mycat连接
使用navicate连接mycat,端口8066(9066为管理端口)
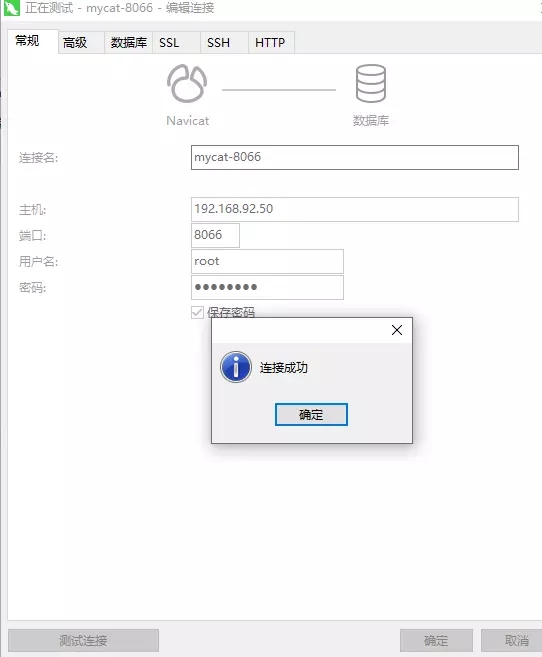
使用命令连接mycat
[root@localhost ~]# mysql -h127.0.0.1 -uroot -p123456 -P8066
Welcome to the MariaDB monitor. Commands end with ; or \g.
Your MySQL connection id is 12
Server version: 5.6.29-mycat-1.6.7.1-release-20190213150257 MyCat Server (OpenCloudDB)
Copyright (c) 2000, 2017, Oracle, MariaDB Corporation Ab and others.
Type 'help;' or '\h' for help. Type '\c' to clear the current input statement.
MySQL [(none)]>
管理端命令:
mysql -h127.0.0.1 -uroot -proot -P9066
查看虚拟逻辑库:
MySQL [(none)]> show databases;
+----------+
| DATABASE |
+----------+
| test |
+----------+
1 row in set (0.00 sec)
MySQL [(none)]>
使用逻辑库创建表:
MySQL [(none)]> use test;
CREATE TABLE `tb_user` (
`id` bigint(20) NOT NULL AUTO_INCREMENT,
`username` varchar(50) CHARACTER SET utf8 COLLATE utf8_general_ci NOT NULL COMMENT '用户名',
`password` varchar(32) CHARACTER SET utf8 COLLATE utf8_general_ci NOT NULL COMMENT '密码,加密存储',
`phone` varchar(20) CHARACTER SET utf8 COLLATE utf8_general_ci NULL DEFAULT NULL COMMENT '注册手机号',
`email` varchar(50) CHARACTER SET utf8 COLLATE utf8_general_ci NULL DEFAULT NULL COMMENT '注册邮箱',
`created` datetime(0) NOT NULL,
`updated` datetime(0) NOT NULL,
PRIMARY KEY (`id`) USING BTREE,
UNIQUE INDEX `username`(`username`) USING BTREE,
UNIQUE INDEX `phone`(`phone`) USING BTREE,
UNIQUE INDEX `email`(`email`) USING BTREE
) ENGINE = InnoDB AUTO_INCREMENT = 54 CHARACTER SET = utf8 COLLATE = utf8_general_ci COMMENT = '用户表' ROW_FORMAT = Compact;
可以看到mycat,mysql主从都创建了该表

在创建一张表:
CREATE TABLE `tb_category` (
`id` varchar(5) CHARACTER SET utf8 COLLATE utf8_general_ci NOT NULL,
`name` varchar(200) CHARACTER SET utf8 COLLATE utf8_general_ci NULL DEFAULT NULL COMMENT '名字',
`sort_order` int(4) NOT NULL DEFAULT 1 COMMENT '排列序号,表示同级类目的展现次序,如数值相等则按名称次序排列。取值范围:大于零的整数',
`created` datetime(0) NULL DEFAULT NULL,
`updated` datetime(0) NULL DEFAULT NULL,
PRIMARY KEY (`id`) USING BTREE,
INDEX `updated`(`updated`) USING BTREE
) ENGINE = InnoDB CHARACTER SET = utf8 COLLATE = utf8_general_ci ROW_FORMAT = Compact;
插入一条数据:
INSERT INTO `tb_user`(id,username,password,phone,email,created,updated) VALUES (7, 'zhangsan', 'e10adc3949ba59abbe56e057f20f883e', '13488888888', 'aa@a', '2015-04-06 17:03:55', '2015-04-06 17:03:55');
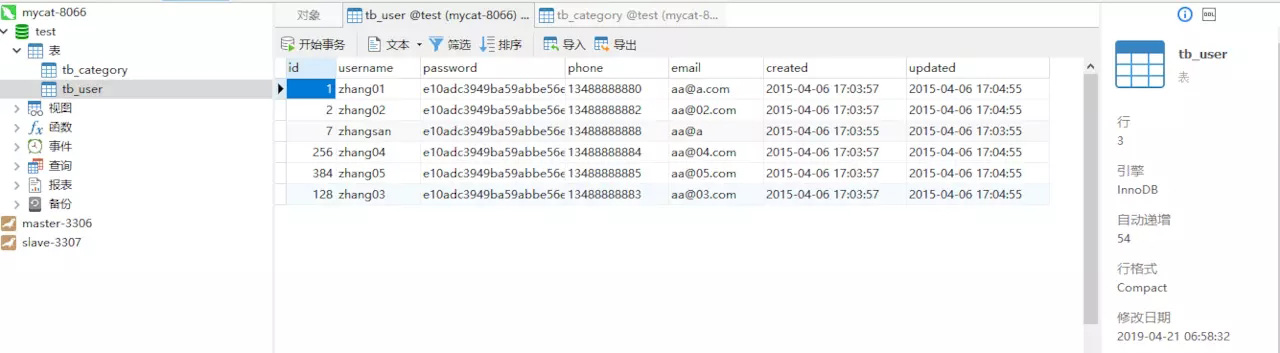
为测试分库效果,我们插入不同ID的数据来观察一下:
INSERT INTO `tb_user`(id,username,password,phone,email,created,updated) VALUES (128, 'zhang02', 'e10adc3949ba59abbe56e057f20f88ss', '13488888882', 'aa@01.com', '2015-04-06 17:03:57', '2015-04-06 17:04:55');
INSERT INTO `tb_user`(id,username,password,phone,email,created,updated) VALUES (256, 'zhang03', 'e10adc3949ba59abbe56e057f20f88ss', '13488888883', 'aa@02.com', '2015-04-06 17:03:57', '2015-04-06 17:04:55');
INSERT INTO `tb_user`(id,username,password,phone,email,created,updated) VALUES (384, 'zhang05', 'e10adc3949ba59abbe56e057f20f88ss', '13488888885', 'aa@05.com', '2015-04-06 17:03:57', '2015-04-06 17:04:55');
可以看到数据分别分布在db1/db2/db3/db4,分布的规则取决于插入数据的主键在rule.xml 设置的分片规则约束。
查看mycat节点健康状态,在主节点输入如下命令:
[root@localhost ~]# mysql -h127.0.0.1 -uroot -p123456 -P9066
Welcome to the MariaDB monitor. Commands end with ; or \g.
Your MySQL connection id is 16
Server version: 5.6.29-mycat-1.6.7.1-release-20190213150257 MyCat Server (monitor)
Copyright (c) 2000, 2017, Oracle, MariaDB Corporation Ab and others.
Type 'help;' or '\h' for help. Type '\c' to clear the current input statement.
MySQL [(none)]> show @@heartbeat;
+--------+-------+---------------+------+---------+-------+--------+---------+--------------+---------------------+-------+
| NAME | TYPE | HOST | PORT | RS_CODE | RETRY | STATUS | TIMEOUT | EXECUTE_TIME | LAST_ACTIVE_TIME | STOP |
+--------+-------+---------------+------+---------+-------+--------+---------+--------------+---------------------+-------+
| hostM1 | mysql | 192.168.92.50 | 3306 | 1 | 0 | idle | 30000 | 1,9,6 | 2019-04-21 20:44:40 | false |
| hostS2 | mysql | 192.168.92.51 | 3307 | 1 | 0 | idle | 30000 | 1,9,67381 | 2019-04-21 20:44:40 | false |
+--------+-------+---------------+------+---------+-------+--------+---------+--------------+---------------------+-------+
2 rows in set (0.36 sec)
上述 RS_CODE 1代表节点正常,-1代表节点异常。
查询mycat所有命令:
MySQL [(none)]> show @@help;
+--------------------------------------------------------------+--------------------------------------------+
| STATEMENT | DESCRIPTION |
+--------------------------------------------------------------+--------------------------------------------+
| show @@time.current | Report current timestamp |
| show @@time.startup | Report startup timestamp |
| show @@version | Report Mycat Server version |
| show @@server | Report server status |
| show @@threadpool | Report threadPool status |
| show @@database | Report databases |
| show @@datanode | Report dataNodes |
| show @@datanode where schema = ? | Report dataNodes |
| show @@datasource | Report dataSources |
| show @@datasource where dataNode = ? | Report dataSources |
| show @@datasource.synstatus | Report datasource data synchronous |
| show @@datasource.syndetail where name=? | Report datasource data synchronous detail |
| show @@datasource.cluster | Report datasource galary cluster variables |
| show @@processor | Report processor status |
| show @@command | Report commands status |
| show @@connection | Report connection status |
| show @@cache | Report system cache usage |
| show @@backend | Report backend connection status |
| show @@session | Report front session details |
| show @@connection.sql | Report connection sql |
| show @@sql.execute | Report execute status |
| show @@sql.detail where id = ? | Report execute detail status |
| show @@sql | Report SQL list |
| show @@sql.high | Report Hight Frequency SQL |
| show @@sql.slow | Report slow SQL |
| show @@sql.resultset | Report BIG RESULTSET SQL |
| show @@sql.sum | Report User RW Stat |
| show @@sql.sum.user | Report User RW Stat |
| show @@sql.sum.table | Report Table RW Stat |
| show @@parser | Report parser status |
| show @@router | Report router status |
| show @@heartbeat | Report heartbeat status |
| show @@heartbeat.detail where name=? | Report heartbeat current detail |
| show @@slow where schema = ? | Report schema slow sql |
| show @@slow where datanode = ? | Report datanode slow sql |
| show @@sysparam | Report system param |
| show @@syslog limit=? | Report system mycat.log |
| show @@white | show mycat white host |
| show @@white.set=?,? | set mycat white host,[ip,user] |
| show @@directmemory=1 or 2 | show mycat direct memory usage |
| show @@check_global -SCHEMA= ? -TABLE=? -retry=? -interval=? | check mycat global table consistency |
| switch @@datasource name:index | Switch dataSource |
| kill @@connection id1,id2,... | Kill the specified connections |
| stop @@heartbeat name:time | Pause dataNode heartbeat |
| reload @@config | Reload basic config from file |
| reload @@config_all | Reload all config from file |
| reload @@route | Reload route config from file |
| reload @@user | Reload user config from file |
| reload @@sqlslow= | Set Slow SQL Time(ms) |
| reload @@user_stat | Reset show @@sql @@sql.sum @@sql.slow |
| rollback @@config | Rollback all config from memory |
| rollback @@route | Rollback route config from memory |
| rollback @@user | Rollback user config from memory |
| reload @@sqlstat=open | Open real-time sql stat analyzer |
| reload @@sqlstat=close | Close real-time sql stat analyzer |
| offline | Change MyCat status to OFF |
| online | Change MyCat status to ON |
| clear @@slow where schema = ? | Clear slow sql by schema |
| clear @@slow where datanode = ? | Clear slow sql by datanode |
+--------------------------------------------------------------+--------------------------------------------+
59 rows in set (0.16 sec)
遇到如下错误:

修改schema.xml 文件属性checkSQLschema:
<schema name="test" checkSQLschema="true" sqlMaxLimit="100">
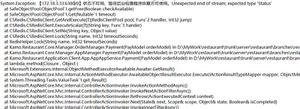
遇到如下错误:
jvm 1 | Caused by: io.mycat.config.util.ConfigException: org.xml.sax.SAXParseException; lineNumber: 97; columnNumber: 42; Attribute "defaultAccount" must be declared for element type "user".
jvm 1 | at io.mycat.config.loader.xml.XMLServerLoader.load(XMLServerLoader.java:111)
jvm 1 | at io.mycat.config.loader.xml.XMLServerLoader.<init>(XMLServerLoader.java:69)
jvm 1 | at io.mycat.config.loader.xml.XMLConfigLoader.<init>(XMLConfigLoader.java:56)
jvm 1 | at io.mycat.config.ConfigInitializer.<init>(ConfigInitializer.java:77)
jvm 1 | at io.mycat.config.MycatConfig.<init>(MycatConfig.java:72)
jvm 1 | at io.mycat.MycatServer.<init>(MycatServer.java:144)
jvm 1 | at io.mycat.MycatServer.<clinit>(MycatServer.java:96)
jvm 1 | ... 7 more
jvm 1 | Caused by: org.xml.sax.SAXParseException; lineNumber: 97; columnNumber: 42; Attribute "defaultAccount" must be declared for element type "user".
请修改server.xml 文件,将user模块的defaultAccount取消:
<user name="root" >
<property name="password">123456</property>
<property name="schemas">test</property>
</user>
最后放一张mycat查询结果截图:
总结
以上就是这篇文章的全部内容了,希望本文的内容对大家的学习或者工作具有一定的参考学习价值,谢谢大家对的支持。
以上是 Docker实现Mariadb分库分表及读写分离功能 的全部内容, 来源链接: utcz.com/p/225984.html