Spring Boot缓存实战 EhCache示例
Spring boot默认使用的是SimpleCacheConfiguration,即使用ConcurrentMapCacheManager来实现缓存。但是要切换到其他缓存实现也很简单
pom文件
在pom中引入相应的jar包
<dependencies>
<groupId>org.springframework.boot</groupId>
<artifactId>spring-boot-starter-web</artifactId>
</dependency>
<dependency>
<groupId>org.springframework.boot</groupId>
<artifactId>spring-boot-starter-data-jpa</artifactId>
</dependency>
<dependency>
<groupId>mysql</groupId>
<artifactId>mysql-connector-java</artifactId>
</dependency>
<dependency>
<groupId>org.apache.commons</groupId>
<artifactId>commons-dbcp2</artifactId>
</dependency>
<dependency>
<groupId>org.springframework.boot</groupId>
<artifactId>spring-boot-starter-cache</artifactId>
</dependency>
<dependency>
<groupId>net.sf.ehcache</groupId>
<artifactId>ehcache</artifactId>
</dependency>
</dependencies>
配置文件
EhCache所需要的配置文件,只需要放到类路径下,Spring Boot会自动扫描。
<?xml version="1.0" encoding="UTF-8"?>
<ehcache>
<cache name="people" maxElementsInMemory="1000"/>
</ehcache>
也可以通过在application.properties文件中,通过配置来指定EhCache配置文件的位置,如:
spring.cache.ehcache.config= # ehcache配置文件地址
Spring Boot会自动为我们配置EhCacheCacheMannager的Bean。
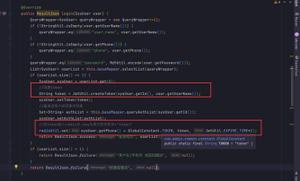
关键Service
package com.xiaolyuh.service.impl;
import com.xiaolyuh.entity.Person;
import com.xiaolyuh.repository.PersonRepository;
import com.xiaolyuh.service.PersonService;
import org.springframework.beans.factory.annotation.Autowired;
import org.springframework.cache.annotation.CacheEvict;
import org.springframework.cache.annotation.CachePut;
import org.springframework.cache.annotation.Cacheable;
import org.springframework.stereotype.Service;
@Service
public class PersonServiceImpl implements PersonService {
@Autowired
PersonRepository personRepository;
@Override
@CachePut(value = "people", key = "#person.id")
public Person save(Person person) {
Person p = personRepository.save(person);
System.out.println("为id、key为:" + p.getId() + "数据做了缓存");
return p;
}
@Override
@CacheEvict(value = "people")//2
public void remove(Long id) {
System.out.println("删除了id、key为" + id + "的数据缓存");
//这里不做实际删除操作
}
@Override
@Cacheable(value = "people", key = "#person.id")//3
public Person findOne(Person person) {
Person p = personRepository.findOne(person.getId());
System.out.println("为id、key为:" + p.getId() + "数据做了缓存");
return p;
}
}
Controller
package com.xiaolyuh.controller;
import com.xiaolyuh.entity.Person;
import com.xiaolyuh.service.PersonService;
import org.springframework.beans.factory.annotation.Autowired;
import org.springframework.cache.CacheManager;
import org.springframework.web.bind.annotation.RequestBody;
import org.springframework.web.bind.annotation.RequestMapping;
import org.springframework.web.bind.annotation.RestController;
@RestController
public class CacheController {
@Autowired
PersonService personService;
@Autowired
CacheManager cacheManager;
@RequestMapping("/put")
public long put(@RequestBody Person person) {
Person p = personService.save(person);
return p.getId();
}
@RequestMapping("/able")
public Person cacheable(Person person) {
System.out.println(cacheManager.toString());
return personService.findOne(person);
}
@RequestMapping("/evit")
public String evit(Long id) {
personService.remove(id);
return "ok";
}
}
启动类
@SpringBootApplication
@EnableCaching// 开启缓存,需要显示的指定
public class SpringBootStudentCacheApplication {
public static void main(String[] args) {
SpringApplication.run(SpringBootStudentCacheApplication.class, args);
}
}
测试类
package com.xiaolyuh;
import static org.springframework.test.web.servlet.request.MockMvcRequestBuilders.post;
import static org.springframework.test.web.servlet.result.MockMvcResultMatchers.content;
import static org.springframework.test.web.servlet.result.MockMvcResultMatchers.status;
import java.util.HashMap;
import java.util.Map;
import org.junit.Before;
import org.junit.Test;
import org.junit.runner.RunWith;
import org.springframework.beans.factory.annotation.Autowired;
import org.springframework.boot.test.context.SpringBootTest;
import org.springframework.http.MediaType;
import org.springframework.test.context.junit4.SpringRunner;
import org.springframework.test.web.servlet.MockMvc;
import org.springframework.test.web.servlet.MvcResult;
import org.springframework.test.web.servlet.setup.MockMvcBuilders;
import org.springframework.web.context.WebApplicationContext;
import net.minidev.json.JSONObject;
@RunWith(SpringRunner.class)
@SpringBootTest
public class SpringBootStudentCacheApplicationTests {
@Test
public void contextLoads() {
}
private MockMvc mockMvc; // 模拟MVC对象,通过MockMvcBuilders.webAppContextSetup(this.wac).build()初始化。
@Autowired
private WebApplicationContext wac; // 注入WebApplicationContext
// @Autowired
// private MockHttpSession session;// 注入模拟的http session
//
// @Autowired
// private MockHttpServletRequest request;// 注入模拟的http request\
@Before // 在测试开始前初始化工作
public void setup() {
this.mockMvc = MockMvcBuilders.webAppContextSetup(this.wac).build();
}
@Test
public void testAble() throws Exception {
for (int i = 0; i < 2; i++) {
MvcResult result = mockMvc.perform(post("/able").param("id", "2"))
.andExpect(status().isOk())// 模拟向testRest发送get请求
.andExpect(content().contentType(MediaType.APPLICATION_JSON_UTF8))// 预期返回值的媒体类型text/plain;
// charset=UTF-8
.andReturn();// 返回执行请求的结果
System.out.println(result.getResponse().getContentAsString());
}
}
}
打印日志
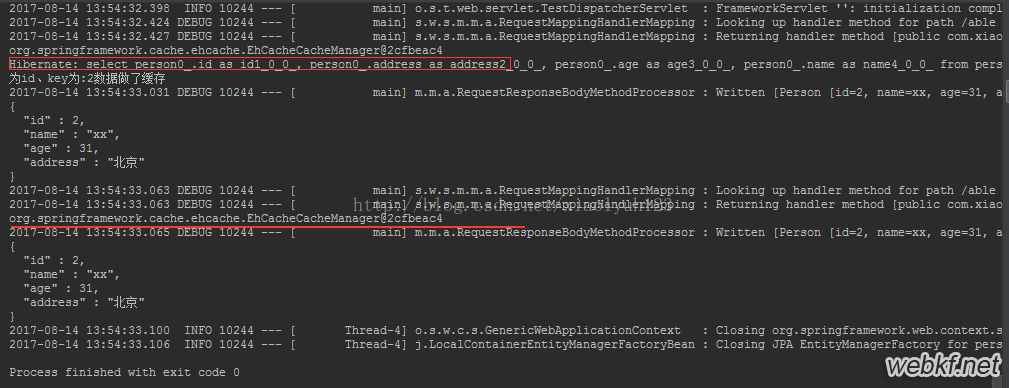
从上面可以看出第一次走的是数据库,第二次走的是缓存
源码:https://github.com/wyh-spring-ecosystem-student/spring-boot-student/tree/releases
以上是 Spring Boot缓存实战 EhCache示例 的全部内容, 来源链接: utcz.com/p/214269.html