在Docker里面安装oracle11R2
主题:
由于在网上找到的关于基于docker安装的oracle11R2的相关介绍有些地方不是那么明白,在安装的时候比较尴尬,因此为了以后方便使用,今日特做了个实际操作, 并把主要步骤进行记录;
约定:
linux: centos7
docker: 19.03.12
oracle: 11R2
安装目录: /oracle/install
工具: yum install -y zip unzip
oracle镜像:jaspeen/oracle-11g
![]()
准备:
1.linux安装docker ,安装过程省略;
2.下载oracle11R2
linux.x64_11gR2_database_1of2.zip linux.x64_11gR2_database_2of2.zip
3.复制安装包
将上面下载的安装包解压到/oracle/install/目录下面,并解压(默认解压到database目录)。
4.镜像下载
docker pull jaspeen/oracle-11g
5.下载检测
docker images

至此,我们的镜像已经成功下载;由于oracle许可限制等原因,当前镜像并不能直接启用运行,该镜像仅仅完成了关于oracle的有关配置,实际的安装还需要用到我们的安装包(解压出来的database)
6.镜像安装脚本
#!/usr/bin/env bashset -esource
/assets/colorechotrap
"echo_red '******* ERROR: Something went wrong.'; exit 1" SIGTERMtrap
"echo_red '******* Caught SIGINT signal. Stopping...'; exit 2" SIGINTif [ ! -d "/install/database" ]; thenecho_red
"Installation files not found. Unzip installation files into mounted(/install) folder"exit
1fi
echo_yellow
"Installing Oracle Database 11g"su oracle
-c "/install/database/runInstaller -silent -ignorePrereq -waitforcompletion -responseFile /assets/db_install.rsp"/opt/oracle/oraInventory/orainstRoot.sh
/opt/oracle/app/product/11.2.0/dbhome_1/root.sh
通过上面的镜像安装脚本可知,在制作镜像的时候,里面默认回到/install/database/目录下面去找安装文件,因此主机里面的Oracle安装目录需要映射到容器里面,才能正确的安装。
安装:
1.安装命令
命令解释:
privileged 给这个容器特权,安装oracle可能需要操作需要root权限的文件或目录name 给这个容器名一个名字
p 映射端口
v 挂在文件到容器指定目录 (
/server/install/database 对应容器 /install/database)jaspeen
/oracle-11g 代表启动指定的容器
安装命令:
docker run --privileged --name oracle11g -p 1521:1521 -v /server/install:/install jaspeen/oracle-11g
2.开始安装
根据上面的安装命令,我们约定主机的1521端口应和到容器的1521端口;8080端口映射到容器的8080端口;此处暂时不映射8080端口,因此执行上面的安装命令,Oracle将安装到容器里面,接下来开始安装:

接下来就是自动安装的一个过程,由于其按照时间比较旧,因此开始安装后请耐性等待(由于本次是夜间安装,因此后半夜睡觉了,也不知道什么时候安装完成,早上起来关机收成功)
3.安装验证
经过了一个晚上,接下来该是验证成果了;
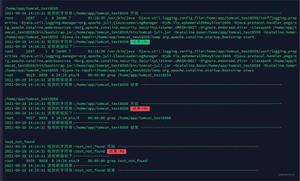
首先检测容器是否正常启动 docker ps
![]()
通过截图,我们知道容器已经安装成功了。
解锁账号,修改密码
进入容器: docker exec -it oracle11g /bin/bash
切换账号: su oracle
nosql登录: sqlplus / as sysdba

alter user scott account unlock;
commit;
alter user scott identitfied by 123456;
conn system/manager as sysdba;
alter user system identified by manager;
alter user sys identified by manager;
exit ;(退出sql)
此致已基本验证了我们的容器是可以正常运行的;
4.提交镜像
由于我们在工作中根据实际需要需要快速的搭建oracle的环境,但是不能每次都这么搭建,否则太慢了,还非人力,精力,接下来我们把刚才的容器提交为新的镜像,备份镜像以供实际需要。
从容器创建镜像口令:
docker commit [options] 容器ID 镜像名称:版本号,具体参数如下:
-a "提交作者"
-c 使用Dockerfile指令创建容器
-m 提交时的说明文字
-p commit时暂停容器
根据容器制作镜像:
镜像取名 ty-oracle11g-r2-init,
docker commit -a "liwenxue" -m "oracle11g-r2镜像初版" -p oracle11g ty-oracle11g-r2:v0
停用原版容器,根据新的镜像生产新的容器,并做好端口、数据目录映射
5.安装结束
至此基本安装结束。
以上是 在Docker里面安装oracle11R2 的全部内容, 来源链接: utcz.com/a/74726.html