Python管理Google Drive文件
背景
Google Drive给我们提供了很多管理和共享文件的简便方法,而且还是免费的(当然免费账户有一定存储限制)。但是,对于某些edu用户,Google Drive存储不仅是免费的,而且是无配额限制的。您是否想知道如何从数据科学的角度充分利用这种免费的云存储服务? 实际上,这并不困难,我们可以使用Python轻松实现访问和管理Google Drive文件。
设置Google Service API认证
首先,我们需要获取Google Service API的身份验证文件,以便我们的Python代码可以访问Google Drive。 为此,我们需要:
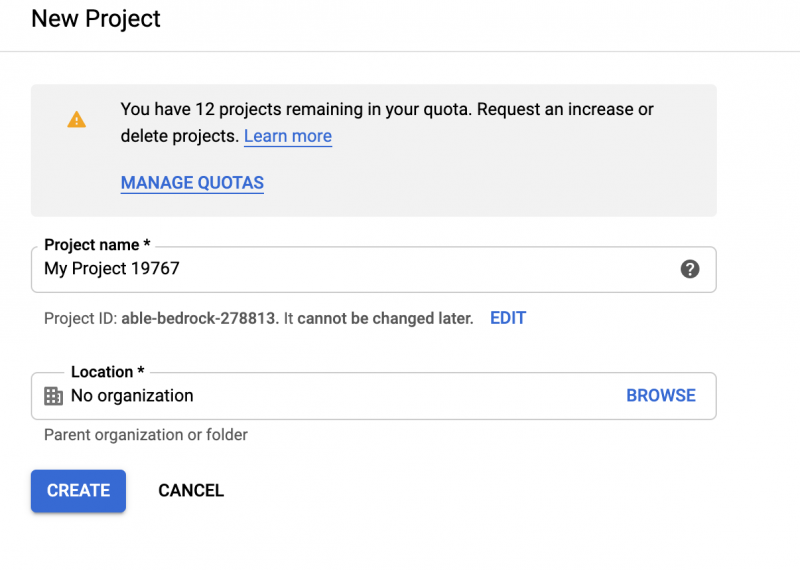
- 在Google Developer Console 页面建立一个新项目(如下图所示)
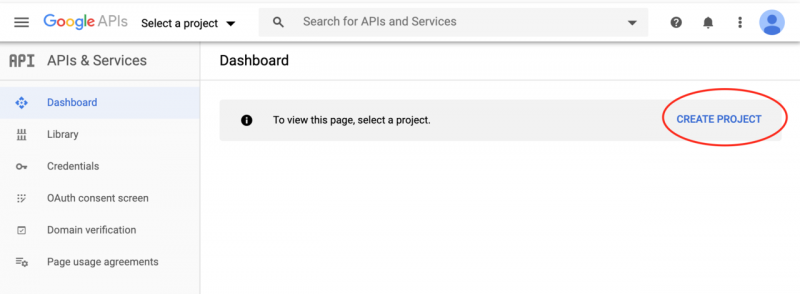
你可以给这个项目一个名字,也可以设为默认值。
- 点击"ENABLE APIS AND SERVICES"开通API服务(如下图所示).
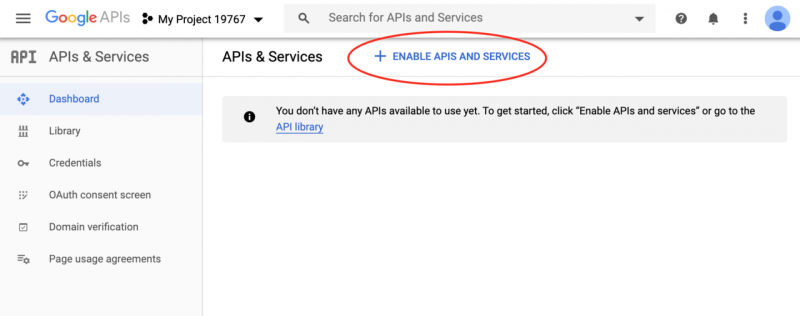
然后页面会转到下面的截图。
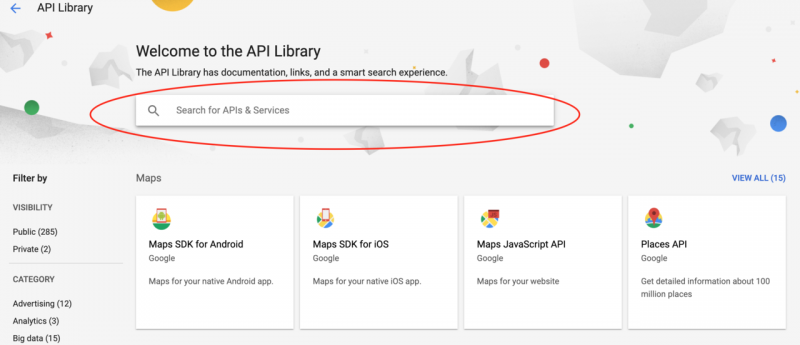
在上面的搜索框内搜索"Google Drive",我们会得到如下界面。
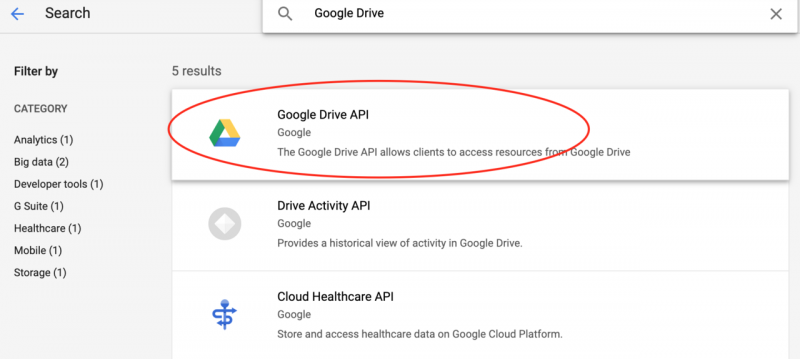
点击"Google Drive API",进入下一个界面。
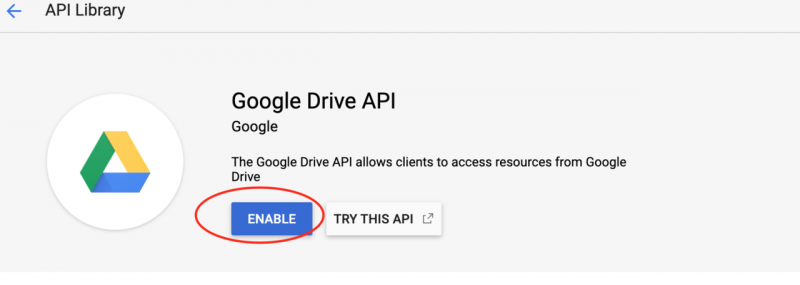
点击"ENABLE"开通Google Drive API服务,进入下一个界面。

- 点击"CREATE CREDENTIALS"创建密码信息。
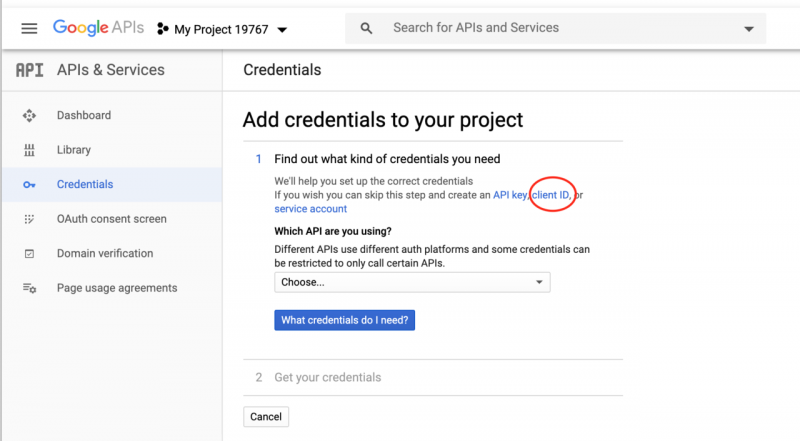
在上面的截图中点击"client ID",然后在下一个界面中点击"CREATE",并下载创建成功的JSON密码文件如下。
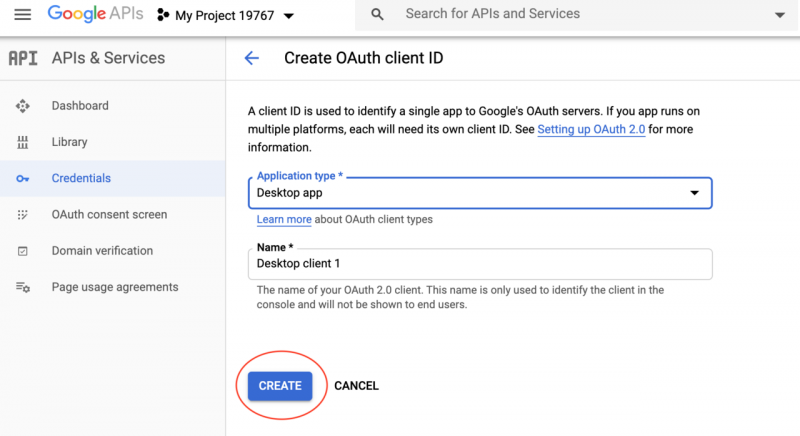

下载的JSON文件就是Python程序读写Google Drive所需要的Google Serivces认证文件。
安装使用PyDrive
下面我们就可以通过在终端运行pip install pydrive安装PyDrive库,并使用PyDrive库管理和读写Google Drive文件。
下面的代码将完成Google Drive用户认证,并列出Google Drive根目录下的所有文件。需要说明的是,我们需要把上面步骤中下载的JSON文件另存为client_serets.json文件,并把它放到Python程序所在的存储文件下。
from pydrive.auth import GoogleAuthfrom pydrive.drive import GoogleDrive
# Rename the downloaded JSON file to client_secrets.json
# The client_secrets.json file needs to be in the same directory as the script.
gauth = GoogleAuth()
drive = GoogleDrive(gauth)
# List files in Google Drive
fileList = drive.ListFile({'q': "'root' in parents and trashed=false"}).GetList()
for file1 in file_list:
print('title: %s, id: %s' % (file1['title'], file1['id']))
每次运行上面的代码,程序都会自动打开一个浏览器页面让用户填写Google用户名和密码。为了避免每次都填写用户名和密码,我们可以创建一个settings.yaml文件,如下所示完成相关设置。settings.yaml文件的具体信息可参见PyDrive官方文档。
client_config_backend:settingsclient_config:
client_id:your_client_id
client_secret:your_client_secret
save_credentials:True
save_credentials_backend:file
save_credentials_file:credentials.json
get_refresh_token:True
oauth_scope:
- https://www.googleapis.com/auth/drive.file
其中, client_id和client_secret可以通过下面所示的截图获得。

重新运行上面的Python代码,程序将要求您再次输入Google密码。 然后它将创建一个credientials.json文件。 再次运行时,Python会自动提取该文件中的内容完成身份验证,这样我们就不需要再次输入密码了。
利用下面的代码,我们就可以把本地文件上传到Google Drive指定的文件夹里。
# Upload files to your Google Driveupload_file_list = ['google_console1.png', 'google_console2.png']
for upload_file in upload_file_list:
gfile = drive.CreateFile({'parents': [{'id': '1pzschX3uMbxU0lB5WZ6IlEEeAUE8MZ-t'}]})
# Read file and set it as a content of this instance.
gfile.SetContentFile(upload_file)
gfile.Upload() # Upload the file.
上面的代码将两个本地文件google_console1.png和google_console2.png上传到我的Google Drive文件夹test/中。 为此,PyDrive库将在Google Drive中创建两个文件,然后读取并将本地的两个文件上传到相应的文件中。 此处,我们需要提供相应Google Drive文件夹的id。 在此示例中,test文件夹的ID为1pzschX3uMbxU0lB5WZ6IlEEeAUE8MZ-t。 小窍门:我们可以从浏览器中获取Google Drive文件夹ID。 例如,当我在Google Drive中打开test文件夹时,浏览器将地址显示为https://drive.google.com/drive/folders/1pzschX3uMbxU0lB5WZ6IlEEeAUE8MZ-t。test文件夹的相应ID是浏览器地址栏中最后一个符号后的部分,即1pzschX3uMbxU0lB5WZ6IlEEeAUE8MZ-t。
同样,我们也可以使用以下代码直接将文件写入Google Drive:
file1 = drive.CreateFile({
'parents': [{'id': '1pzschX3uMbxU0lB5WZ6IlEEeAUE8MZ-t'}],
'title': 'Hello.txt'}) # Create GoogleDriveFile instance with title 'Hello.txt'.
file1.SetContentString('Hello World!') # Set content of the file from given string.
file1.Upload()
我们也可以用下面的代码直接读取Google Drive里的文件。
file2 = drive.CreateFile({'id': file1['id']})file2.GetContentString('Hello.txt')
总结
通过这篇文章,我们学习了如何使用PyDrive直接管理Google Drive中的文件(包括读写和创建)。 主要步骤如下:
- 设置Google DriveAPI并创建认证文件
- 安装PyDrive并完成身份验证
- 使用Python管理Google Drive文件(比如上传和读写)
- 更多PyDrive的使用和文件管理功能请参见PyDrive官方网站。
以上是 Python管理Google Drive文件 的全部内容, 来源链接: utcz.com/a/19440.html

