带你用python利用小猪佩奇制作四个小游戏
![带你用python利用小猪佩奇制作四个小游戏[Python基础]](/wp-content/uploads/new2022/20220602jjjkkk2/2890211443_1.jpg)
本文的文字及图片来源于网络,仅供学习、交流使用,不具有任何商业用途,版权归原作者所有,如有问题请及时联系我们以作处理
以下文章来源于腾讯云 作者:Python进阶者
( 想要学习Python?Python学习交流群:1039649593,满足你的需求,资料都已经上传群文件流,可以自行下载!还有海量最新2020python学习资料。 )
本文说明
为什么要学习python?是因为不仅社会上很多工作需要用到python,同时我们可以利用python做很多好玩儿的事儿,
PS:我帮女朋友曾经做了个人的动态二维码和图片切分为九宫格,她就很开心呀!毕竟她是文科生,就会觉得你很牛逼!所以有趣的技术还是需要学习。
当然python还有很多用途,等待着我们去发现,相信它会给你的学习生活带来乐趣。
本文同样是利用小猪佩奇带着大家学习python的几个好玩儿的操作(大纲如下),俗话说:“兴趣是最好的老师”,我们只有喜欢上一门语言,才会有学好它的欲望。
- 1.利用python绘制一个小猪佩奇;
- 2.利用python给小猪佩奇换背景色;
- 3.利用python将小猪佩奇切分为九宫格;
- 4.利用python制作小猪佩奇动态二维码;
1.利用python绘制一个小猪佩奇
turtle库是一个很好的python图形绘制库,利用它我们可以绘制各种各样的图形、小动物。这个库其实并不难,实际你怎么绘制这个图形,对应的代码,就跟着你的实际绘制图形的方向走下去,即可。PS:当你有孩子了,是不是既可以利用turtle教他们绘制某些图案,还可以培养他们的编程兴趣,好处很多哦!
from turtle import *# 绘制鼻子
def nose(x,y):
penup()
goto(x,y)
pendown()
setheading(-30)
begin_fill()
a=0.4
for i in range(120):
if 0<=i<30 or 60<=i<90:
a=a+0.08
left(3)
forward(a)
else:
a=a-0.08
left(3)
forward(a)
end_fill()
penup()
setheading(90)
forward(25)
setheading(0)
forward(10)
pendown()
pencolor(255,155,192)
setheading(10)
begin_fill()
circle(5)
color(160,82,45)
end_fill()
penup()
setheading(0)
forward(20)
pendown()
pencolor(255,155,192)
setheading(10)
begin_fill()
circle(5)
color(160,82,45)
end_fill()
# 绘制头部
def head(x,y):
color((255,155,192),"pink")
penup()
goto(x,y)
setheading(0)
pendown()
begin_fill()
setheading(180)
circle(300,-30)
circle(100,-60)
circle(80,-100)
circle(150,-20)
circle(60,-95)
setheading(161)
circle(-300,15)
penup()
goto(-100,100)
pendown()
setheading(-30)
a=0.4
for i in range(60):
if 0<=i<30 or 60<=i<90:
a=a+0.08
left(3)
forward(a)
else:
a=a-0.08
left(3)
forward(a)
end_fill()
# 绘制耳朵
def ears(x,y):
color((255,155,192),"pink")
penup()
goto(x,y)
pendown()
begin_fill()
setheading(100)
circle(-50,50)
circle(-10,120)
circle(-50,54)
end_fill()
penup()
setheading(90)
forward(-12)
setheading(0)
forward(30)
pendown()
begin_fill()
setheading(100)
circle(-50,50)
circle(-10,120)
circle(-50,56)
end_fill()
# 绘制眼睛
def eyes(x,y):
color((255,155,192),"white")
penup()
setheading(90)
forward(-20)
setheading(0)
forward(-95)
pendown()
begin_fill()
circle(15)
end_fill()
color("black")
penup()
setheading(90)
forward(12)
setheading(0)
forward(-3)
pendown()
begin_fill()
circle(3)
end_fill()
color((255,155,192),"white")
penup()
setheading(90)
forward(-25)
setheading(0)
forward(40)
pendown()
begin_fill()
circle(15)
end_fill()
color("black")
penup()
setheading(90)
forward(12)
setheading(0)
forward(-3)
pendown()
begin_fill()
circle(3)
end_fill()
# 绘制腮帮
def cheek(x,y):
color((255,155,192))
penup()
goto(x,y)
pendown()
setheading(0)
begin_fill()
circle(30)
end_fill()
# 绘制嘴巴
def mouth(x,y):
color(239,69,19)
penup()
goto(x,y)
pendown()
setheading(-80)
circle(30,40)
circle(40,80)
# 绘制身体
def body(x,y):
color("red",(255,99,71))
penup()
goto(x,y)
pendown()
begin_fill()
setheading(-130)
circle(100,10)
circle(300,30)
setheading(0)
forward(230)
setheading(90)
circle(300,30)
circle(100,3)
color((255,155,192),(255,100,100))
setheading(-135)
circle(-80,63)
circle(-150,24)
end_fill()
# 绘制手
def hands(x,y):
color((255,155,192))
penup()
goto(x,y)
pendown()
setheading(-160)
circle(300,15)
penup()
setheading(90)
forward(15)
setheading(0)
forward(0)
pendown()
setheading(-10)
circle(-20,90)
penup()
setheading(90)
forward(30)
setheading(0)
forward(237)
pendown()
setheading(-20)
circle(-300,15)
penup()
setheading(90)
forward(20)
setheading(0)
forward(0)
pendown()
setheading(-170)
circle(20,90)
# 绘制脚
def foot(x,y):
pensize(10)
color((240,128,128))
penup()
goto(x,y)
pendown()
setheading(-90)
forward(40)
setheading(-180)
color("black")
pensize(15)
forward(20)
pensize(10)
color((240,128,128))
penup()
setheading(90)
forward(40)
setheading(0)
forward(90)
pendown()
setheading(-90)
forward(40)
setheading(-180)
color("black")
pensize(15)
forward(20)
# 绘制尾巴
def tail(x,y):
pensize(4)
color((255,155,192))
penup()
goto(x,y)
pendown()
setheading(0)
circle(70,20)
circle(10,330)
circle(70,30)
# 设置画布和画笔
def setting():
pensize(4)
hideturtle()
colormode(255)
color((255,155,192),"pink")
setup(840,500)
speed(10)
def main():
setting() # 画布和画笔设置
nose(-100,100) # 鼻子
head(-69,167) # 头
ears(0,160) # 耳朵
eyes(0,140) # 眼睛
cheek(80,10) # 腮帮
mouth(-20,30) # 嘴巴
body(-32,-8) # 身体
hands(-56,-45) # 手
foot(2,-177) # 脚
tail(148,-155) # 尾巴
done() # 结束
if__name__ == "__main__":
main()
结果如下: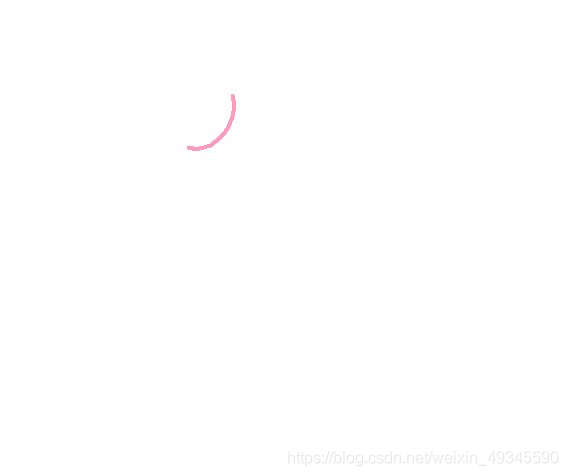
2.利用python给小猪佩奇换背景色
我们在昨天已经讲述过怎么使用python库给证件照换底色,大家可以参考那篇文章学习一下。换背景色的原理:每一个图像都是由像素点构成的,我们想要替换他们的颜色,就是找到每个像素点对应的位置,然后用指定颜色,去替换它!一般证件照背景色并不是同一种蓝色像素点,无法完成像素点的定位,这就需要我们对图像进行【腐蚀】或【膨胀】,完成图片黑白话,这样白色的像素点是255,就可以很好的定位了。
import cv2import numpy as np# 读取照片img=cv2.imread("zhu.jpg")
# 图像缩放
img = cv2.resize(img,None,fx=0.5,fy=0.5)
rows,cols,channels = img.shape
print(rows,cols,channels)
cv2.imshow("img",img)
# 图片转换为灰度图
hsv = cv2.cvtColor(img,cv2.COLOR_BGR2HSV)
cv2.imshow("hsv",hsv)
# 图片的二值化处理
lower_blue=np.array([90,70,70])
upper_blue=np.array([110,255,255])
mask = cv2.inRange(hsv, lower_blue, upper_blue)
#腐蚀膨胀
erode=cv2.erode(mask,None,iterations=1)
cv2.imshow("erode",erode)
dilate=cv2.dilate(erode,None,iterations=1)
cv2.imshow("dilate",dilate)
#遍历替换
for i in range(rows):
for j in range(cols):
if erode[i,j]==255: # 像素点为255表示的是白色,我们就是要将白色处的像素点,替换为红色
img[i,j]=(0,0,255)#此处替换颜色,为BGR通道
cv2.imshow("res",img)
# 窗口等待的命令,0表示无限等待
cv2.waitKey(0)
结果如下: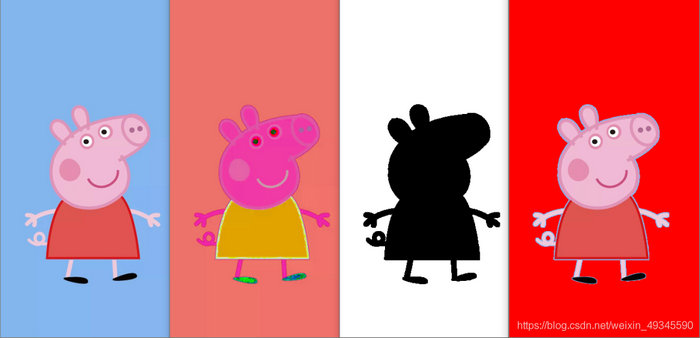
3.利用python将小猪佩奇切分为九宫格
将图片切分为九宫格的原理就是:找到图片对应位置的坐标,然后进行切割。由于是九宫格,我们切分的是3*3,然后利用双层循环遍历对应位置的坐标后,进行图片切割。
from PIL import Imageimport sys#将图片填充为正方形def fill_image(image):
width, height = image.size
#选取长和宽中较大值作为新图片的,小的地方,用图片填充为等宽等高
new_image_length = width if width > height else height
#生成新图片[白底]
new_image = Image.new(image.mode, (new_image_length, new_image_length), color="white")
#将之前的图粘贴在新图上,居中
if width > height:#原图宽大于高,则填充图片的竖直维度
#(x,y)二元组表示粘贴上图相对下图的起始位置
new_image.paste(image, (0, int((new_image_length - height) / 2)))
else:
new_image.paste(image, (int((new_image_length - width) / 2),0))
return new_image
#切图
def cut_image(image):
width, height = image.size
item_width = int(width / 3)
item_height = int(height / 3)
box_list = []
#双重循环,生成9张图片基于原图的位置
# 注意:图片左上角是(0,0),右下角是(width,height)
for i in range(0,3):
for j in range(0,3):
print((j*item_width,i*item_height,(j+1)*item_width,(i+1)*item_height))
box = (j*item_width,i*item_height,(j+1)*item_width,(i+1)*item_height)
box_list.append(box)
image_list = [image.crop(box) for box in box_list]
return image_list
#保存
def save_images(image_list):
index = 1
for image in image_list:
image.save(str(index) + ".jpg")
index += 1
file_path = "zhuzhu.jpg"
image = Image.open(file_path)
image = fill_image(image)
image_list = cut_image(image)
save_images(image_list)
结果如下: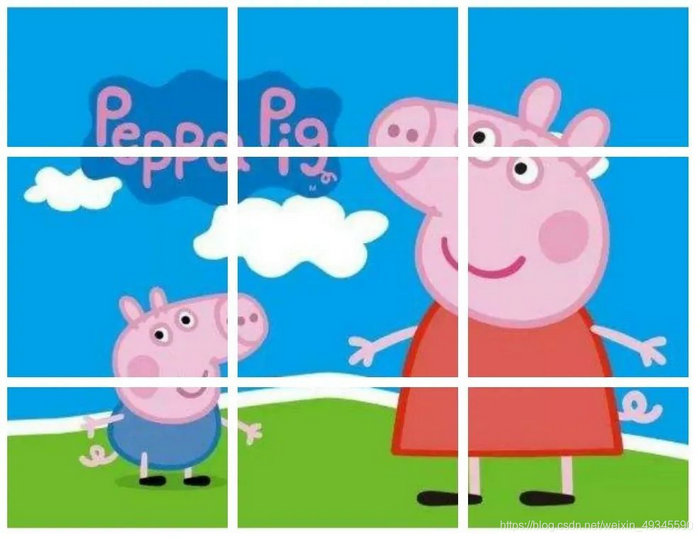
4.利用python制作小猪佩奇动态二维码
代码说明:如果我们利用的背景图是gif动态图,生成的就是动态二维码。如果利用的背景是静态图,生成的是静态二维码。
from MyQR import myqrimport matplotlib.pyplot as plt# 生成的二维码最终在你电脑的存储位置#
当你使用了动态图作为背景,这里可以写成".gif",保存出来的就是gif动态二维码!save_name = "傻逼1.gif"
myqr.run(
# 该链接表示你想要生成二维码的链接。
words="https://blog.csdn.net/weixin_41261833",
version=10, # 容错率
level="H", # 纠错水平,范围是L、M、Q、H,从左到右依次升高
colorized=True, # False为黑白
contrast=1.5, # 用以调节图片的对比度,1.0 表示原始图片。
brightness=1.0, # 用来调节图片的亮度。
save_name=save_name,#存储的文件名
# 背景图片的路径,你如果给的是".jpg/.jpg"等静态图片,最终生成的就是静态二维码!
# 背景图片的路径,你如果给的是".gif"等动态图片,最终只需要保存为".gif",生成的就是动态二维码!
picture=r"G:1Pycharm_Projectcsdn分享系列小猪佩奇的几个操作动态.gif"
)
# 查看生成的二维码图片
img = Image.open(save_name) # 读取所保存的图片展示二维码
plt.figure("Image") # 图像窗口名称
plt.imshow(img)
plt.axis("off") # 关掉坐标轴为 off
plt.show()
结果如下: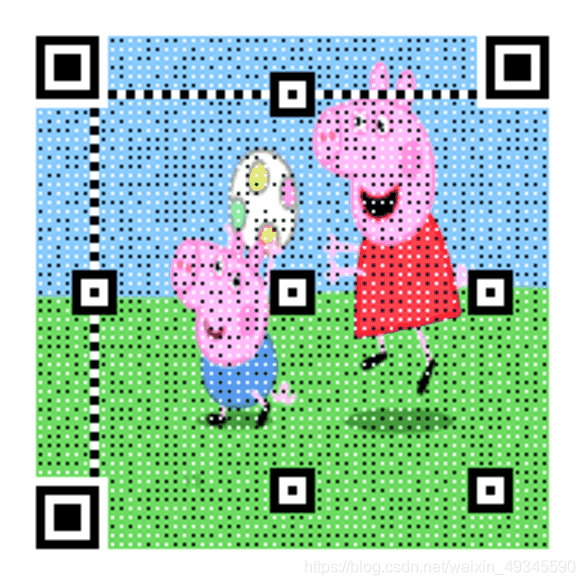
以上是 带你用python利用小猪佩奇制作四个小游戏 的全部内容, 来源链接: utcz.com/z/537686.html