(LNMP)Nginx_PHP_MariaDB

L用的是Centos7.5以上,主要是NMP三组件的安装记录。
通常会先安装一下依赖:
yuminstall -y pcre-devel zlib-devel openssl-devel
使用yum或rpm方式安装MariaDB
# 保留缓存软件包
#sudo vim /etc/yum.confcachedir
=/var/cache/yum/$basearch/$releaseverkeepcache=1
# 防火墙先关为敬
 systemctl stop firewalld.service
 systemctl disable firewalld.service
#------------------最简单的 yum 安装,默认版本5.5.64 -------------------------
yum install mariadb mariadb-server
systemctl start mariadb
netstat -nltp   # 找3306
# vim /etc/my.cnf --[mysqld]下增加一行: innodb_file_per_table=1
systemctl restart mariadb

mysql
use mysql;
grant all PRIVILEGES on *.* to "root"@"%" IDENTIFIED BY "123456" with grant option;
grant all PRIVILEGES on *.* to "root"@"localhost" IDENTIFIED BY "123456" with grant option;
FLUSH PRIVILEGES;
# ------------离线下载安装 rpm 的 5.5.64 版本---------------------------------
# https:
//mirrors.tuna.tsinghua.edu.cn/mariadb//mariadb-5.5.65/yum/centos74-amd64/rpms/# https://mariadb.com/kb/en/library/installing-mariadb-with-the-rpm-tool/
# 可能要下载以下rpm包MariaDB-client-5.5.65-1.el7.centos.x86_64.rpm
MariaDB-client-debuginfo-5.5.65-1.el7.centos.x86_64.rpm
MariaDB-server-debuginfo-5.5.65-1.el7.centos.x86_64.rpm
MariaDB-devel-5.5.65-1.el7.centos.x86_64.rpm
MariaDB-server-5.5.65-1.el7.centos.x86_64.rpm
MariaDB-shared-5.5.65-1.el7.centos.x86_64.rpm
MariaDB-test-5.5.65-1.el7.centos.x86_64.rpm
MariaDB-common-5.5.65-1.el7.centos.x86_64.rpm
MariaDB-compat-5.5.65-1.el7.centos.x86_64.rpm
libzstd-1.3.4-1.el7.x86_64.rpm
galera-25.3.26-1.rhel7.el7.centos.x86_64.rpm
jemalloc-3.6.0-1.el7.x86_64.rpm
jemalloc-devel-3.6.0-1.el7.x86_64.rpm
rpm -Uvh --force --nodeps *.rpm
#./bin/mysqladmin -u root password "123456"
#./bin/mysqladmin -u root -h evxapp01 password "123456"
#Alternatively you can run:
#./bin/mysql_secure_installation
./bin/mysqld --defaults-file=/etc/my.cnf --user=mysql &
# 后续设置同上.
# ------------- 使用官方推荐的 yum 方式安装 10.4.8 -----------------------------
# https://mariadb.com/kb/en/library/yum/
# 先得到仓库
curl -sS https://downloads.mariadb.com/MariaDB/mariadb_repo_setup | sudo bash
# 成功后, 编辑 /etc/yum.repos.d/mariadb.repo 更改一下 url 国内源. 比如清华,其它不改。如果网速够快,可以不改。
[mariadb-main]name
= MariaDB Serverbaseurl
= https://mirrors.tuna.tsinghua.edu.cn/mariadb/mariadb-10.4.8/yum/rhel/$releasever/$basearchgpgkey
= file:///etc/pki/rpm-gpg/MariaDB-Server-GPG-KEYgpgcheck
= 1enabled
= 1[mariadb-maxscale]
# To use the latest stable release of MaxScale, use "latest" as the version
# To use the latest beta (or stable if no current beta) release of MaxScale, use "beta" as the version
name = MariaDB MaxScale
baseurl = https://mirrors.tuna.tsinghua.edu.cn/MaxScale/2.4/centos/$releasever/$basearch
gpgkey = file:///etc/pki/rpm-gpg/MariaDB-MaxScale-GPG-KEY
gpgcheck = 1
enabled = 1
[mariadb-tools]
name = MariaDB Tools
baseurl = https://mirrors.tuna.tsinghua.edu.cn/Tools/rhel/$releasever/$basearch
gpgkey = file:///etc/pki/rpm-gpg/MariaDB-Enterprise-GPG-KEY
gpgcheck = 1
enabled = 1
# 然后就可以直接 yum 安装 10.4.8 了。因为上面的文件里写的是 10.4.8 版本
yum install MariaDB-server galera-4 MariaDB-client MariaDB-shared MariaDB-backup MariaDB-common
# 配置文件同上.
# 启动 状态 停止 重启 开机启动
systemctl start mariadb
systemctl status mariadb
systemctl stop mariadb
systemctl restart mariadb
systemctl enable mariadb
二进制程序包 tar 安装 MariaDB 供参考:(1) 准备用户groupadd
-r -g 306 mysqluseradd
-r -g 306 -u 306 -m -d /data/mysqldb mysql(
2) 准备数据目录以
/data/mysqldb为例,建议使用逻辑卷chown mysql:mysql /data/mysqldbchmod700 /data/mysqldb(
3) 准备二进制程序tar xf mariadb-10.2.15-linux-x86_64.tar.gz -C /usr/local #/usr/local是程序包指定的目录,必须解压在这里cd
/usr/local;ln -sv mariadb-10.2.15 mysqlchown -R mysql:mysql /usr/local/mysql/(
4) 准备配置文件mkdir /etc/mysql/cp support-files/my-huge.cnf /etc/mysql/my.cnf
#/usr/local/mysql/support-files下有很多my-*.cnf文件,分别对应不同的内存大小,可打开看看,选择对应自己机器的拷贝就行
vim /etc/mysql/my.cnf
[mysqld]中添加三个选项:
datadir = /data/mysqldb
innodb_file_per_table = on # 可不加
skip_name_resolve = on # 禁止主机名解析,建议使用,不加也可
(5) 创建数据库文件
cd /usr/local/mysql/
./scripts/mysql_install_db --datadir=/data/mysqldb --user=mysql
(6) 准备日志文件
touch /var/log/mysqld.log
chown mysql:mysql /var/log/mysqld.log
(7) 准备服务脚本,并启动服务
cp ./support-files/mysql.server /etc/rc.d/init.d/mysqld
chkconfig --add mysqld
service mysqld start
(8) 安全初始化
/usr/local/mysql/bin/mysql_secure_installation
(9) 添加环境变量
echo PATH=/usr/local/mysql/bin:$PATH > /etc/profile.d/mysql.sh
. /etc/profile.d/mysql.sh
mysql -uroot -p
-- use mysql;
-- grant all PRIVILEGES on *.* to "root"@"%" IDENTIFIED BY "123456" with grant option;
-- grant all PRIVILEGES on *.* to "root"@"localhost" IDENTIFIED BY "123456" with grant option;
-- FLUSH PRIVILEGES;
解决ibdata1体积太大问题
# 备份全部库mysqldump
-uroot -p123456 --all-databases --add-drop-table > /opt/all.sql# vim
/etc/my.cnf --[mysqld]下增加一行:innodb_file_per_table
=1# 重启服务
systemctl restart mariadb
mysql
-uroot -p123456show variables like
"%per_table%"; -- 得到 ON 即开启成功# 删除 ibdata1
cd
/var/lib/mysqlrm -rf ib_logfile*rm -rf ibdata1
# 重启服务
systemctl restart mariadb
# 导入数据
mysql -uroot -p123456 < /opt/all.sql
安装与配置nginx1.17.4
systemctl status firewalld.servicesystemctl stop firewalld.service
systemctl disable firewalld.service
systemctl status firewalld.service
tar zxf nginx-1.17.4.tar.gzcd nginx
-1.17.4/.
/configure --prefix=/opt/nginx --with-openssl=/usr/bin/opensslmake & makeinstallvim
/etc/profilePATH
=/opt/nginx/sbin:$PATHexport PATH
.
/etc/profileuseradd nginx
passwd nginxcd
/opt/chown -R nginx:nginx nginx/
ln -s /opt/nginx/sbin/nginx /usr/bin/nginx
cd /
# 修改conf/nginx.conf 文件,并启用PHP
user nginx;worker_processes auto;error_log logs/error.log info
;pid logs/nginx.pid
;events {
use epoll
; worker_connections 16384;}http {
include mime.types
; default_type application/octet-stream;log_format main "$remote_addr - $remote_user
[$time_local] "$request" ""$status $body_bytes_sent
"$http_referer" ""
"$http_user_agent" "$http_x_forwarded_for" "$request_time"";sendfile on
; tcp_nopush on;keepalive_timeout
65; types_hash_max_size 2048;server {
listen
80; server_name _;location / {
root html
; index index.html index.htm index.php; }error_page
500 502 503 504 /50x.html; location = /50x.html {root html
; }location ~ .php$ {
root html
; fastcgi_pass 127.0.0.1:9000; fastcgi_index index.php; fastcgi_param SCRIPT_FILENAME $document_root$fastcgi_script_name; include fastcgi_params; }}
}
su nginxsudo nginx -t

# 启用PHP解析后,如果浏览器出现 File not found . 需要检查nginx.conf配置文件
# 可能需要将 $document_root 改成绝对路径。例如下面的配置就改成了/webapp/www
location ~* .php$ { fastcgi_index index.php
; fastcgi_pass 127.0.0.1:9000; include fastcgi_params; fastcgi_param SCRIPT_FILENAME /webapp/www$fastcgi_script_name; fastcgi_param SCRIPT_NAME $fastcgi_script_name; }
安装与配置PHP7.2.22
cd /opttar zxf php-7.2.22.tar.gzcd php
-7.2.22
安装依赖
yuminstall -y autoconf gcc gcc-c++ libxml2 libxml2-devel openssl openssl-devel
    bzip2bzip2-devel libcurl libcurl-devel libjpeg libjpeg-devel libpng libpng-devel
    freetype freetype-devel gmp gmp-devel libmcrypt libmcrypt-devel readline readline-devel
    libxslt libxslt-devel
因为要安装 MediaWiki, 所以再安装依赖 APCu, icu, intl
# 下载 https://pecl.php.net/package/APCu# 下载 https://github.com/unicode-org/icu 或者git
# icu需要在php编译之前安装,成功后就可以在编译PHP时直接使用。
tar xf icu4c-52_1-src.tgzcd icu/source
mkdir /usr/local/icu
./configure --prefix=/usr/local/icu
make && make install
# PHP编译时 --enable-intl --with-icu-dir=/usr/local/icu
# apcu 需要在php安装之后安装。安装完后需要重启 php-fpm
# 直接带上intl扩展。
tar zxf apcu-5.1.17.tgz
cd apcu-5.1.17
phpize # /usr/local/php/bin/phpize
./configure --with-php-config=/usr/local/php/bin/php-config
make && makeinstall
# /etc/php.ini中添加引用:
extension=apcu.so
apc.enabled=on
apc.shm_size=128M
apc.enable_cli=on
/etc/init.d/php-fpm restart

# 如果时编译时没有intl,事后安装,则如下执行:
cd /opt/php-7.2.22/ext/intl
make clean
phpize
./configure --with-php-config=/usr/local/php/bin/php-config --enable-intl --with-icu-dir=/usr/local/icu
make && make install
预编译: 注意红色的2项,需要在系统中添加对应的组和用户,用于启动php-fpm。 参数 with-config-file-path=/etc 则指定php.ini的位置
./configure --prefix=/usr/local/php --with-config-file-path=/etc --enable-fpm --with-fpm-user=nginx--with-fpm-group=nginx
--enable-inline-optimization --disable-debug --disable-rpath --enable-shared --enable-soap --with-libxml-dir--with-xmlrpc --with-openssl --with-mhash --with-pcre-regex --with-sqlite3 --with-zlib --enable-bcmath --with-iconv --with-bz2 --enable-calendar --with-curl
--with-cdb --enable-dom
--enable-exif --enable-fileinfo --enable-filter --with-pcre-dir--enable-ftp--with-gd --with-openssl-dir--with-jpeg-dir--with-png-dir--with-zlib-dir--with-freetype-dir--enable-gd-jis-conv --with-gettext --with-gmp --with-mhash --enable-json --enable-mbstring --enable-mbregex --enable-mbregex-backtrack --with-libmbfl --with-onig --enable-pdo --with-mysqli=mysqlnd --with-pdo-mysql=mysqlnd --with-zlib-dir--with-pdo-sqlite --with-readline --enable-session --enable-shmop --enable-simplexml --enable-sockets --enable-sysvmsg --enable-sysvsem --enable-sysvshm --enable-wddx --with-libxml-dir--with-xsl --enable-zip--enable-mysqlnd-compression-support --with-pear --enable-opcache
--enable-intl
--with-icu-dir=/usr/local/icu
编译如果出错:
configure: error: off_t undefined; check your library configuration解决:加入icu/lib路径
echo "/usr/local/lib64 /usr/local/lib /usr/lib /usr/lib64 /usr/local/icu/lib" >> /etc/ld.so.conf
ldconfig -v
安装:
make && make install
添加用户和组,如果事先没有此用户的话:
groupadd nginxuseradd
-g nginx
配置并启动 php-fpm
vi /etc/profilePATH
=$PATH:/usr/local/php/binexport PATH
source
/etc/profilecd
/opt/php7.2.22cp php.ini-production /etc/php.ini
cp /usr/local/php/etc/php-fpm.conf.default /usr/local/php/etc/php-fpm.conf
cp /usr/local/php/etc/php-fpm.d/www.conf.default /usr/local/php/etc/php-fpm.d/www.conf
cp sapi/fpm/init.d.php-fpm /etc/init.d/php-fpm
chmod +x /etc/init.d/php-fpm
/etc/init.d/php-fpm start
/etc/init.d/php-fpm restart
/etc/init.d/php-fpm stop
如果需要 opcache, 操作如下:
yum install -y php-pecl-zendopcache
# 修改配置文件 php.inizend_extension
=opcache.so[opcache]
opcache.enable
=1# 然后重启php-fpm 和 nginx
/etc/init.d/php-fpm restart
nginx -s reload

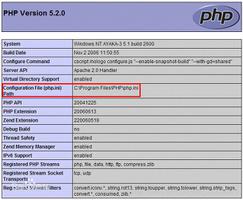
# 最后用 phpinfo() 检查
一个个安装嫌烦的话, 开发环境也可以使用xampp包
./xampp-linux-x64-7.2.22-0-installer.runcd
/opt/lampp.
/lampp security
# 依次设置安全选项.但是最后要手动启用mysql的远程连接#在
/opt/lampp/etc/my.cnf 中注释掉:#skip
-networking
以上是 (LNMP)Nginx_PHP_MariaDB 的全部内容, 来源链接: utcz.com/z/531918.html

