手把手编写文件服务器

文件服务器" title="文件服务器">文件服务器编写的详细流程步骤,有需要的伙伴可以参考下
一、项目需求
最近做了人力资源管理相关的项目,涉及到文件的上传、下载和预览等功能,由于条件有限,只能自己手写文件服务器。
二、思路
由于用的是SpringBoot版本,这边进行相应的文件参数配置以及项目部署的服务器划分出相应静态文件区域,进行流上传,路径存储,下载和预览通过转换成Base64给前端来实现,下面就来看下代码的实现过程。
三、实现过程
1.在application.yml文件进行配置声明
#文件上传upload:
path:
#临时上传目录(本地测试环境)
temporary: D:
/desk/up/#正式上传目录(正式环境)
formal:
/home/formal/file/CV/#正式上传目录(正式环境)
formalOffer:
/home/formal/file/offer/#转化后图片保存路径(本地测试环境)
imgTemp: D:
/desk/up/img#转化后图片保存路径(正式环境)
img:
/home/formal/file/picture/CV/#转化后图片保存路径(正式环境)
imgOffer:
/home/formal/file/picture/offer/multipart:
#单个文件最大内存
maxFileSize: 5MB
#所有文件最大内存
maxRequestSize: 10MB
2.编写FileConfig配置类
import lombok.Data;import org.springframework.beans.factory.annotation.Value;import org.springframework.context.annotation.Configuration;/*** 功能描述: 文件上传配置类
*
*
@author WCJ* @date 2022/3/1 9:05
*/@Data
@Configuration
publicclass FilesConfig {/*** 单文件上传最大内存
*/@Value(
"${upload.multipart.maxFileSize}")private String maxFileSize;/*** 多文件上传最大内存
*/@Value(
"${upload.multipart.maxRequestSize}")private String maxRequestSize;/*** 文件上传临时目录
*/@Value(
"${upload.path.temporary}")private String temporaryPath;/*** 简历文件上传正式目录
*/@Value(
"${upload.path.formal}")private String formalPath;/*** 简历图片生成路径
*/@Value(
"${upload.path.img}")private String imgUrl;/*** offer文件上传正式目录
*/@Value(
"${upload.path.formalOffer}")private String offerFormalPath;/*** offer图片生成路径
*/@Value(
"${upload.path.imgOffer}")private String offerImgUrl;/*** 测试环境图片生成路径
*/@Value(
"${upload.path.imgTemp}")private String tempImgUrl;}
Tip1--这边需要注意的是,由于使用到@Value路径注入,如果配置信息是写在 application-dev.yml 里面的话,在启动项目是会出现类比dev配置文件先加载的问题,出现加载报空的问题,解决方法是把配置信息放在总配置文件 application.yml 第一时间加载出来。
3.编写对应Controller--文件上传
/*** 服务对象
*/@Resource(name
= "fileBPO")private FileBPO fileBPO;/*** 文件配置对象
*/@Resource
private FilesConfig filesConfig;/*** 设置文件上传大小:在配置文件中限定
*
@return*/
@Bean
public MultipartConfigElement multipartConfigElement() {
MultipartConfigFactory factory = new MultipartConfigFactory();
//单个文件最大
factory.setMaxFileSize(DataSize.parse(filesConfig.getMaxFileSize()));
//设置总上传数据总大小
factory.setMaxRequestSize(DataSize.parse(filesConfig.getMaxRequestSize()));
return factory.createMultipartConfig();
}
/**
* 仅上传简历返回文件id
* @param request 文件
* @return 简历文件id
* @throws IOException
*/
@OperLog
@PostMapping("/uploadCV")
@ApiOperation(value= "上传简历", notes = "仅上传简历并返回文件id
"+
"{HttpServletRequest 流形式上传
" +
"MultipartFile文件,(仅支持 doc、png、pdf、jpeg、jpg),<=5M
" +
"}")
public AjaxResponse uploadCV(HttpServletRequest request) throws IOException {
AjaxResponse ajaxResponse = new AjaxResponse();
try{
MultipartHttpServletRequest mureq = (MultipartHttpServletRequest) request;
Map<String, MultipartFile> files = mureq.getFileMap();
MultipartFile fileNew = files.get("file");
//文件过滤
// 文件名
String fileName = fileNew.getOriginalFilename();
// 在file文件夹中创建名为fileName的文件
assert fileName != null;
int split = fileName.lastIndexOf(".");
// 文件后缀,用于判断上传的文件是否是合法的
String suffix = fileName.substring(split+1,fileName.length());
if("jpg".equals(suffix) || "jpeg".equals(suffix) || "png".equals(suffix)|| "pdf".equals(suffix) || "doc".equals(suffix)) {
// 正确的类型,保存文件
String fileId = fileBPO.uploadCV(fileNew, filesConfig.getFormalPath(),filesConfig.getImgUrl());
if(!StringUtils.isBlank(fileId)){
ajaxResponse.setData("data",fileId);
ajaxResponse.setMsg("上传成功");
}else {
thrownew BusinessException("上传失败:数据库表同步失败");
}
}else{
thrownew BusinessException("上传失败:上传简历(仅支持 doc、png、pdf、jpeg、jpg格式)");
}
}catch (Exception ex){
thrownew BusinessException("上传失败:文件接收处理异常"+ex.getMessage());
}
return ajaxResponse;
}
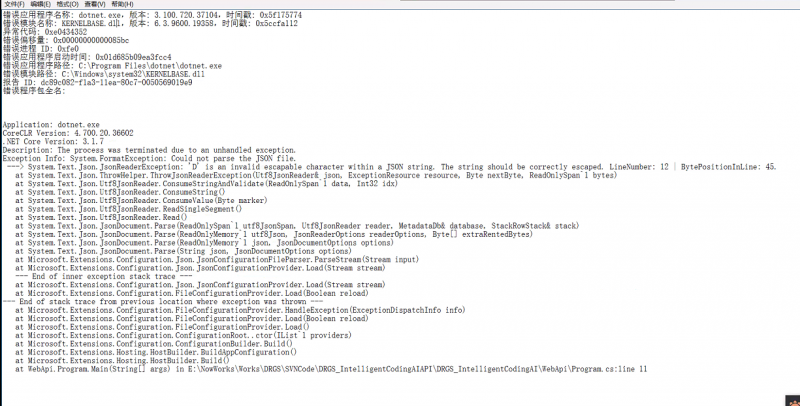
Tip2--这个地方一开始传参用的是 @RequestParam("file")MultipartFile file 但是postman测试始终拿不到文件信息,出现下图报错,后面想了下:一般在前端上传文件的话,他会有专门的一个id ,然后后端根据id来确认是不是这个文件,后面我们postman是拿到这个文件了,可是没有对应的识别id,然后就是一直为空,后面我换了一个文件上传的写法:用HttpServletRequest的方式,终于拿到的流信息。
4.编写对应BPO方法及其实现类
/*** 上传文件返回文件id
*
@param file 文件*
@param path 原文件路径*
@param imgPath 图片路径*
@return 文件id*/String uploadCV(MultipartFile file, String path,String imgPath)
throws IOException;
@Overridepublic String uploadCV(MultipartFile file, String path,String imgPath) throws IOException {//获取当前登录人HashMap<String,String> map = UserUtil.getAbb001AndUserId();
String userid= map.get("userid");
//时间文件夹
SimpleDateFormat sdf = new SimpleDateFormat("yyyyMMddHHmmssSSS");
String dateStr ="";
try {
//1、日期转字符串
Calendar calendar = Calendar.getInstance();
Date date = calendar.getTime();
dateStr = sdf.format(date);
} catch (Exception e) {
thrownew BusinessException(e.getMessage());
}
//新的文件存放路径加上新的文件名
String fileName = file.getOriginalFilename();
int split = fileName.lastIndexOf(".");
// 文件名、文件后缀
String name = fileName.substring(0,split);
String suffix = fileName.substring(split+1,fileName.length());
String uuId = UUID.randomUUID().toString().replace("-", "");
String newName = name+ "." + suffix;
String newPath = path + userid+"/"+dateStr +"/"+uuId+"/"+newName;
File file1 = new File(newPath);
//判断文件目录是否存在
this.checkFile(newPath);
//存储文件
file.transferTo(file1);
//新建文件上传对象
AccessoryInfo accessoryInfo = new AccessoryInfo();
//TODO 将对应的文件路径、大小、格式等基本信息存储到数据库
//文件转化
~~String png = imgPath + userid+"/"+dateStr +"/"+ uuId+"/"+name + ".png";~~
~~String pdf = imgPath + userid+"/"+dateStr +"/"+uuId+"/"+name+ ".pdf";~~
~~String imgSource = this.toPng(suffix,newPath,pdf,png);~~
accessoryInfo.setImgSource(imgSource);
//同步添加到文件上传表
int save = 0;
try{
save= accessoryInfoBPO.saveAccessoryInfo(accessoryInfo);
//返回文件id
return accessoryInfo.getId();
}catch (Exception e){
thrownew BusinessException("AccessoryInfo表新增失败"+e.getMessage());
}
}
/*** 判断文件目录是否存在
*
@param path 文件路径*
@return*/
publicvoid checkFile(String path) {
File file1 = new File(path);
//判断文件目录是否存在
if (!file1.getParentFile().exists()) {
//创建文件存放目录
//无论是几个/,都是创建一个文件夹
//mkdirs(): 创建多层目录,如:E:/upload/2019
//mkdir(): 只创建一层目录,如:E:upload
//如果不加这一行不会创建新的文件夹,会报系统找不到路径
file1.getParentFile().mkdirs();
}
}
5.编写对应Controller--文件下载
/*** 简历下载
*
@param ccb212 简历文件id*
@return 简历下载情况*/@OperLog
@GetMapping(
"/downFile")@ApiOperation(value
= "简历下载", notes = "根据文件id返回base64"+
"{"ccb212": "简历文件id",
" +
"}")
public AjaxResponse downFile(@RequestParam("ccb212") String ccb212) {
AjaxResponse ajaxResponse = new AjaxResponse();
//根据文件id查询相应的文件存储路径
String base64 = cb02BPO.getUrlById(ccb212);
if (!StringUtils.isBlank(base64)){
//转base64
File file = new File(base64);
ToPngUtil toPngUtil = new ToPngUtil();
String toBase64 = toPngUtil.toBase64(file);
//
ajaxResponse.setData("data",toBase64);
ajaxResponse.setMsg("下载成功");
}
return ajaxResponse;
}
/*** 将文件转化为Base64字符串
*
@param file*
@return Base64字符串*/public String toBase64(File file){
InputStream in = null;
byte[] data = null;
try{
in = new FileInputStream(file);
data = newbyte[in.available()];
in.read(data);
}catch (IOException e){
thrownew BusinessException("文件转化为Base64字符串格式失败:"+e.getMessage());
}finally{
if (in != null) {
try {
in.close();
} catch (IOException e) {
thrownew BusinessException("文件转化为Base64字符串格式失败:"+e.getMessage());
}
}
}
//Base64编码
BASE64Encoder encoder = new BASE64Encoder();
return "data:image/png;base64," + encoder.encode(data);
}
四、尾言
看到这儿,基本的文件上传服务器功能就已经实现了,可以根据业务的需求对方法进行自适应操作,后续笔者也会持续更新相关的工具类解析,看到这里的小伙伴们,你们的点赞和评论是对笔者最大的肯定和动力~
以上是 手把手编写文件服务器 的全部内容, 来源链接: utcz.com/z/520251.html


