基于SpringSecurity搭建简单的用户权限系统(一)工程搭建

前言
前面用了 4 篇文章, 讲解了 Spring Security 的入门使用, 但是关于 Spring Security 的部分使用配置讲解的还是不够清楚.
- Spring Security 01- 将 Spring security 引入到工程
- Spring security 02-自定义用户登录页面和登录处理逻辑
- Spring security 03-自定义登录成功后的处理逻辑
- Spring security 04-整合 jwt
接下来会通过两篇文章来基于 Spring Security 搭建一个简单的用户权限系统, 通过引导的方式, 带你 了解 Spring Security 的基本配置使用, 不会涉及到原理和源码, 完全是 小白级别 的入门教程, 而且代码注释基本会覆盖到每个 Spring Security 功能点.
本文目标
- 基于
Springboot + Spring Security + Mybatis Plus搭建项目工程 Spring Security基本用法回顾
工程搭建
我们的主要目的是讲解 Spring Security 的使用, 因此会忽略很多不相关的细节, 比如:
- 不会去写用户、角色的增删改查接口, 以及一些业务逻辑层, 基本都是通过 DAO 层直接访问数据库
- 建表语句只包含主要的字段, 更不会考虑建索引
1. 添加 pom 依赖
<parent> <groupId>org.springframework.boot</groupId>
<artifactId>spring-boot-starter-parent</artifactId>
<version>2.3.2.RELEASE</version>
<relativePath/>
</parent>
<dependencies>
<!-- security -->
<dependency>
<groupId>org.springframework.boot</groupId>
<artifactId>spring-boot-starter-security</artifactId>
</dependency>
<!-- web 层 -->
<dependency>
<groupId>org.springframework.boot</groupId>
<artifactId>spring-boot-starter-web</artifactId>
</dependency>
<!-- 测试 -->
<dependency>
<groupId>org.springframework.boot</groupId>
<artifactId>spring-boot-starter-test</artifactId>
</dependency>
<!-- mapper 层 -->
<dependency>
<groupId>com.baomidou</groupId>
<artifactId>mybatis-plus-boot-starter</artifactId>
<version>3.3.2</version>
</dependency>
<!-- 数据源 -->
<dependency>
<groupId>com.alibaba</groupId>
<artifactId>druid-spring-boot-starter</artifactId>
<version>1.1.10</version>
</dependency>
<!-- mysql -->
<dependency>
<groupId>mysql</groupId>
<artifactId>mysql-connector-java</artifactId>
<scope>runtime</scope>
</dependency>
<!-- lombok,省略 get/set 方法 -->
<dependency>
<groupId>org.projectlombok</groupId>
<artifactId>lombok</artifactId>
<scope>provided</scope>
</dependency>
</dependencies>
<a name="8e7ny"></a>
2. application.yml 配置文件
spring: # 数据库配置
datasource:
type: com.alibaba.druid.pool.DruidDataSource
username: root
password: ""
url: jdbc:mysql://localhost:3306/manager-demo?serverTimezone=GMT%2b8&autoReconnect=true&failOverReadOnly=false&characterEncoding=utf8&useUnicode=true&&allowMultiQueries=true
# 端口 8999
server:
port: 8999
3. 数据库脚本
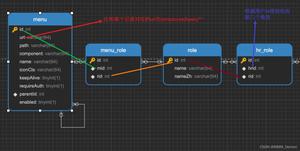
采用经典的 5 张表, 来构建 用户-角色-权限 之间的多对多关系.
-- 用户表CREATE TABLE `user`
(
`id` int(11) NOT NULL AUTO_INCREMENT,
`name` varchar(32) DEFAULT NULL COMMENT "昵称",
`username` varchar(255) DEFAULT NULL COMMENT "用户名",
`password` varchar(255) DEFAULT NULL COMMENT "密码",
PRIMARY KEY (`id`)
) ENGINE = InnoDB
DEFAULT CHARSET = utf8;
-- 角色表
CREATE TABLE `role`
(
`id` int(11) NOT NULL AUTO_INCREMENT,
`name` varchar(64) DEFAULT NULL,
`role_name` varchar(64) DEFAULT NULL COMMENT "角色名称",
PRIMARY KEY (`id`)
) ENGINE = InnoDB
DEFAULT CHARSET = utf8;
-- 用户 <==> 角色关联表
CREATE TABLE `user_role`
(
`id` int(11) NOT NULL AUTO_INCREMENT,
`user_id` int(11) DEFAULT NULL,
`role_id` int(11) DEFAULT NULL,
PRIMARY KEY (`id`)
) ENGINE = InnoDB
DEFAULT CHARSET = utf8;
-- 菜单表
CREATE TABLE `menu`
(
`id` int(11) NOT NULL AUTO_INCREMENT,
`url` varchar(64) DEFAULT NULL,
`name` varchar(64) DEFAULT NULL,
PRIMARY KEY (`id`)
) ENGINE = InnoDB
DEFAULT CHARSET = utf8;
-- 角色 <==> 权限关联表
CREATE TABLE `menu_role`
(
`id` int(11) NOT NULL AUTO_INCREMENT,
`menu_id` int(11) DEFAULT NULL,
`role_id` int(11) DEFAULT NULL,
PRIMARY KEY (`id`)
) ENGINE = InnoDB
DEFAULT CHARSET = utf8;
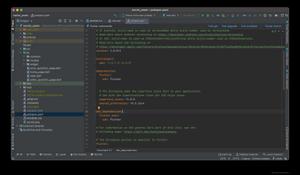
4. 项目目录结构
Spring Security 知识回顾
当我们仅仅引入 Spring Security 依赖, 接着启动项目, 此时 Spring Security 已经起作用了, 它会启用自己的默认配置, 比如:
- 启用自己内置的登录页面
- 默认的用户名(user) 和 密码(输出到控制台)
- 加载一系列过滤器等等
- 默认拦截所有的 url 请求(除了可以匿名访问的, 像登录请求), 然后跳转至登录页面
默认行为
- 登录失败, 会跳转至内置的登录页
- 鉴权失败, 会跳转至 403 Forbidden 页面
以上所说的内容, 可以通过
@``EnableWebSecurity注解 + 继承WebSecurityConfigurerAdapter配置类去修改.- 比如配置用户信息
- 登录失败后的, 默认行为, 可以改为返回 json 格式的错误信息
- 其他
下篇文章会详细说明如何修改上述所说的默认配置.
以上是 基于SpringSecurity搭建简单的用户权限系统(一)工程搭建 的全部内容, 来源链接: utcz.com/z/519204.html

