Nginx+Docker多阶段构建的部署学习

前几天部署了一个网站,原来我一直是发布完成之后,通过ftp把文件上传上去,有几个大佬给我说了多阶段构建,此时我就不需要发布再搞了,直接将项目添加docker支持。
#See https://aka.ms/containerfastmode to understand how Visual Studio uses this Dockerfile to build your images for faster debugging.FROM mcr.microsoft.com/dotnet/core/aspnet:3.1-buster-slim AS base
WORKDIR /app
EXPOSE 80
FROM mcr.microsoft.com/dotnet/core/sdk:3.1-buster AS build
WORKDIR /src
COPY ["amusinghoS.App/amusinghoS.App.csproj", "amusinghoS.App/"]
COPY ["amusinghoS.Entity/amusinghoS.EntityData.csproj", "amusinghoS.Entity/"]
COPY ["amusinghoS.Shared/amusinghoS.Shared.csproj", "amusinghoS.Shared/"]
COPY ["amusinghoS.Services/amusinghoS.Services.csproj", "amusinghoS.Services/"]
COPY ["amusinghoS.Redis/amusinghoS.Redis.csproj", "amusinghoS.Redis/"]
RUN dotnet restore "amusinghoS.App/amusinghoS.App.csproj"
COPY . .
WORKDIR "/src/amusinghoS.App"
RUN dotnet build "amusinghoS.App.csproj" -c Release -o /app/build
FROM build AS publish
RUN dotnet publish "amusinghoS.App.csproj" -c Release -o /app/publish
FROM base AS final
WORKDIR /app
COPY --from=publish /app/publish .
ENTRYPOINT ["dotnet", "amusinghoS.App.dll"]
其中最重要的就是那几个COPY ,只要是和你这个项目有依赖的,统统打包,构建成一个镜像。
然后就是Nginx了,配置文件如下。那个端口对准1314的端口必须是docker的外网端口!
worker_processes 1;events {
worker_connections
1024;}
http {
include mime.types;
default_type application
/octet-stream;sendfile on;
keepalive_timeout
65;server {
listen
80;server_name localhost;
error_page
500502503504 /50x.html;location
/ {proxy_pass http:
//39.104.53.29:1314;proxy_http_version 1.1;
proxy_set_header Upgrade $http_upgrade;
proxy_set_header Connection keep-alive;
proxy_set_header Host $http_host;
proxy_cache_bypass $http_upgrade;
}
}
}
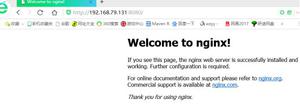
此时访问39.104.53.29 就可以访问到docker对外开放的1314 对内5001的网站了。
原文链接:https://www.cnblogs.com/ZaraNet/archive/2020/05/25/12957158.html
以上是 Nginx+Docker多阶段构建的部署学习 的全部内容, 来源链接: utcz.com/z/516774.html