Springboot源码分析ApplicationListener应用环境(5)

Spring boot源码分析-ApplicationListener应用环境(5)
关于ApplicationListener
ApplicationListener为spring框架内的事件监听接口,使用观察者模式实现。他有一个默认的接口来管理这些Listener,接口名称为ApplicationEventMulticaster
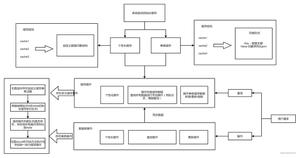
查看这些类的结构图
其中Springboot实现了众多ApplicationListener ApplicationEventMulticaster有一个默认的实现SimpleApplicationEventMulticaster
从上一篇文章,我们知道springboot关于通知机制的起点SpringApplicationRunListener,他在spring里面有一个实现EventPublishingRunListener构造方法
public EventPublishingRunListener(SpringApplication application, String[] args) {
this.application = application;
this.args = args;
this.initialMulticaster = new SimpleApplicationEventMulticaster();
for (ApplicationListener<?> listener : application.getListeners()) {
this.initialMulticaster.addApplicationListener(listener);
}
}
1
2
3
4
5
6
7
8
我们就知道了,所有的ApplicationListener在启动的时候就会被放入到EventPublishingRunListener,然后在springboot启动的每一个过程去发出相应的事件通知,从而执行相应的事件(在每个事件中可以处理自己需要的事情)
SpringBoot中各个ApplicationListener的作用
ClearCachesApplicationListener
在spring的context容器完成refresh()方法时被调用,调用清除了两个缓存信息
具体作用还不知道,后期找到了再补上
public abstract class ReflectionUtils {
private static final Map<Class<?>, Method[]> declaredMethodsCache =
new ConcurrentReferenceHashMap<Class<?>, Method[]>(256);
private static final Map<Class<?>, Field[]> declaredFieldsCache =
new ConcurrentReferenceHashMap<Class<?>, Field[]>(256);
······
}
1
2
3
4
5
6
7
ParentContextCloserApplicationListener
容器关闭时发出通知,如果父容器关闭,那么自容器也一起关闭
FileEncodingApplicationListener(参数spring.mandatory-file-encoding)
在springboot环境准备完成以后运行,获取环境中的系统环境参数,检测当前系统环境的file.encoding和spring.mandatory-file-encoding设置的值是否一样,如果不一样则抛出异常
如果不配置spring.mandatory-file-encoding则不检查
AnsiOutputApplicationListener(参数spring.output.ansi.enabled)
在springboot环境准备完成以后运行,
如果你的终端支持ANSI,设置彩色输出会让日志更具可读性。
ConfigFileApplicationListener
重要(读取加载springboot配置文件),下面详细讲
DelegatingApplicationListener(参数context.listener.classes)
把Listener转发给配置的这些class处理,这样可以支持外围代码不去写spring.factories中的org.springframework.context.ApplicationListener相关配置,保持springboot原来代码的稳定
LiquibaseServiceLocatorApplicationListener(参数liquibase.servicelocator.ServiceLocator)
如果存在,则使用springboot相关的版本进行替代
ClasspathLoggingApplicationListener
程序启动时,讲classpath打印到debug日志,启动失败时classpath打印到info日志
LoggingApplicationListener
根据配置初始化日志系统log
接着4,再讲springboot的profiles和配置文件加载
ConfigFileApplicationListener文件被spring-boot启动回调有两种情况
在spring-boot环境准备完成
listeners.environmentPrepared(environment);
1
在spring-boot的ApplicationContext容器初始化设置完成以后会被调用
listeners.contextLoaded(context);
1
先看准备完成环境的调用
ConfigFileApplicationListener.java
private void onApplicationEnvironmentPreparedEvent(
ApplicationEnvironmentPreparedEvent event) {
List<EnvironmentPostProcessor> postProcessors = loadPostProcessors();
postProcessors.add(this);
AnnotationAwareOrderComparator.sort(postProcessors);
for (EnvironmentPostProcessor postProcessor : postProcessors) {
postProcessor.postProcessEnvironment(event.getEnvironment(),
event.getSpringApplication());
}
}
1
2
3
4
5
6
7
8
9
10
该方法找到了spring-boot环境中配置的EnvironmentPostProcessor的实现类 进行了环境初始化后操作的处理,在spring-boot的配置中配置了
spring.factories
# Environment Post Processors
org.springframework.boot.env.EnvironmentPostProcessor=
org.springframework.boot.cloud.CloudFoundryVcapEnvironmentPostProcessor,
org.springframework.boot.env.SpringApplicationJsonEnvironmentPostProcessor
1
2
3
4
所以看代码默认就有了3个processor
首先看CloudFoundryVcapEnvironmentPostProcessor,其主要作用是对于spring-cloud的提供支持
@Override
public void postProcessEnvironment(ConfigurableEnvironment environment,
SpringApplication application) {
if (CloudPlatform.CLOUD_FOUNDRY.isActive(environment)) {
Properties properties = new Properties();
addWithPrefix(properties, getPropertiesFromApplication(environment),
"vcap.application.");
addWithPrefix(properties, getPropertiesFromServices(environment),
"vcap.services.");
MutablePropertySources propertySources = environment.getPropertySources();
if (propertySources.contains(
CommandLinePropertySource.COMMAND_LINE_PROPERTY_SOURCE_NAME)) {
propertySources.addAfter(
CommandLinePropertySource.COMMAND_LINE_PROPERTY_SOURCE_NAME,
new PropertiesPropertySource("vcap", properties));
}
else {
propertySources
.addFirst(new PropertiesPropertySource("vcap", properties));
}
}
}
1
2
3
4
5
6
7
8
9
10
11
12
13
14
15
16
17
18
19
20
21
22
再看SpringApplicationJsonEnvironmentPostProcessor类,
可以获取spring.application.json 或者 SPRING_APPLICATION_JSON的参数作为spring-boot参数
一种方式可以设置系统参数放入到systemProperties环境中配置运行参数
完成加载以后,spring会在环境environment环境中增加一个MapPropertySource的PropertySource项,里面存放着属性,这样就可以注入对象了
再看ConfigFileApplicationListener本身这个类,也实现了EnvironmentPostProcessor接口并且加到了容器里面,所以也会执行ConfigFileApplicationListener的postProcessEnvironment方法
@Override
public void postProcessEnvironment(ConfigurableEnvironment environment,
SpringApplication application) {
addPropertySources(environment, application.getResourceLoader());
configureIgnoreBeanInfo(environment);
bindToSpringApplication(environment, application);
}
1
2
3
4
5
6
7
这个就是加载springboot的配置文件的,时间点在spring容器准备好了Environment以后,先看addPropertySources,该方法主要做了两件事情
1.封装RandomValuePropertySource的属性封装添加到systemEnvironment后面,名字为random 2.加载配置文件,我们再看第二个Loader类
注:RandomValuePropertySource主要的作用是生成随机数,其功能可以随机出int,lang,uuid等随机数
my.secret=${random.value}
my.number=${random.int}
my.bignumber=${random.long}
my.uuid=${random.uuid}
my.number.less.than.ten=${random.int(10)}
my.number.in.range=${random.int[1024,65536]}
1
2
3
4
5
6
protected void addPropertySources(ConfigurableEnvironment environment,
ResourceLoader resourceLoader) {
//把一个名字叫random的属性封装添加到systemEnvironment后面
RandomValuePropertySource.addToEnvironment(environment);
//加载配置文件 这个是入口
new Loader(environment, resourceLoader).load();
}
1
2
3
4
5
6
7
Loader是一个内部类,主要作用是委托加载属性文件加载动作主要由load方法来完成
private class Loader {
private final ConfigurableEnvironment environment;
private final ResourceLoader resourceLoader;
Loader(ConfigurableEnvironment environment, ResourceLoader resourceLoader) {
this.environment = environment;
//设置resourceLoader
this.resourceLoader = resourceLoader == null ? new DefaultResourceLoader()
: resourceLoader;
}
public void load() {
this.propertiesLoader = new PropertySourcesLoader();
this.activatedProfiles = false;
this.profiles = Collections.asLifoQueue(new LinkedList<Profile>());
this.processedProfiles = new LinkedList<Profile>();
// Pre-existing active profiles set via Environment.setActiveProfiles()
// are additional profiles and config files are allowed to add more if
// they want to, so don"t call addActiveProfiles() here.
// 1.把环境中的profiles取出来
Set<Profile> initialActiveProfiles = initializeActiveProfiles();
this.profiles.addAll(getUnprocessedActiveProfiles(initialActiveProfiles));
if (this.profiles.isEmpty()) {
for (String defaultProfileName : this.environment.getDefaultProfiles()) {
Profile defaultProfile = new Profile(defaultProfileName, true);
if (!this.profiles.contains(defaultProfile)) {
this.profiles.add(defaultProfile);
}
}
}
// The default profile for these purposes is represented as null. We add it
// last so that it is first out of the queue (active profiles will then
// override any settings in the defaults when the list is reversed later).
// 2.增加了默认的profiles null
this.profiles.add(null);
//3.循环处理profiles,查找文件位置然后去加载文件
while (!this.profiles.isEmpty()) {
Profile profile = this.profiles.poll();
//位置查找方法
for (String location : getSearchLocations()) {
if (!location.endsWith("/")) {
// location is a filename already, so don"t search for more
// filenames
load(location, null, profile);
}
else {
for (String name : getSearchNames()) {
load(location, name, profile);
}
}
}
this.processedProfiles.add(profile);
}
//4.增加ConfigurationProperties
addConfigurationProperties(this.propertiesLoader.getPropertySources());
}
}
1
2
3
4
5
6
7
8
9
10
11
12
13
14
15
16
17
18
19
20
21
22
23
24
25
26
27
28
29
30
31
32
33
34
35
36
37
38
39
40
41
42
43
44
45
46
47
48
49
50
51
52
53
54
55
56
57
58
59
60
61
load方法做了一下工作:
1.把环境中的profiles取出来,然后保存到profiles集合中
2.增加了默认的profiles null
3.循环处理profiles,查找文件位置然后去加载文件
4.增加ConfigurationProperties
其中 1-2很容易明白,就是先准备profiles的集合,再看3如何处理配置文件的,我们先开getSearchLocations看查找的事那些位置
private Set<String> getSearchLocations() {
Set<String> locations = new LinkedHashSet<String>();
// User-configured settings take precedence, so we do them first
// 如果配置了
if (this.environment.containsProperty(CONFIG_LOCATION_PROPERTY)) {
for (String path : asResolvedSet(
this.environment.getProperty(CONFIG_LOCATION_PROPERTY), null)) {
if (!path.contains("$")) {
path = StringUtils.cleanPath(path);
if (!ResourceUtils.isUrl(path)) {
path = ResourceUtils.FILE_URL_PREFIX + path;
}
}
locations.add(path);
}
}
locations.addAll(
asResolvedSet(ConfigFileApplicationListener.this.searchLocations,
DEFAULT_SEARCH_LOCATIONS));
return locations;
}
1
2
3
4
5
6
7
8
9
10
11
12
13
14
15
16
17
18
19
20
21
由方法可以看出,如果我们配置了spring.config.location属性,系统会获取配置的属性文件,从而加载自定义路径的配置文件,默认的加载路径有
spring.config.name为加载的配置文件名,默认的文件名为application
然后调用方法加载配置文件
private void load(String location, String name, Profile profile) {
String group = "profile=" + (profile == null ? "" : profile);
if (!StringUtils.hasText(name)) {
// Try to load directly from the location
loadIntoGroup(group, location, profile);
}
else {
// Search for a file with the given name
for (String ext : this.propertiesLoader.getAllFileExtensions()) {
if (profile != null) {
// Try the profile-specific file
loadIntoGroup(group, location + name + "-" + profile + "." + ext,
null);
for (Profile processedProfile : this.processedProfiles) {
if (processedProfile != null) {
loadIntoGroup(group, location + name + "-"
+ processedProfile + "." + ext, profile);
}
}
// Sometimes people put "spring.profiles: dev" in
// application-dev.yml (gh-340). Arguably we should try and error
// out on that, but we can be kind and load it anyway.
loadIntoGroup(group, location + name + "-" + profile + "." + ext,
profile);
}
// Also try the profile-specific section (if any) of the normal file
loadIntoGroup(group, location + name + "." + ext, profile);
}
}
}
1
2
3
4
5
6
7
8
9
10
11
12
13
14
15
16
17
18
19
20
21
22
23
24
25
26
27
28
29
30
31
默认会加载properties,xml,yml,yaml四种文件,我们只讲常用的properties
和yml 文件
我们看loadIntoGroup方法,主要功能就是把配置文件解析出来的属性加载到一个叫applicationConfigurationProperties的属性中去
关于具体的文件解析Loader类PropertySourceLoader,springboot默认提供了两个配置文件的解析类,在springboot的spring.factories中配置了两个解析方式,默认用来解析.properties和.yam文件,具体的可以去查看
# PropertySource Loaders
org.springframework.boot.env.PropertySourceLoader=
org.springframework.boot.env.PropertiesPropertySourceLoader,
org.springframework.boot.env.YamlPropertySourceLoader
1
2
3
4
两个解析类的加载方式,在加载PropertySourcesLoader的时候,通过factory的方式加载了两个系统默认的配置文件读写方式,用于进行配置文件解析
public PropertySourcesLoader(MutablePropertySources propertySources) {
Assert.notNull(propertySources, "PropertySources must not be null");
this.propertySources = propertySources;
this.loaders = SpringFactoriesLoader.loadFactories(PropertySourceLoader.class,
getClass().getClassLoader());
}
1
2
3
4
5
6
具体需要看yml解析的方式就可以查看YamlPropertySourceLoader
————————————————
版权声明:本文为CSDN博主「oldflame-Jm」的原创文章,遵循 CC 4.0 BY-SA 版权协议,转载请附上原文出处链接及本声明。
原文链接:https://blog.csdn.net/jamet/java/article/details/78042486
以上是 Springboot源码分析ApplicationListener应用环境(5) 的全部内容, 来源链接: utcz.com/z/515621.html


