内网穿透工具nps

github地址: https://github.com/ehang-io/nps
1、安装服务端
服务器系统是centos 7.5,安装方式有两种,一是编译安装,步骤比较繁琐,还耗时,所有这里选择第二种安装方式,作者提供了编译好的安装文件,根据自己的系统架构下载对应的最新版服务端。
2、修改服务端配置文件
nps.conf
appname = nps#Boot mode(dev|pro)
runmode = dev
#HTTP(S) proxy port, no startup if empty
http_proxy_ip=0.0.0.0
#80
http_proxy_port=
#443
https_proxy_port=
https_just_proxy=true
#default https certificate setting
https_default_cert_file=conf/server.pem
https_default_key_file=conf/server.key
##bridge
bridge_type=tcp
bridge_port=8060
bridge_ip=0.0.0.0
# Public password, which clients can use to connect to the server
# After the connection, the server will be able to open relevant ports and parse related domain names according to its own configuration file.
public_vkey=123
#Traffic data persistence interval(minute)
#Ignorance means no persistence
#flow_store_interval=1
# log level LevelEmergency->0 LevelAlert->1 LevelCritical->2 LevelError->3 LevelWarning->4 LevelNotice->5 LevelInformational->6 LevelDebug->7
log_level=7
#log_path=nps.log
#Whether to restrict IP access, true or false or ignore
#ip_limit=true
#p2p
#p2p_ip=127.0.0.1
#p2p_port=6000
#web
web_host=a.o.com
web_username=用户名
web_password=密码
web_port = 8080
web_ip=0.0.0.0
web_base_url=
web_open_ssl=false
web_cert_file=conf/server.pem
web_key_file=conf/server.key
# if web under proxy use sub path. like http://host/nps need this.
#web_base_url=/nps
#Web API unauthenticated IP address(the len of auth_crypt_key must be 16)
auth_key=test
auth_crypt_key =1234567812345678
#allow_ports=9001-9009,10001,11000-12000
#Web management multi-user login
allow_user_login=false
allow_user_register=false
allow_user_change_username=false
#extension
allow_flow_limit=false
allow_rate_limit=false
allow_tunnel_num_limit=false
allow_local_proxy=false
allow_connection_num_limit=false
allow_multi_ip=false
system_info_display=false
#cache
http_cache=false
http_cache_length=100
web_port
web管理端口
web_password
web界面管理密码
web_username
web界面管理账号
web_base_url
web管理主路径,用于将web管理置于代理子路径后面
bridge_port
服务端客户端通信端口
https_proxy_port
域名代理https代理监听端口
http_proxy_port
域名代理http代理监听端口
auth_key
web api密钥
bridge_type
客户端与服务端连接方式kcp或tcp
public_vkey
客户端以配置文件模式启动时的密钥,设置为空表示关闭客户端配置文件连接模式
ip_limit
是否限制ip访问,true或false或忽略
flow_store_interval
服务端流量数据持久化间隔,单位分钟,忽略表示不持久化
log_level
日志输出级别
auth_crypt_key
获取服务端authKey时的aes加密密钥,16位
p2p_ip
服务端Ip,使用p2p模式必填
p2p_port
p2p模式开启的udp端口
pprof_ip
debug pprof 服务端ip
pprof_port
debug pprof 端口
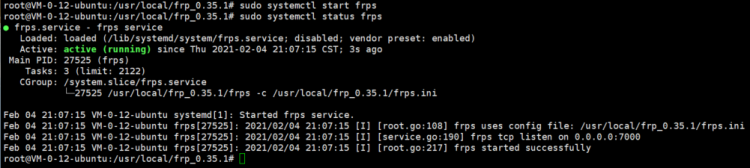
3、启动服务端
./nps start#停止/重启服务端
./nps stop|restart启动后即可通过浏览器访问web控制面板
公网ip:web界面端口(默认8080),密码默认为123,都可以通过配置文件nps.conf设置
4、客户端使用
根据自己的系统架构下载对应的最新版客户端。
接着设置配置文件nps.conf
[common]server_addr=111.111.111.111:8060
conn_type=tcp
vkey=123
auto_reconnection=true
max_conn=1000
flow_limit=1000
rate_limit=1000
basic_username=11
basic_password=3
web_username=user
web_password=1234
crypt=true
compress=true
#pprof_addr=0.0.0.0:9999
[health_check_test1]
health_check_timeout=1
health_check_max_failed=3
health_check_interval=1
health_http_url=/
health_check_type=http
health_check_target=127.0.0.1:8083,127.0.0.1:8082
[health_check_test2]
health_check_timeout=1
health_check_max_failed=3
health_check_interval=1
health_check_type=tcp
health_check_target=127.0.0.1:8083,127.0.0.1:8082
[web]
host=c.o.com
target_addr=127.0.0.1:8083,127.0.0.1:8082
[tcp]
mode=tcp
target_addr=127.0.0.1:3389
server_port=10000
[socks5]
mode=socks5
server_port=19009
multi_account=multi_account.conf
[file]
mode=file
server_port=19008
local_path=/Users/liuhe/Downloads
strip_pre=/web/
[http]
mode=httpProxy
server_port=19004
[udp]
mode=udp
server_port=12253
target_addr=114.114.114.114:53
[ssh_secret]
mode=secret
password=ssh2
target_addr=123.206.77.88:22
[ssh_p2p]
mode=p2p
password=ssh3
[secret_ssh]
local_port=2001
password=ssh2
[p2p_ssh]
local_port=2002
password=ssh3
target_addr=123.206.77.88:22
以上是 内网穿透工具nps 的全部内容, 来源链接: utcz.com/z/514304.html