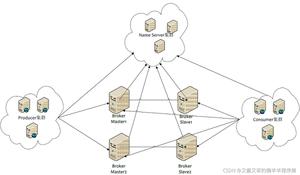
Rocketmq中的Broker启动流程(四)

程序的启动入口在org.apache.rocketmq.broker.BrokerStartup中,非常的简单,简单到要吐一口老血
public static void main(String[] args) { start(createBrokerController(args)); // 创建BrokerController,然后启动,是不是简单的要死
}
下面分析一下这个两个流程中还有哪些东西
1.创建BrokerController
public static BrokerController createBrokerController(String[] args) { final BrokerConfig brokerConfig = new BrokerConfig(); // 1.1 创建Broker配置
final NettyServerConfig nettyServerConfig = new NettyServerConfig(); // 1.2 创建netty服务器配置
final NettyClientConfig nettyClientConfig = new NettyClientConfig();// 1.3 创建netty客户端配置
nettyServerConfig.setListenPort(10911); //设置Broker端端口号
final MessageStoreConfig messageStoreConfig = new MessageStoreConfig(); // 1.4 有关消息存储的配置
String namesrvAddr = brokerConfig.getNamesrvAddr();
messageStoreConfig.setHaListenPort(nettyServerConfig.getListenPort() + 1); // 1.5 数据同步的端口号
final BrokerController controller = new BrokerController(
brokerConfig,
nettyServerConfig,
nettyClientConfig,
messageStoreConfig); // 1.6 创建BrokerController
boolean initResult = controller.initialize(); // 1.7 BrokerController的初始化
Runtime.getRuntime().addShutdownHook(new Thread(new Runnable() {
private volatile boolean hasShutdown = false;
private AtomicInteger shutdownTimes = new AtomicInteger(0);
@Override
public void run() {
synchronized (this) {
log.info("Shutdown hook was invoked, {}", this.shutdownTimes.incrementAndGet());
if (!this.hasShutdown) {
this.hasShutdown = true;
long beginTime = System.currentTimeMillis();
controller.shutdown();
long consumingTimeTotal = System.currentTimeMillis() - beginTime;
log.info("Shutdown hook over, consuming total time(ms): {}", consumingTimeTotal);
}
}
}
}, "ShutdownHook")); // 1.8 向JVM中注册Hook函数
return controller;
}
以上可以看出,从1.1 到 1.5 是设置各种配置参数, 1.6 创建Broker ,1.7 是Broker的初始化过程,1.8是注册Hook函数,那么这个时候能我们就创建了Broker了,下面看下启动流程。
2.Broker的启动
public static BrokerController start(BrokerController controller) { controller.start(); // 启动,看具体的实现
return controller;
}
public void start() throws Exception {
if (this.messageStore != null) {
this.messageStore.start(); // 2.1 启动消息存储
}
if (this.remotingServer != null) {
this.remotingServer.start(); // 2.2 启动路由服务
}
if (this.fastRemotingServer != null) {
this.fastRemotingServer.start(); // 2.3 快速路由服务,主要用于扫描生产者和消费者是否还存活
}
if (this.fileWatchService != null) {
this.fileWatchService.start();
}
if (this.brokerOuterAPI != null) {
this.brokerOuterAPI.start(); // 2.4 broker的对外api
}
if (this.pullRequestHoldService != null) {
this.pullRequestHoldService.start(); // 2.5 启动拉取消息的辅助服务,主要看消息是否到达
}
if (this.clientHousekeepingService != null) {
this.clientHousekeepingService.start(); // 2.6 客户端心跳服务
}
if (this.filterServerManager != null) {
this.filterServerManager.start(); // 2.7 过滤消息服务
}
if (!messageStoreConfig.isEnableDLegerCommitLog()) {
startProcessorByHa(messageStoreConfig.getBrokerRole());
handleSlaveSynchronize(messageStoreConfig.getBrokerRole());
}
this.registerBrokerAll(true, false, true); // 2.8 注册Broker
this.scheduledExecutorService.scheduleAtFixedRate(new Runnable() {
@Override
public void run() {
try {
BrokerController.this.registerBrokerAll(true, false, brokerConfig.isForceRegister());
} catch (Throwable e) {
log.error("registerBrokerAll Exception", e);
}
}
}, 1000 * 10, Math.max(10000, Math.min(brokerConfig.getRegisterNameServerPeriod(), 60000)), TimeUnit.MILLISECONDS); // 2.9 启动定时任务
if (this.brokerStatsManager != null) {
this.brokerStatsManager.start(); //2.10 Broker状态管理
}
if (this.brokerFastFailure != null) {
this.brokerFastFailure.start(); // 2.11 清理过期请求
}
}
可以看到,在Broker启动的过程中有多复杂,消息存储的启动,心跳的检查,注册Broker,扫描过期的请求,监听消息是否到达等等功能,在下几篇的文章中我们在一点一点的分析
参考资料
http://rocketmq.apache.org/
以上是 Rocketmq中的Broker启动流程(四) 的全部内容, 来源链接: utcz.com/z/514283.html