SpringBoot实战:SpringBoot之自定义配置(一)

首先在resource/config文件夹下新建一个datasource.properties文件来进行数据库相关的配置如下:
#数据库地址spring.datasource.url=jdbc:mysql://127.0.0.1:3306/wusy?characterEncoding=UTF-8&useSSL=false
#数据库用户名
spring.datasource.username=root
#数据密码
spring.datasource.password=123456
#数据库驱动
spring.datasource.driver-class-name=com.mysql.cj.jdbc.Driver
#最大连接数
spring.datasource.tomcat.max-active=20
#最大空闲数
spring.datasource.tomcat.max-idle=8
#最小空闲数
spring.datasource.tomcat.min-idle=8
#初始化连接数
spring.datasource.tomcat.initial-size=10
#对池中空闲的连接是否进行验证,验证失败则回收此连接
spring.datasource.tomcat.test-while-idle=true
在启动类中添加读取datasource.properties文件的注解@PropertySource
import org.slf4j.Logger;import org.slf4j.LoggerFactory;import org.springframework.boot.SpringApplication;import org.springframework.boot.autoconfigure.SpringBootApplication;import org.springframework.context.annotation.PropertySource;/**
* @author wusy
* Company: xxxxxx科技有限公司
* Createtime : 2020/2/24 21:42
* Description : SpringBoot应用启动器
*/
@SpringBootApplication
@PropertySource(value = {"classpath:config/datasource.properties"}, encoding = "utf-8")
public class Application {
private static Logger logger = LoggerFactory.getLogger(Application.class);
public static void main(String[] args) {
SpringApplication application = new SpringApplication(Application.class);
application.run(args);
logger.info("启动成功");
}
}
import org.springframework.beans.factory.annotation.Value;import org.springframework.web.bind.annotation.RequestMapping;
import org.springframework.web.bind.annotation.RequestMethod;
import org.springframework.web.bind.annotation.RestController;
/**
* @author wusy
* Company: xxxxxx科技有限公司
* Createtime : 2020/2/24 21:54
* Description :
*/
@RestController
@RequestMapping("/api/demo")
public class HelloWorldController {
@Value("${spring.datasource.url}")
private String url;
@RequestMapping(value = "/hello", method = RequestMethod.GET)
public String hello() {
return "hello world," + url;
}
}
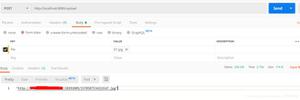
运行应用,打开浏览器,在地址栏输入http://127.0.0.1:8787/api/demo/hello,观察结果
这里只做的简单的演示,推荐一个写的更详细的博客https://www.cnblogs.com/huanzi-qch/p/11122107.html,有兴趣的可以看看。
以上是 SpringBoot实战:SpringBoot之自定义配置(一) 的全部内容, 来源链接: utcz.com/z/513903.html


