nginx基础(一)

一、nginx的安装、启动、停止及文件解读
yum -y install gcc gcc-c++ autoconf pcre-devel make automakeyum -y install wget httpd-tools vim
(1)基于Yum的方式安装Nginx
我们可以先来查看一下yum是否已经存在,命令如下:
yum list | grep nginx
配置nginx下载源:
[nginx]name=nginx repo
baseurl=http://nginx.org/packages/centos/7/$basearch/
gpgcheck=0
enabled=1
将上述代码写入 /etc/yum.repos.d/nginx.repo 中
1yuminstall nginx2 nginx -v
(2)查看nginx安装目录
1 rpm -ql nginxrpm 是linux的rpm包管理工具,-q 代表询问模式,-l 代表返回列表。
(3)nginx.conf文件解读
nginx.conf 文件是Nginx总配置文件,在我们搭建服务器时经常调整的文件。
cd /etc/nginxvim nginx.conf
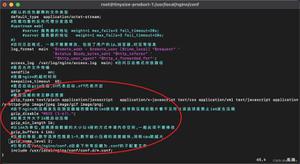
1#运行用户,默认即是nginx,可以不进行设置 2user nginx; 3#Nginx进程,一般设置为和CPU核数一样 4 worker_processes 1; 5#错误日志存放目录 6 error_log /var/log/nginx/error.log warn; 7#进程pid存放位置 8 pid /var/run/nginx.pid; 910
11events {
12 worker_connections 1024; # 单个后台进程的最大并发数
13}
14
15
16http {
17 include /etc/nginx/mime.types; #文件扩展名与类型映射表
18 default_type application/octet-stream; #默认文件类型
19 #设置日志模式
20 log_format main "$remote_addr - $remote_user [$time_local] "$request" "
21"$status $body_bytes_sent "$http_referer" "
22""$http_user_agent" "$http_x_forwarded_for"";
23
24 access_log /var/log/nginx/access.log main; #nginx访问日志存放位置
25
26 sendfile on; #开启高效传输模式
27 #tcp_nopush on; #减少网络报文段的数量
28
29 keepalive_timeout 65; #保持连接的时间,也叫超时时间
30
31 #gzip on; #开启gzip压缩
32
33 include /etc/nginx/conf.d/*.conf; #包含的子配置项位置和文件
(4)default.conf 配置项讲解
进入conf.d目录,然后使用 vim default.conf 进行查看。
1server { 2 listen 80; #配置监听端口 3 server_name localhost; //配置域名4
5 #charset koi8-r;
6 #access_log /var/log/nginx/host.access.log main;
7
8 location / {
9 root /usr/share/nginx/html; #服务默认启动目录
10 index index.html index.htm; #默认访问文件
11 }
12
13 #error_page 404 /404.html; # 配置404页面
14
15 # redirect server error pages to the static page /50x.html
16 #
17 error_page 500502503504 /50x.html; #错误状态码的显示页面,配置后需要重启
18 location = /50x.html {
19 root /usr/share/nginx/html;
20 }
21
22 # proxy the PHP scripts to Apache listening on 127.0.0.1:80
23 #
24 #location ~ .php$ {
25 # proxy_pass http://127.0.0.1;
26 #}
27
28 # pass the PHP scripts to FastCGI server listening on 127.0.0.1:9000
29 #
30 #location ~ .php$ {
31 # root html;
32 # fastcgi_pass 127.0.0.1:9000;
33 # fastcgi_index index.php;
34 # fastcgi_param SCRIPT_FILENAME /scripts$fastcgi_script_name;
35 # include fastcgi_params;
36 #}
37
38 # deny access to .htaccess files, if Apache"s document root
39 # concurs with nginx"s one
40 #
41 #location ~ /.ht {
42 # deny all;
43 #}
44 }
得知服务目录放在了/usr/share/nginx/html下
(5)nginx启动、停止、重启
启动
在centos7以上使用命令 nginx 可直接启动
使用systemctl命令启动 systemctl start nginx.service
使用 ps aux | grep nginx 查看服务开启状况
使用 netstat -lunpt 可查看端口开启状况
停止
1 nginx -s stop2 nginx -s quit3killall nginx4 systemctl stop nginx.service
重启
systemctl restart nginx.servicenginx
-s reload
以上是 nginx基础(一) 的全部内容, 来源链接: utcz.com/z/513854.html


